


Automate conversations with AssistAI chatbot - A user guide
Discover how AssistAI chatbot transforms customer interactions. Learn to set it up to enhance productivity and provide instant, round-the-clock support.
Providing instant, round-the-clock customer support is crucial for business success in this digital world. That's why we are thrilled to introduce AssistAI chatbot. Designed to enhance customer interactions, increase productivity, and provide your visitors with immediate access to essential information, AssistAI is a game changer. In this guide, we will walk you through the steps to set up AssistAI chatbot and seamlessly integrate it into your sales and support strategies.
What is AssistAI chatbot?
AssistAI chatbot is an intelligent chatbot that seamlessly integrates with your CRM, providing automated assistance to your website visitors and customers across multiple channels. It's capable of handling enquiries, guiding users through processes, and even transferring conversations to human agents when necessary.
Key features of AssistAI chatbot
1. Multi-channel support
AssistAI can be integrated with various platforms, including:
- WhatsApp (API and Web)
- Telegram
This multi-channel support ensures that your customers can reach you through their preferred communication platforms.
2. Customisable topics and flows
Create custom conversation topics and flows to guide your chatbot's interactions. This allows you to tailor the bot's responses to your specific business needs and customer enquiries.
3. Smart handoff to human agents
When AssistAI encounters complex queries or detects that a human touch is needed, it can seamlessly transfer the conversation to a human agent, ensuring your customers always receive the best possible support.
4. Customisable appearance
Personalise your chatbot's name, icon, and welcome message to align with your brand identity and create a cohesive customer experience.
Getting started with AssistAI
Let's dive into the details of setting up and using AssistAI in your CRM.
1. Setting up AssistAI chatbot
Step 1: Access AssistAI chatbot
- Log into your CRM.
- Navigate to “Settings” → Automation → AssistAI chatbot.
- Click on "+" on the left panel to begin the AssistAI chatbot creation.
Step 2: Configure basic settings
- Enter a name for your chatbot.
- Add a description to explain the chatbot's purpose.
Step 3: Add topics
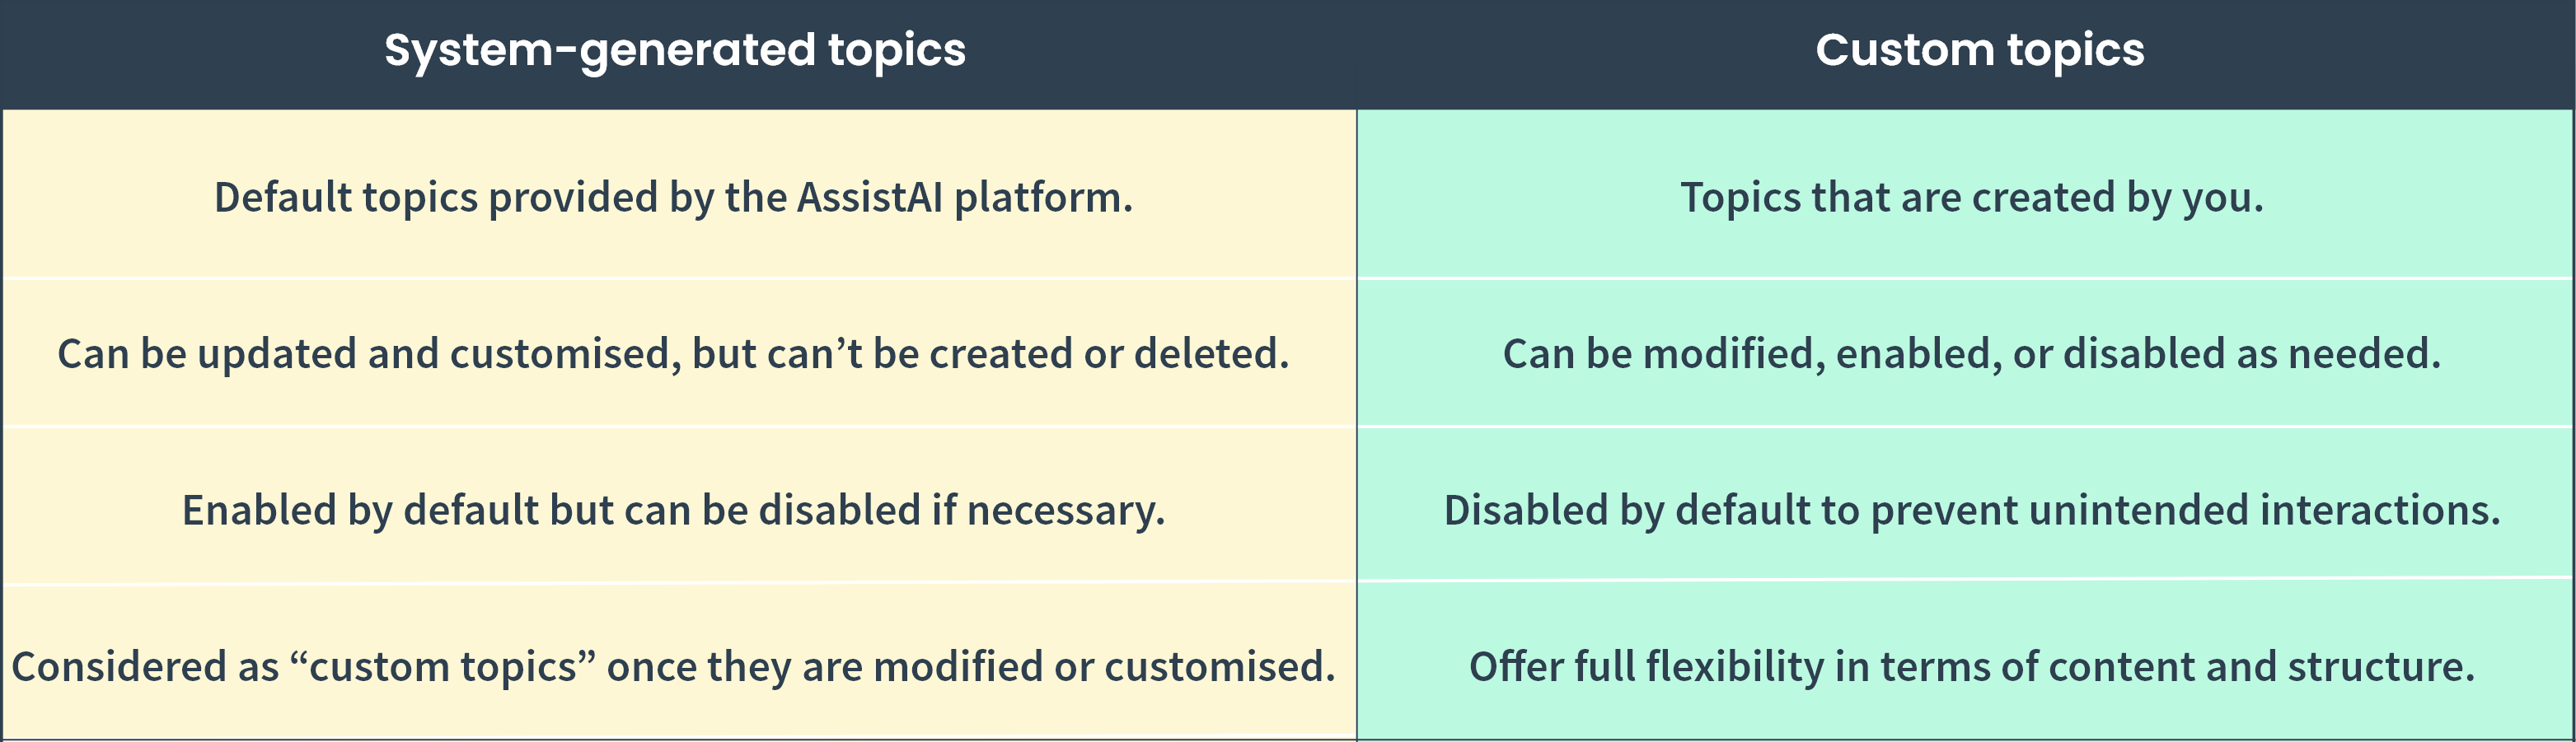
Topics are basically triggers of a conversation that guides the way your chatbot responds. In your CRM, there are 2 types of topics:
- “System generated” topics: System generated topics are created by default, and you cannot create or delete system-them. However, you can update and use them as needed. Additionally, these topics are enabled by default, but you have the option to disable them if required. Once these topics are customised as per your needs, they will be considered as custom topics.
- “Created by me” topics: These are the topics created by you and can be modified as per your requirements. These topics are not enabled by default.
1. Create a topic:
- To use system generated topics, you can either choose the topic from the “Overview” tab or go to the “Topics” tab and choose “System generated”. You can choose the topic to update and use.
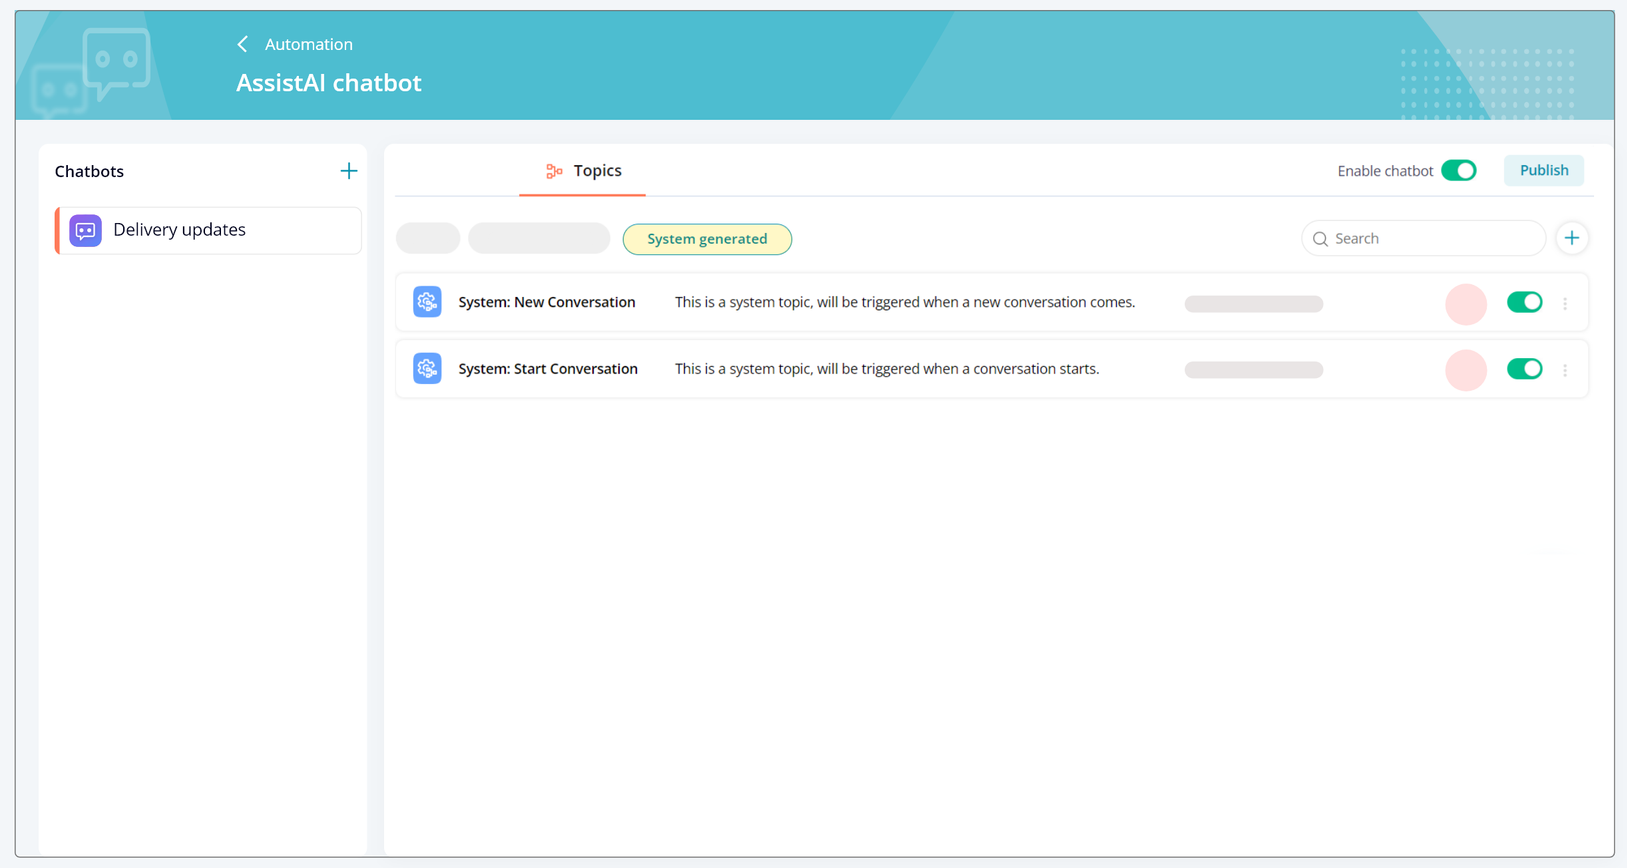
- To create your own topic, there are two ways.
1. Under the “Overview” tab, Click "Add" next to Topics, and a pop-up for creating a new topic will appear
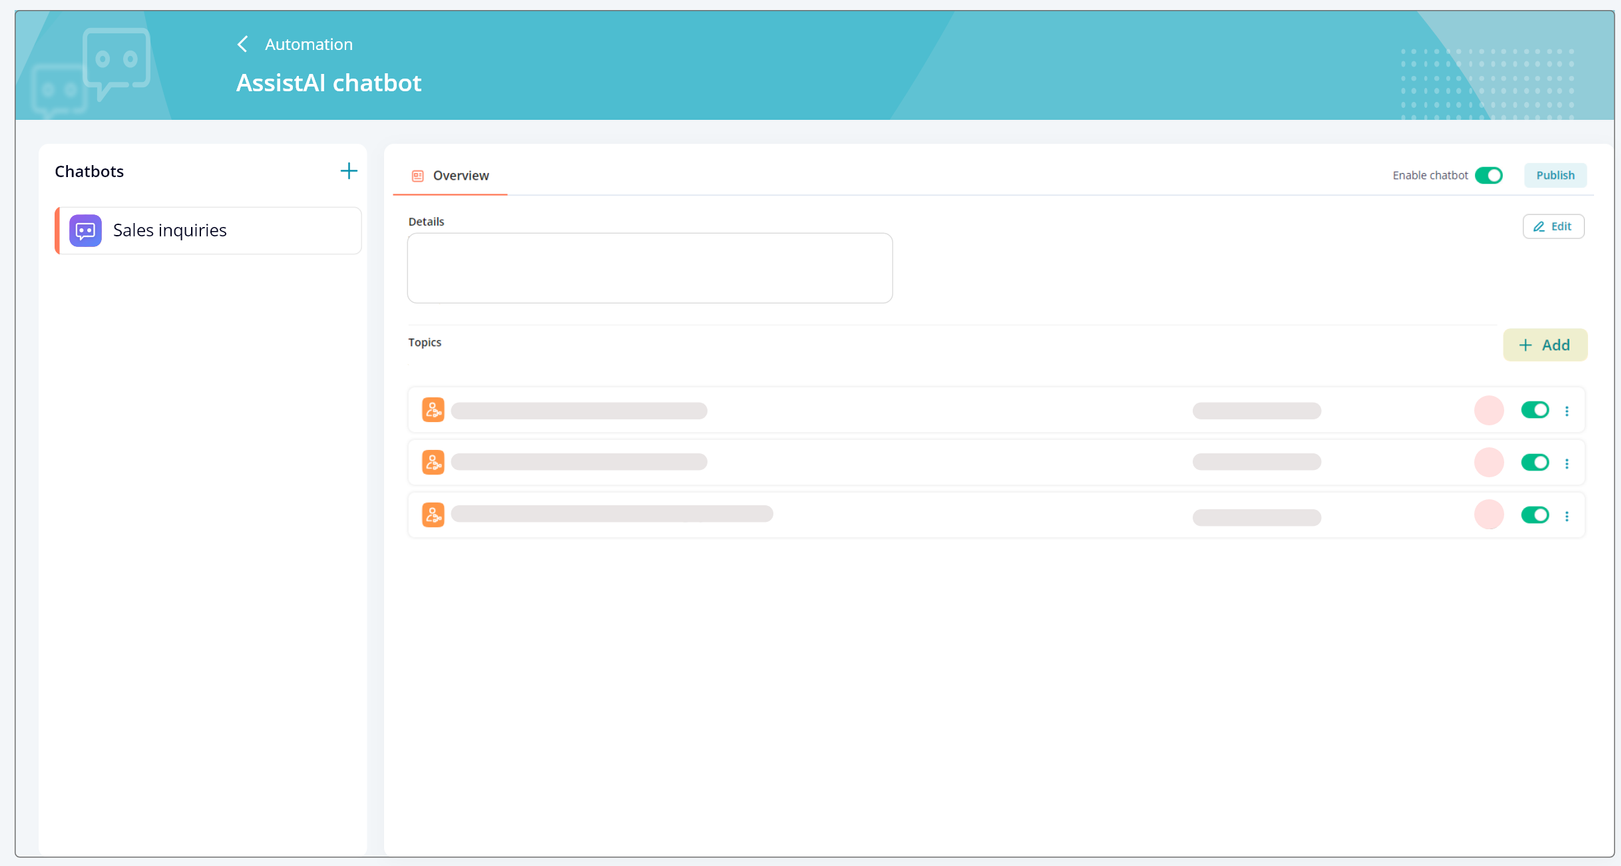
2. Alternatively, go to the “Topics” tab” Click on Click on "Add Topics" to create conversation flows.
Note: Topics created by you can be updated or deleted by clicking the three dots next to the respective topics.
Read for more information on how to configure chatbot topics
Step 4: Integrate channels
AssistAI chatbots are integrated with specified messaging channels. This enables the chatbot to converse with the leads and customers and respond to their queries.
- Click on "Go to channels" from the “Overview” tab or navigate to the “Channels” tab.
- Select a channel from available options: WhatsApp API, WhatsApp Web, Telegram, Facebook, or Instagram. Click “Connect channel”.
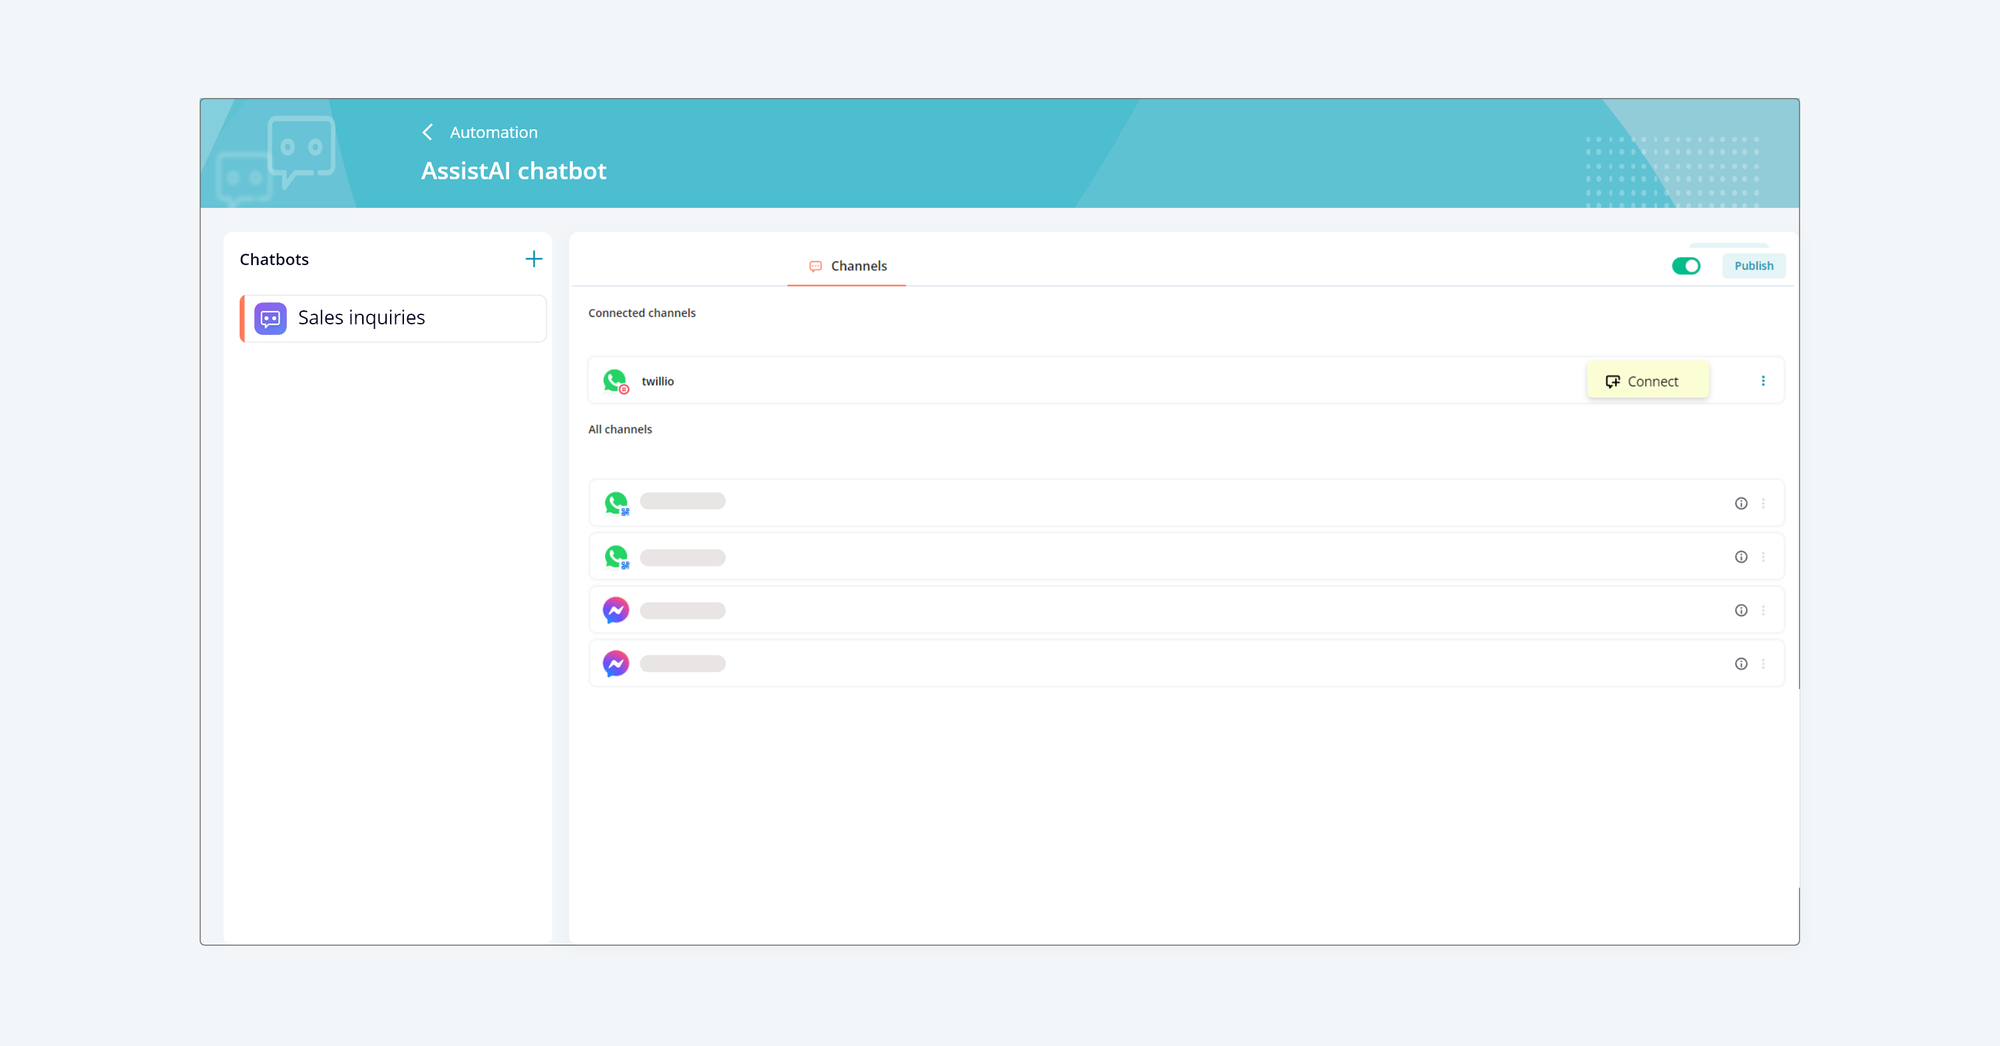
Note:
- If no channels are integrated with the CRM, you will need to integrate them first. Read Comprehensive guide channel integrations to connect your channels.
- One channel can have only one chatbot at a time whereas one chatbot can be integrated with multiple channels.
When you click "Connect" the channel will link to the chatbot. Please note that only one chatbot can be connected to a channel at a time.
If you would like to remove the connected chatbot, click “Remove” next to the respective channel.
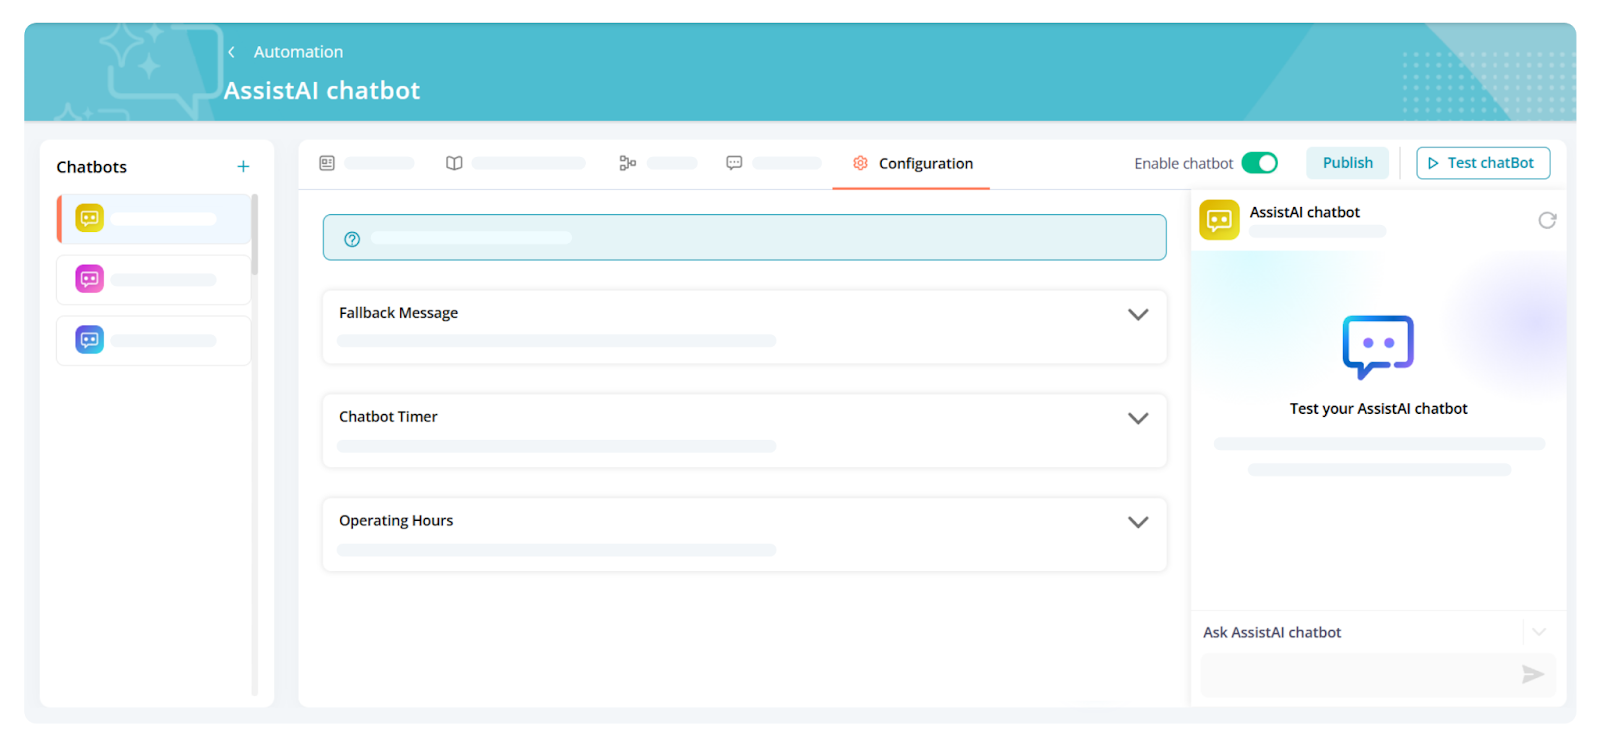
Step 5: Customise configuration
- Click the “Configuration” tab.
- Configure the settings for the three available options, including:
- Fallback Message: Create a message that the chatbot will send when it doesn’t understand the user’s response or gets an unexpected answer.
- Chatbot Timer: Set a time limit to automatically close conversations when there is no activity.
- Operating Hours: Define when the chatbot is active and whether it should operate outside those hours.
Step 6: Publish your chatbot
- Once you are satisfied with your setup, click the "Publish" button.
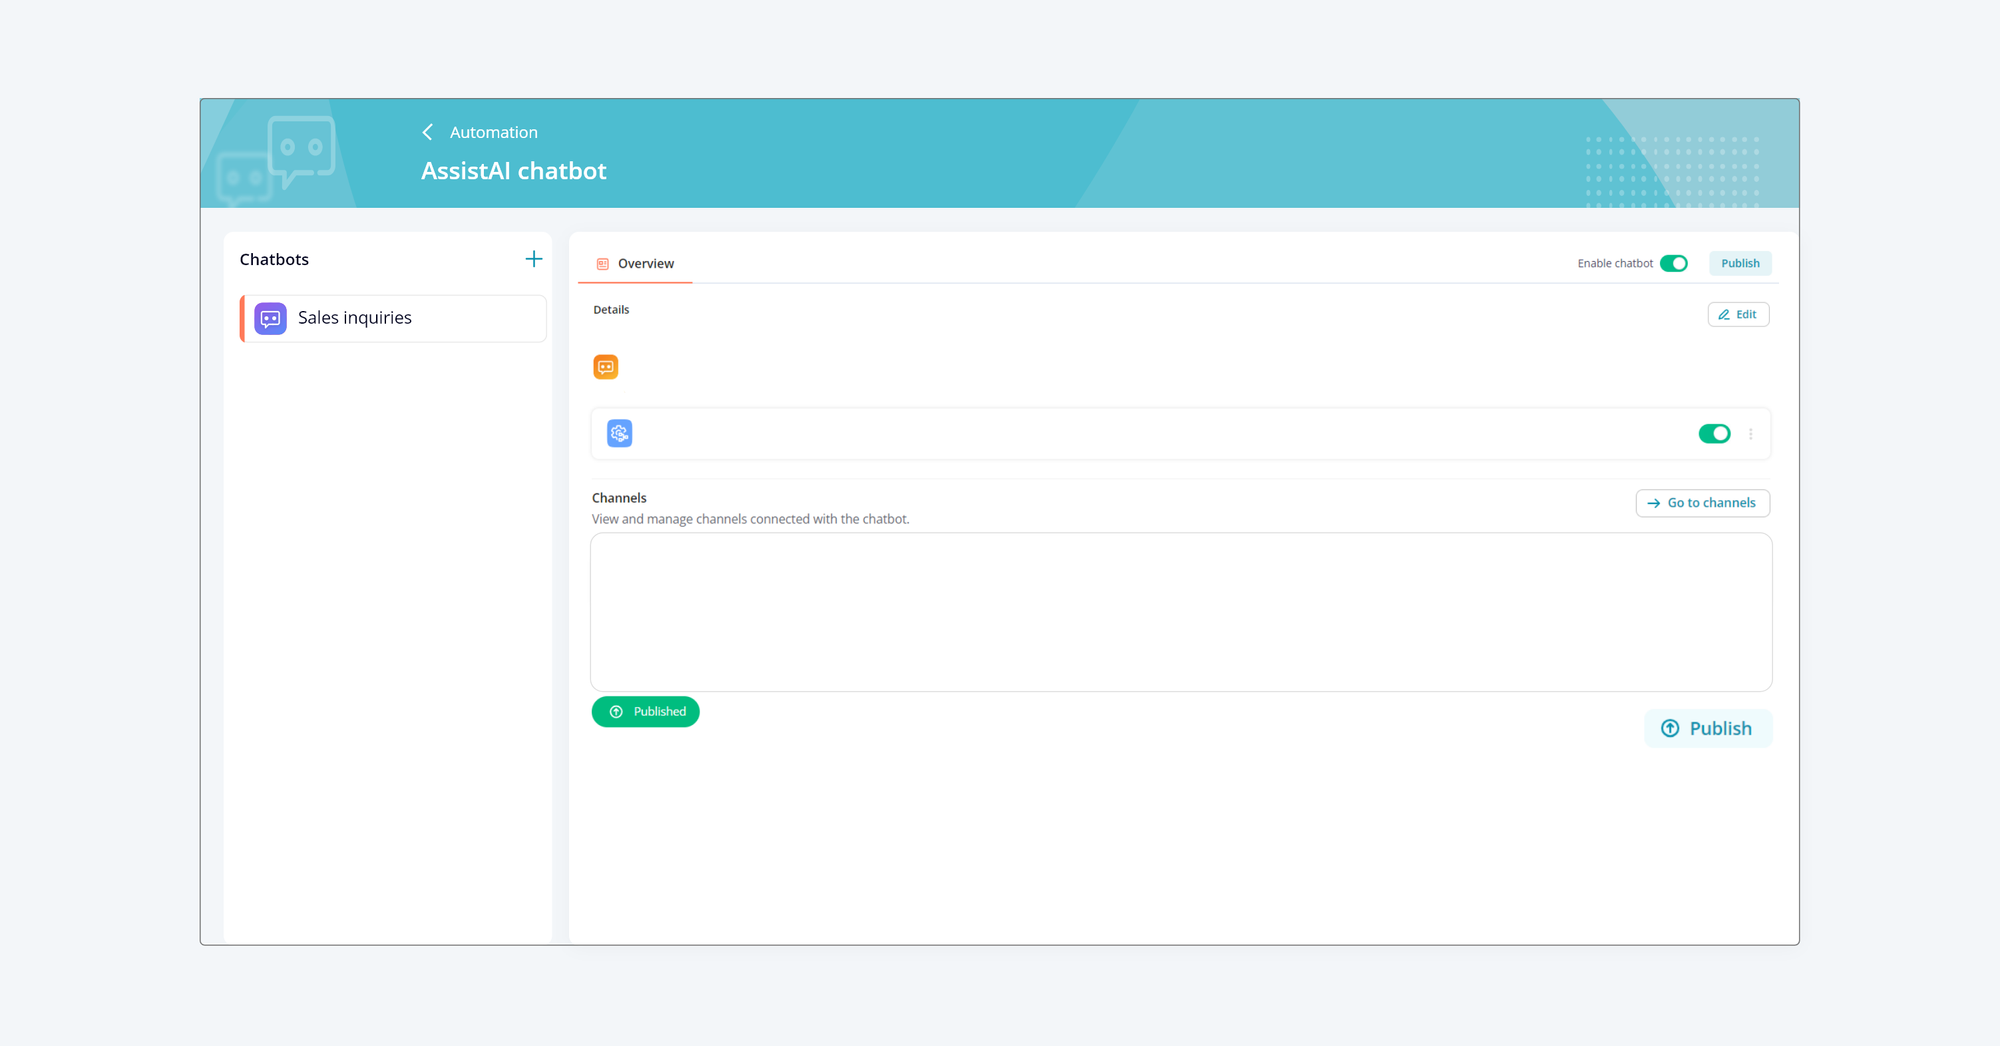
Your AssistAI chatbot will be live on your chosen channels
2. Using AssistAI chatbot in the message module
Once your AssistAI chatbot is set up and published, you can monitor and manage its interactions through the Message Module. Here's how:
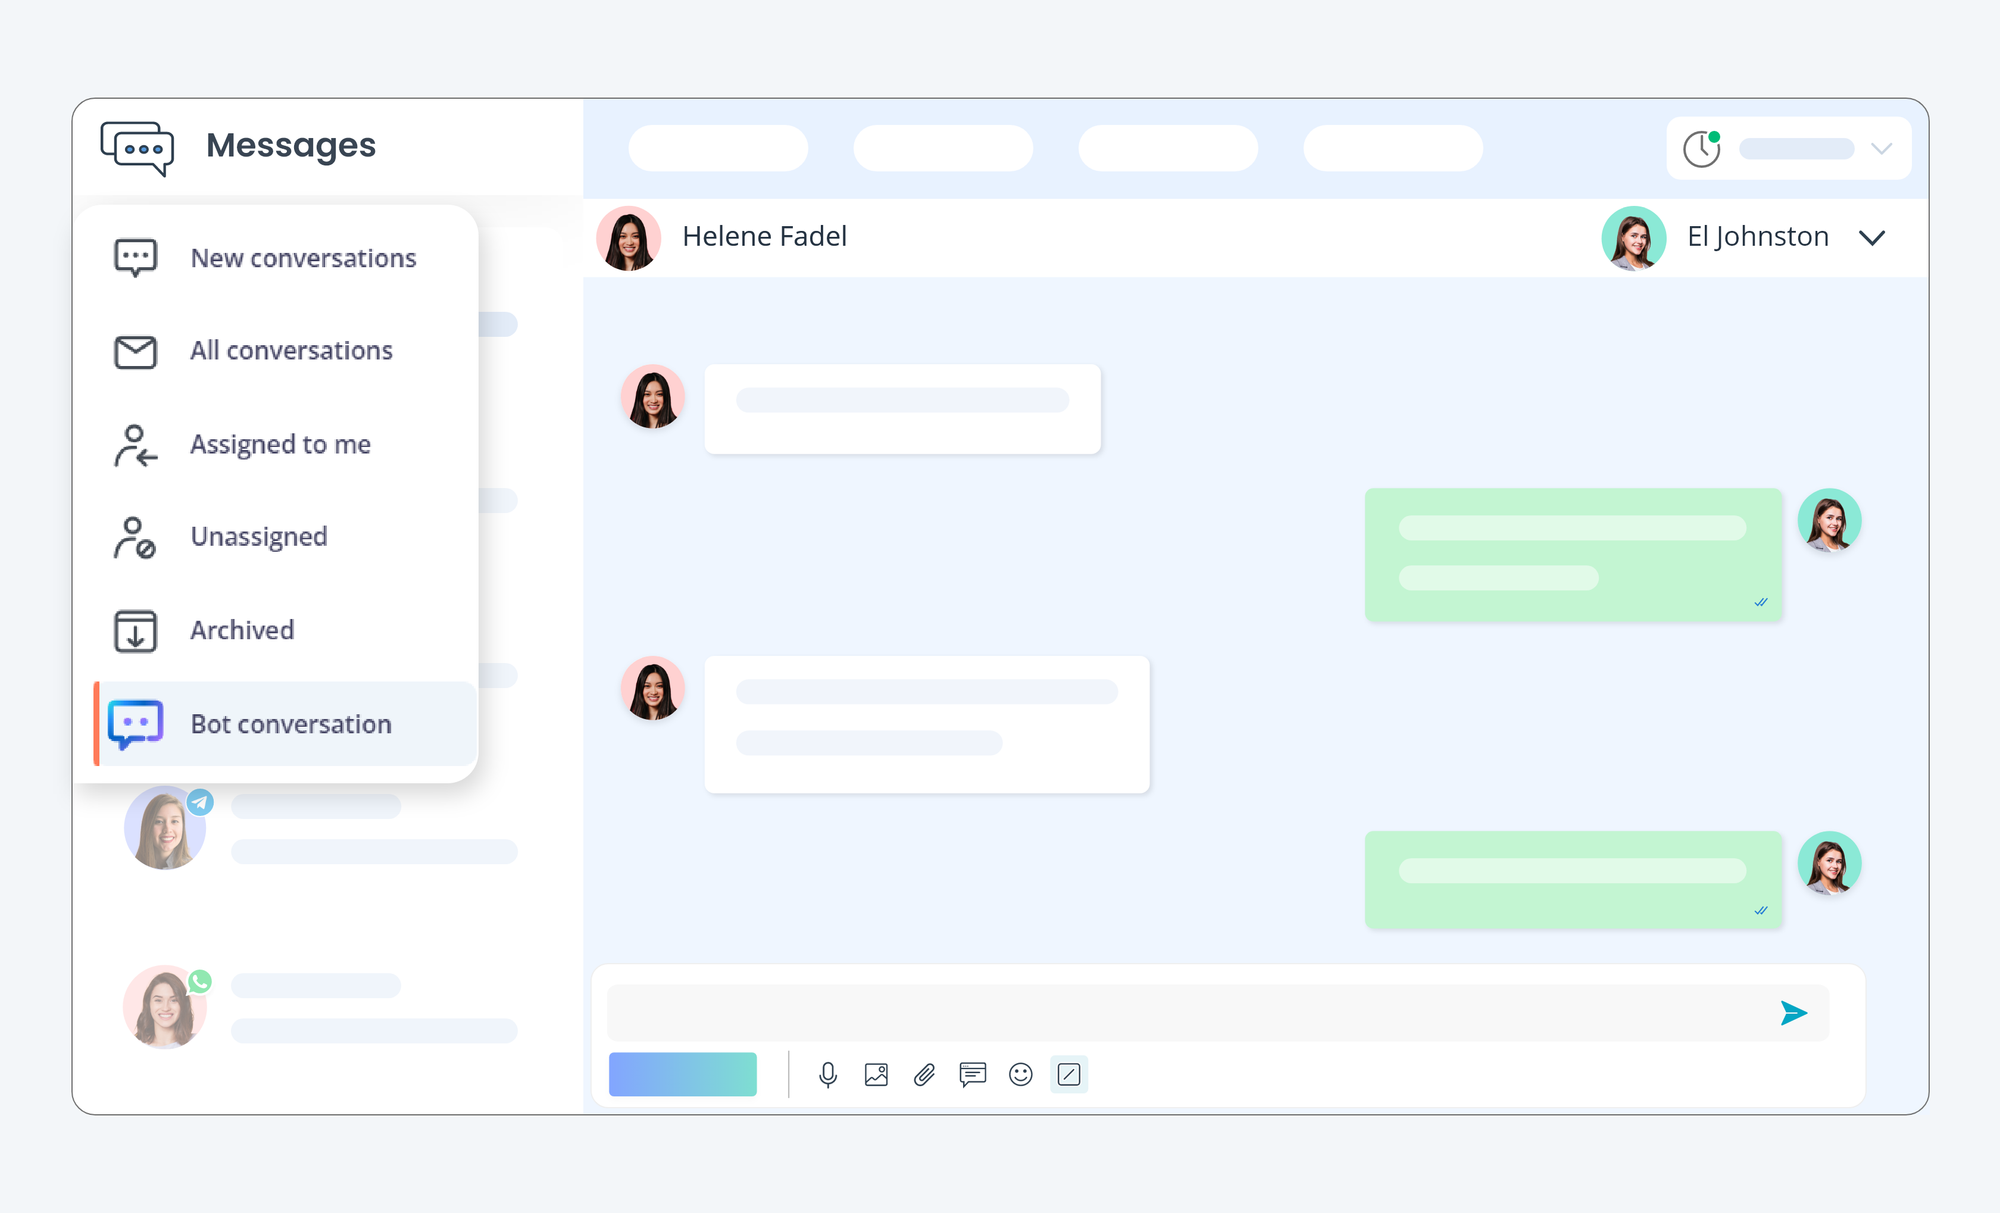
Accessing chatbot conversations
- Navigate to the message module in your CRM. On the left panel, navigate to “Bot conversations”. This section contains all conversations handled by your AssistAI chatbot.
Note: Only admins can delete the bot conversations.
Taking over AssistAI chatbot conversations
- If you notice a conversation that requires human intervention, you can take it over.
- Go to the conversation and choose your name to assign the conversation to yourself.
- The conversation will move from the bot section to your "Assigned to me" tab.
Handling transferred conversations
When AssistAI transfers a conversation to a human agent (based on your handoff settings), you'll receive a notification.
- The transferred conversation will be listed in the "New conversations" tab. Any available agent can then take over the conversation.
Note: If the topic includes the "transfer conversation" action and an agent is already assigned to it, the conversation will be automatically transferred to that agent.
Points to consider
- Use the filters in the message module to view different types of bot conversations:
- Use Assigned to filter, to filter out the conversations based on multiple bots in bot conversation tab
- New conversations handled by the bot will be shown in the Bot conversation tab only
- Conversation can be Closed when the agent do it deliberately
- Pay attention to the chatbot’s name and channel icon on each conversation to understand its origin.
- The chatbot will run when any visitor sends you a message that will match any of your phrases mentioned in the topics.
Analysing and improving
- Regularly review bot conversations to identify areas for improvement.
- Look for common questions that the bot struggles with and update your topics or knowledge base accordingly.
- Use insights from bot interactions to enhance your overall customer service strategy.
By following these detailed steps, you'll be able to set up your AssistAI chatbot effectively and manage its interactions through the Message Module. This powerful tool will help you provide round-the-clock support to your customers while freeing up your human agents to handle more complex inquiries.
Conclusion
AssistAI is more than just a chatbot – it's your 24/7 digital assistant, ready to engage with customers, answer questions, and provide support across multiple channels. By leveraging AssistAI's powerful features, you can enhance customer satisfaction, increase efficiency, and focus your human resources on more complex tasks.
Get started with AssistAI today and transform the way you interact with your customers!
