


A guide to configuring topics and optimising AssistAI chatbot
Discover how to optimise your AssistAI chatbot by configuring topics. Learn how to add trigger phrases, building conversation flows, and use actions like collecting inputs and transferring conversations.
Topics form the backbone of your AssistAI chatbot’s conversational intelligence, serving as the key drivers that shape the way your bot engages with users. By acting as triggers for specific conversations, topics help your chatbot recognize and respond to user queries with precision and relevance. Whether you are addressing frequently asked questions or guiding users through complex processes, properly configured topics ensure smooth, meaningful interactions.
In this comprehensive guide, we will walk you through the process of adding and configuring topics to maximise the effectiveness of your chatbot. You will learn how to tailor topics to meet your business needs, fine-tune conversation flows, and ensure your chatbot delivers accurate, timely responses to keep your users engaged and satisfied.
Before we begin, here are a few points to consider -
Note:
- One chatbot can be connected to multiple channels.
- You need to disconnect the channel in case you want to connect to a different chatbot
- For each channel connected, the template must be configured.
Types of topics
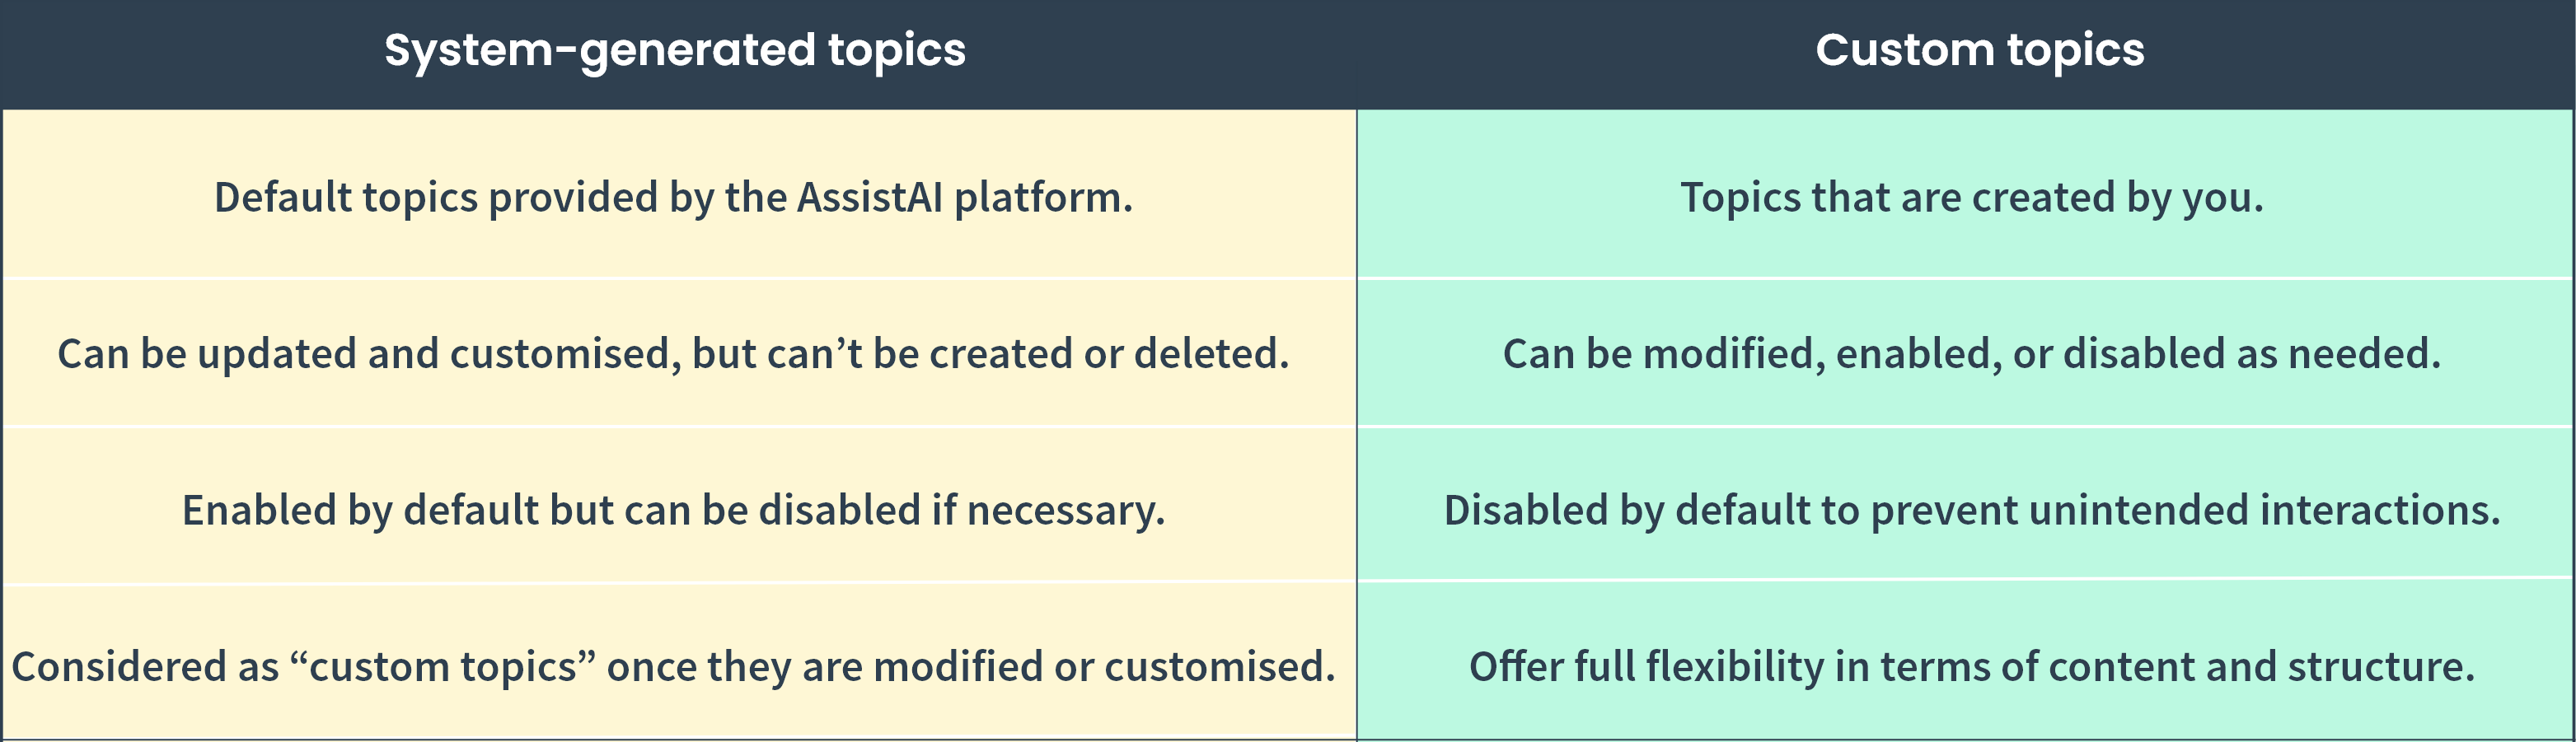
Topics are basically triggers of a conversation that guides the way your chatbot responds. In your CRM, there are 2 types of topics: “System generated” topics and “Created by me” topics
Topics are basically triggers of a conversation that guides the way your chatbot responds. In your CRM, there are 2 types of topics:
- “System generated” topics: System generated topics are created by default, and you cannot create or delete system-them. However, you can update and use them as needed. Additionally, these topics are enabled by default, but you have the option to disable them if required. Once these topics are customised as per your needs, they will be considered as custom topics.
- “Created by me” topics: These are the topics created by you and can be modified as per your requirements. These topics are not enabled by default.
Creating a topic
You can create the topic by navigating to your AssistAI chatbot through “Automation” in “Settings”. (Settings > Automation > AssistAI chatbot > Choose the chatbot from left panel or create a new chatbot)

Using system-generated topics
- Via the "Overview" tab:
- Navigate to the "Overview" section.
- Scroll to the "Topics" area.
- Select a system-generated topic to customise.
- Via the "Topics" tab:
- Go to the "Topics" tab.
- Filter or search for "System generated" topics.
- Choose the topic you want to update.
Creating custom topics
- From the "Overview" tab:
- Locate the "Topics" section.
- Click the "Add" button next to Topics.
- A pop-up will appear for creating a new topic.
- From the "Topics" tab:
- Navigate to the "Topics" tab.
- Click the "Add" button.
- This will open the topic creation interface.
Note: To manage custom topics, use the three-dot menu next to each topic for options like update or delete.
Configuring topics
Topics are the building blocks of your AssistAI chatbot's conversational intelligence. Proper configuration of topics ensures that your chatbot can effectively understand and respond to user queries. This guide will walk you through the process of configuring topics in detail.
1. Adding trigger phrases
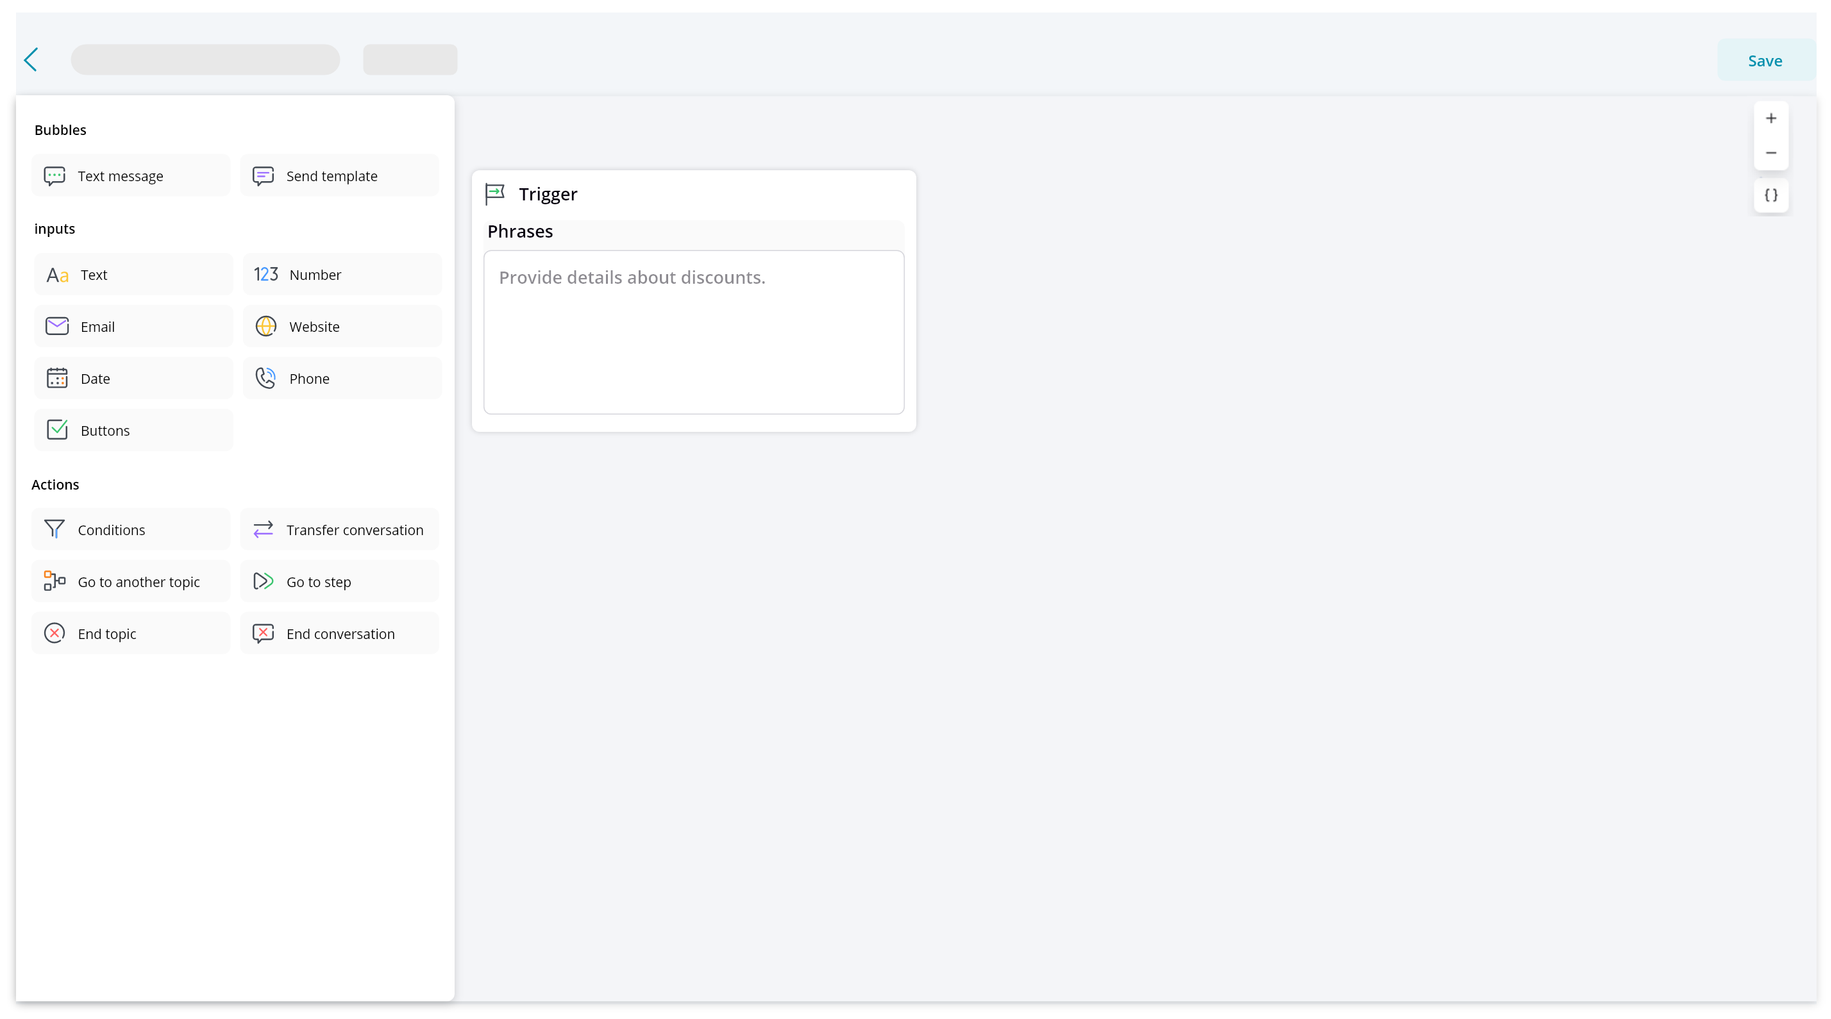
Trigger phrases are key phrases to activate the right topic based on user input. In other words, they determine when a specific topic should be activated in response to user input.
- Purpose: Trigger phrases help the chatbot identify which topic is relevant to the user's query.
- Multiple phrases: Add several variations of how users might ask about a particular topic. This improves the chatbot's ability to understand different phrasings.
- Uniqueness: Ensure trigger phrases are unique within your chatbot to avoid confusion between topics.
Best practices:
- Use natural language phrases that reflect how users actually communicate.
- Include common misspellings, abbreviations, or alternate phrasings.
- Keep phrases concise (typically 2-7 words) but descriptive enough to capture intent.
- Ensure uniqueness across your chatbot to prevent topic conflicts.
- Use a mix of questions and statements to cover various user inputs.
Example (for a return policy topic):
- "How do I return an item?"
- "What's your return policy?"
- "Can I get a refund?"
- "Item return process"
- "Unwanted purchase"
- "Exchange product"
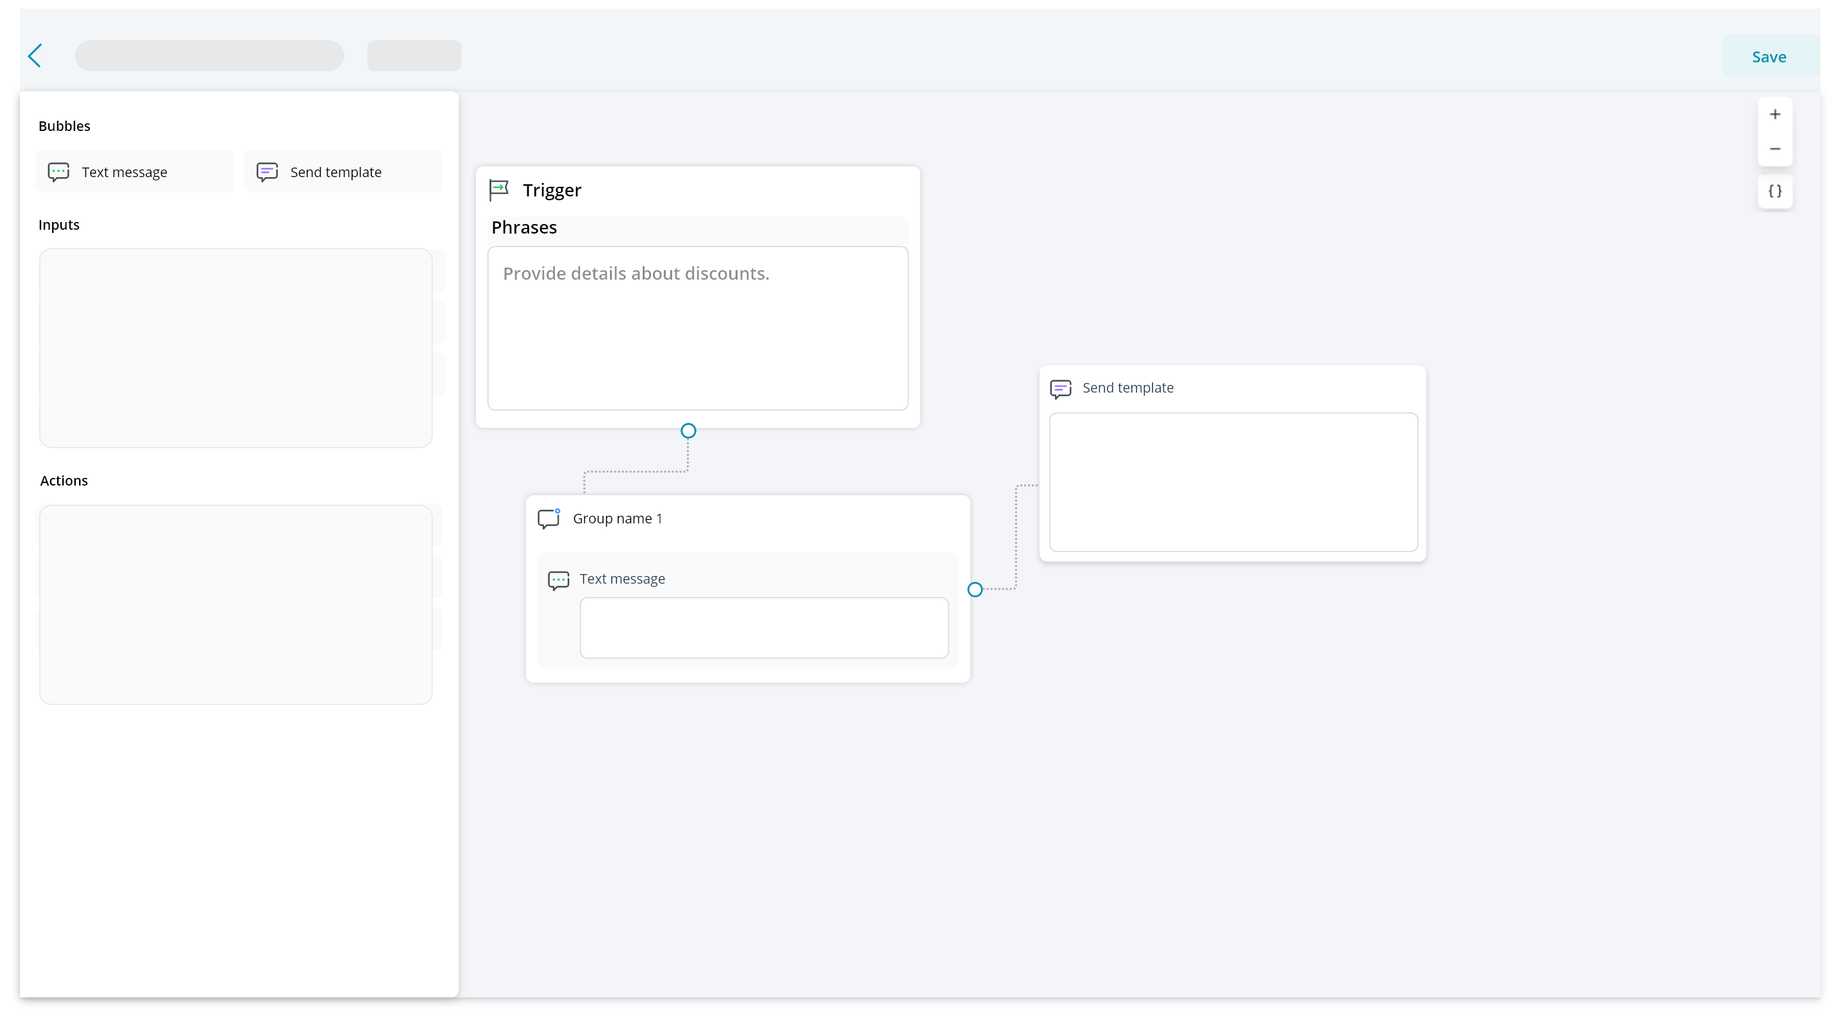
2. Building conversation flow
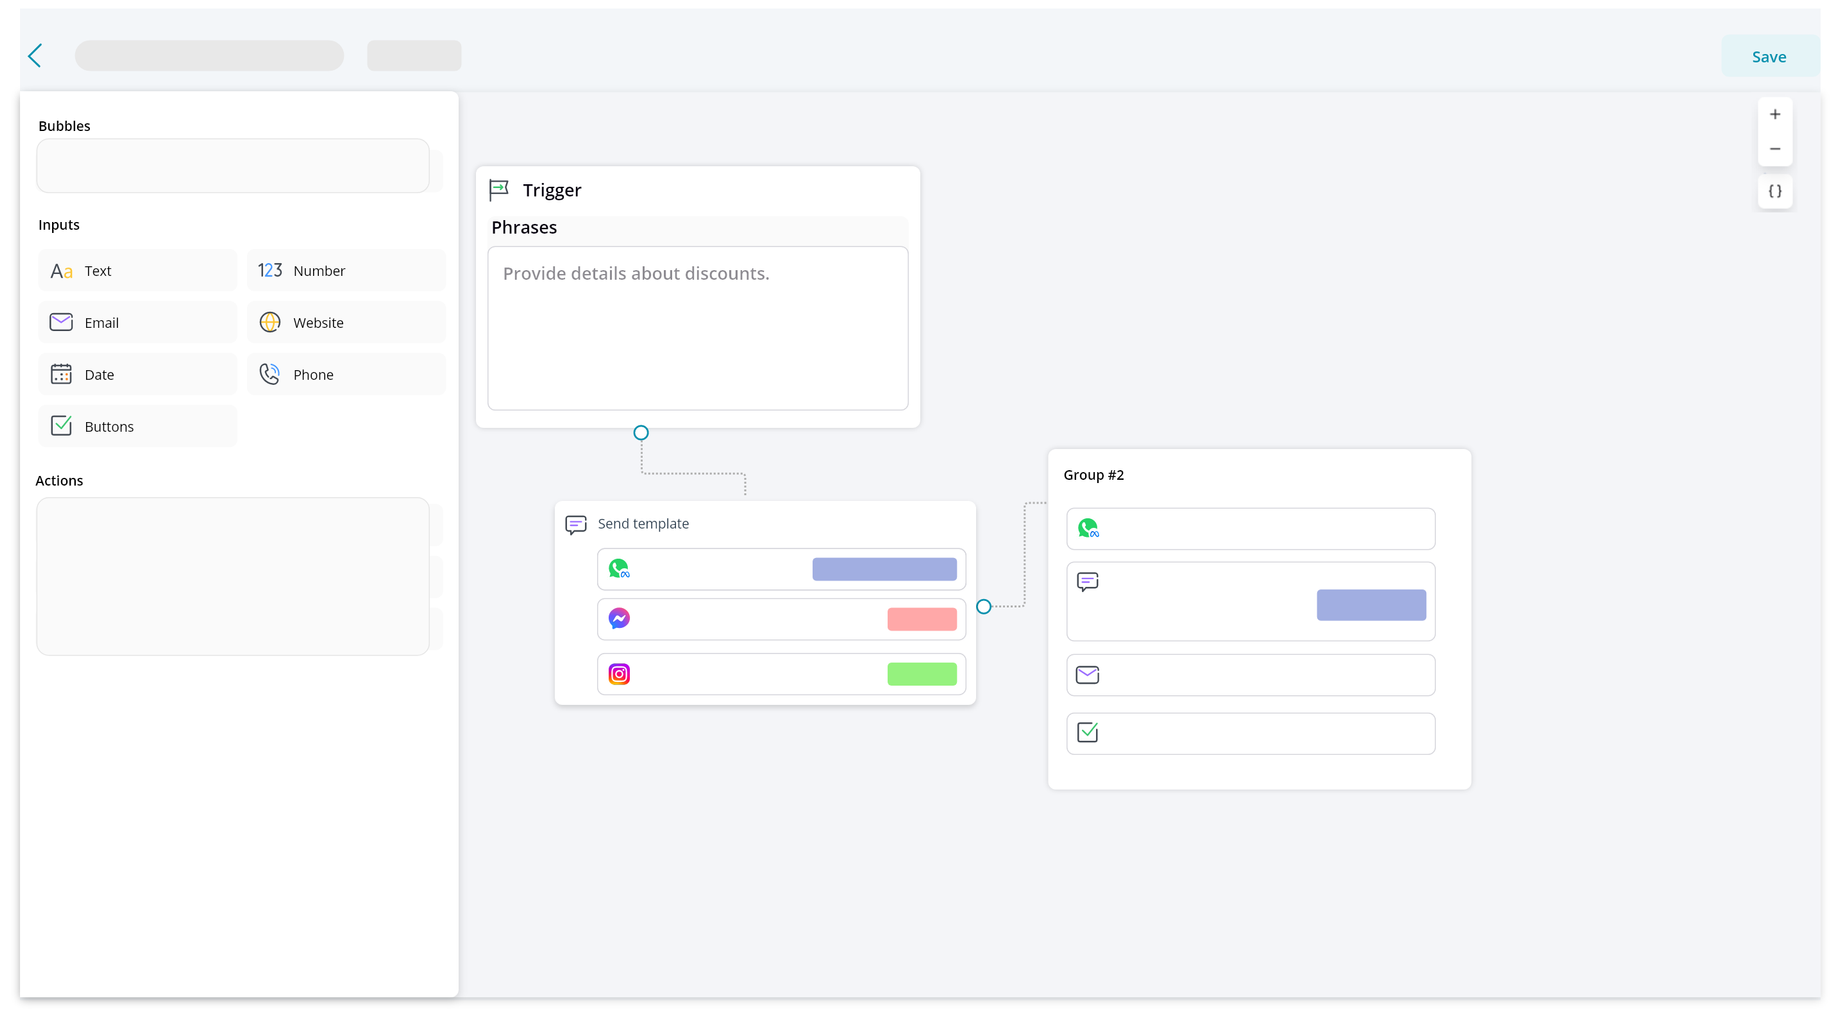
The conversation flow determines how your chatbot interacts with users once a topic is triggered. It's built using various elements that guide the conversation.
2.1 Bubbles
- Sending messages:
- Purpose: Used to send text messages to the user.
- Usage: Provide information, ask questions, or guide the user through a process.
- Best practices:
- Keep messages concise and clear.
- Break long information into multiple bubbles for better readability.Send a Template
- Send template:
- Usage: Send pre-approved message templates (available for certain integrated channels like WhatsApp).
- Best Practices:
- Ensure templates are approved by the channel before using.
- Use templates for consistent, compliant messaging.
2.2 Inputs (Collecting user information)
Purpose: Gather specific information from the user.
Types of inputs:
Inputs are designed to collect information from the user. The available input types are:
- Text: For open-ended responses or detailed information.
- Number: For numerical data like quantities or account numbers.
- Email: To collect email addresses. It includes built-in validation for email format.
- Website: For collecting valid website URL inputs.
- Date: Allows users to input dates in a structured format. It is useful for appointments or deadlines.
- Phone: For collecting phone numbers, can include formatting guidance.
- Buttons: Provide pre-defined options for users to choose from.
- Unlimited options can be added.
- Include descriptive text before the button options.
Best practices for inputs:
- Clearly state what information you're requesting.
- Use appropriate input types for different kinds of data.
- Provide examples or formatting guidance when necessary.
- Validate inputs where possible to ensure data quality.
2.3 Actions
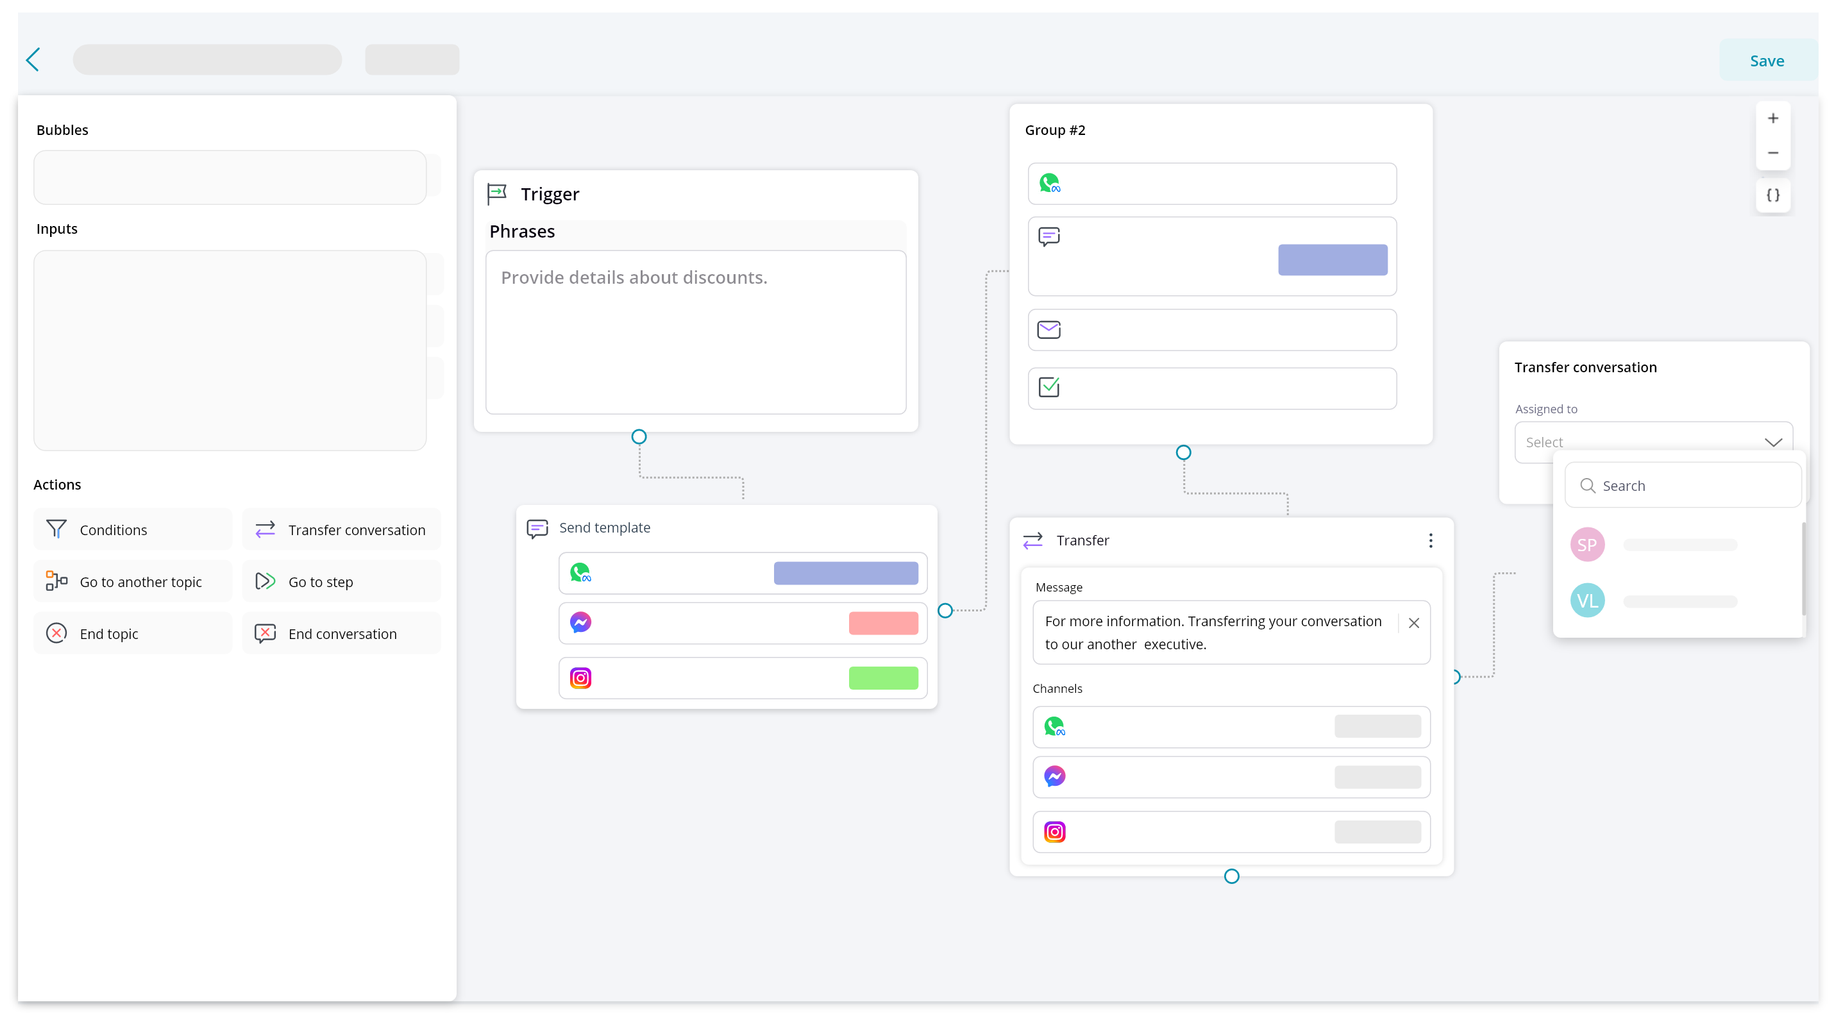
Actions determine what the chatbot does at each step of the conversation. They are the core of your chatbot's functionality.
Action elements control the flow and behaviour of the conversation:
1. Set variable:
“Set variable” allows you to store and manipulate data throughout the conversation. There are two types of variables: System variables and custom variables.
System variables:
- Pre-defined variables like First Name, Email, Date, Time, etc.
- Use these to personalise conversations and gather important user information.
Custom variables:
- Create your own variables to store and use information specific to your use case.
- Examples: product preferences, issue categories, etc.
Best practices:
- Use variables to avoid asking for information the chatbot already has.
- Ensure proper data handling and privacy practices when using variables.
2. Condition:
Condition enables branching based on specific criteria or user inputs.
Types of conditions:
- Based on user responses
- Based on system variables
- Based on custom variables
Best practices:
- Keep conditions simple and clear.
- Plan for all possible outcomes of a condition.
3. Redirect:
This will enable you to redirect the visitor to the external URL. It is useful for linking to resources, products, or additional information.
Best practices:
- Ensure the redirect is relevant and enhances the user experience.
4. Go to another topic:
This action helps you to switch to a different topic based on the input or conversation flow.
Best practices:
- Ensure the transition between topics is smooth and logical.
- Inform the user if there's a significant shift in conversation subject.
5. Go to step:
This action suggests the conversation flow to jump to a specific step within the current topic.
Best practices:
- Use sparingly to avoid creating overly complex flows.
- Ensure the jump makes sense in the context of the conversation.
6. End topic:
This action concludes the current topic when all necessary information has been exchanged.
Best practices:
- Thank the user for their time.
- Summarise key points if appropriate.
- Provide a clear next step or ask if the user needs further assistance.
7. End conversation:
This action helps you to terminate the entire chat session. This can be used when all user needs have been met.
Best practices:
- Thank the user for their time.
- Provide information on how to reach out if they have future questions.
8. Transfer conversation:
This action enables your chatbot to hand off the conversation to a human agent when necessary.
Best Practices:
- Clearly communicate to the user that they're being transferred.
- Set clear criteria for when a transfer should occur.
- Add each agent for the channel you have connected
Once the topic is configured, save it and enable the topic.
Executing the topic
After configuring your topic:
- Save the topic to preserve your changes.
- Enable the topic to make it active in your chatbot.
Note:
- One chatbot can connect to multiple channels (e.g., website, WhatsApp, Facebook Messenger).
- Ensure you configure the template for each connected channel, as requirements may vary.
- Regularly review and update your topics to keep them relevant and effective.
By following these detailed guidelines, you can create effective topics that enhance your AssistAI chatbot's ability to engage users and provide valuable assistance.
Go ahead and start configuring your topics and create and enable the AssistAI chatbot right away.
