


Ticket module: A complete guide to managing support tickets efficiently
Ticket module: What is ticket module, How to create, assign, and reassign tickets; Define permissions and visibility; How to use and manage ticket module
Managing customer support at scale requires structure, visibility, and efficiency. The Ticket module is designed to centralise all your support tickets, helping teams stay organised, respond faster, and deliver better customer experiences.
This guide walks you through the key features of the Ticket module, including ticket management, pipeline tracking, SLA configuration, record association, automatic ticket reassignment, and more.
1. What is ticket module?
The Ticket Module is a dedicated workspace where all your customer support tickets are managed in one place. It provides a structured pipeline to monitor ticket progress and tools to customise how your team interacts with tickets.
Key capabilities
- Centralised ticket management
- Customisable listing views
- Ticket export for reporting
- Structured pipeline tracking
- Automatic and manual ticket creation
- Ticket creation from messages, emails, and records
- Global search for tickets
- Global and channel-level SLA management
- Checklists and comments on every ticket
- Complete ticket timeline and activity history
- Automated ticket reassignment
- Ticket tracking via the dashboard
2. Getting started with ticket module
2.1. Enable automatic ticket creation
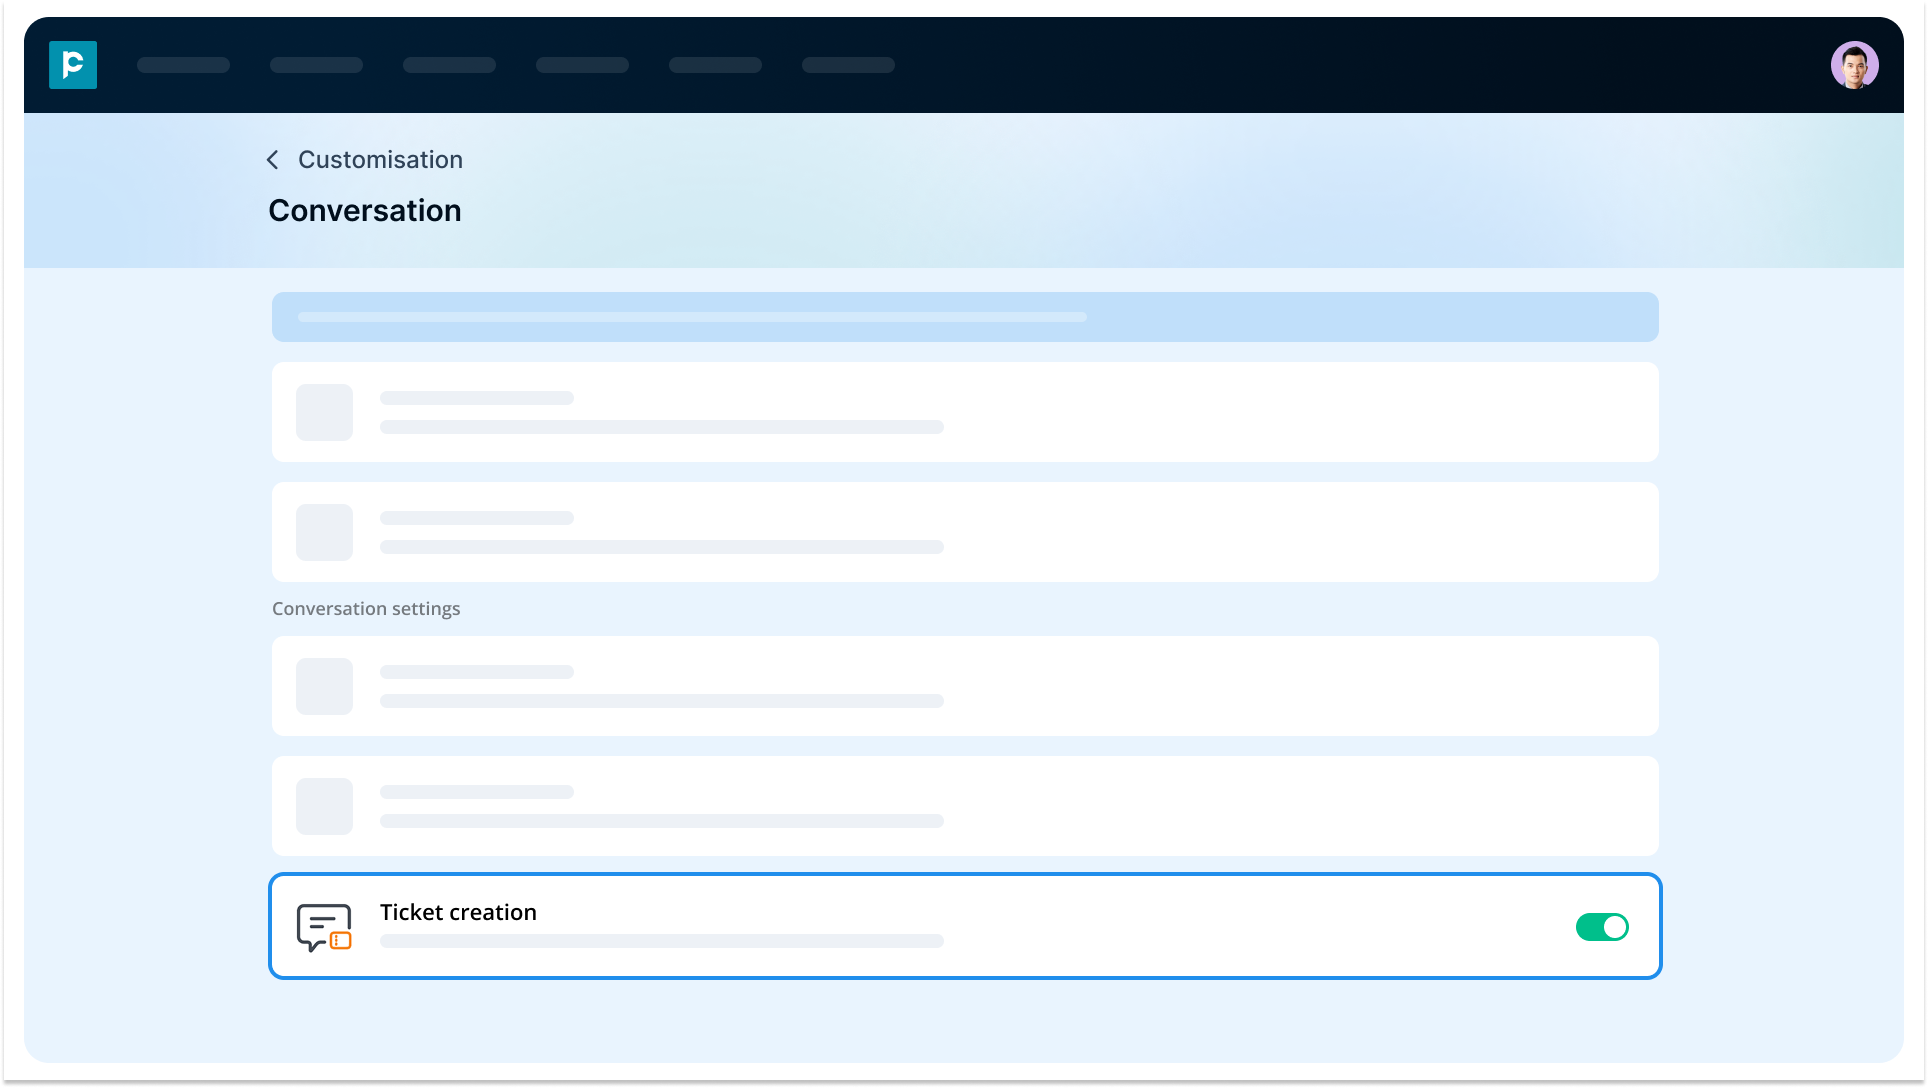
You can configure the system to create tickets for every new conversation session automatically. You now have full control over this behaviour — automatic ticket creation can be enabled or disabled at any time, depending on how your team prefers to manage incoming conversations.
Steps to enable:
- Go to Settings > Customisation
- Navigate to Conversation settings
- Enable Ticket creation
Once enabled, the system will automatically generate a ticket whenever a new conversation starts, ensuring no interaction is missed.
Note: When a conversation is initiated by an agent through a broadcast or workflow message, a ticket is not created automatically. This prevents unnecessary ticket generation for outbound campaigns.
2.2. Create tickets manually
You can now create tickets manually from the Ticket module — ideal for logging issues that come in over a phone call or in person. Manual tickets are standalone — they are not linked to a conversation, and can optionally be associated with your CRM records.
2.2.1. Create tickets from the ticket module
- Navigate to the ticket module.
- Click “Create New” (It will be visible to users with ticket “Create” permission)
- Fill in the details such as Subject and Ticket Owner.
- Click “Save”
Note:
- You can clone an existing ticket by clicking 3 dots next to the ticket.
- Ticket IDs are auto-generated (e.g., TKT-M001).
2.2.2. Create tickets for records
You can create a ticket directly from a record's details page — such as a Contact or an Opportunity. The ticket is automatically associated with that record and appears on the record’s details page alongside its other activities.
For records (accounts or contacts), you can create a ticket in 2 ways:
- From listing screen: Go to the listing page, click on the three dots, click “Create ticket” and enter details.
- From details screen: Click on any record and navigate to the details screen. On the right panel, you can see the associated tickets or the button to create a new ticket.
2.2.3. Create tickets via email threads
You can convert an email thread into a support ticket directly from your inbox, without re-entering details manually.
- Go to the inbox and open the email thread in the inbox
- On the right, you can see the the ticket icon. It will show the list of tickets associated with the email. You can click new ticket by clicking “+”.
- The ticket form opens pre-filled — the subject is taken from the email subject, the source is set to Email, and the default pipeline and stage are applied
Note:
- Smart auto-association: If the email sender is identified as a Lead or Contact in your CRM, the ticket is automatically associated with that record. If the sender matches both, it is associated with both.
- From the email extension: You can also create tickets from the Gmail or Outlook extension, provided the email is associated with a Lead or Contact in the system. Once created, the Ticket ID appears in the extension as a hyperlink to the Ticket Details page.
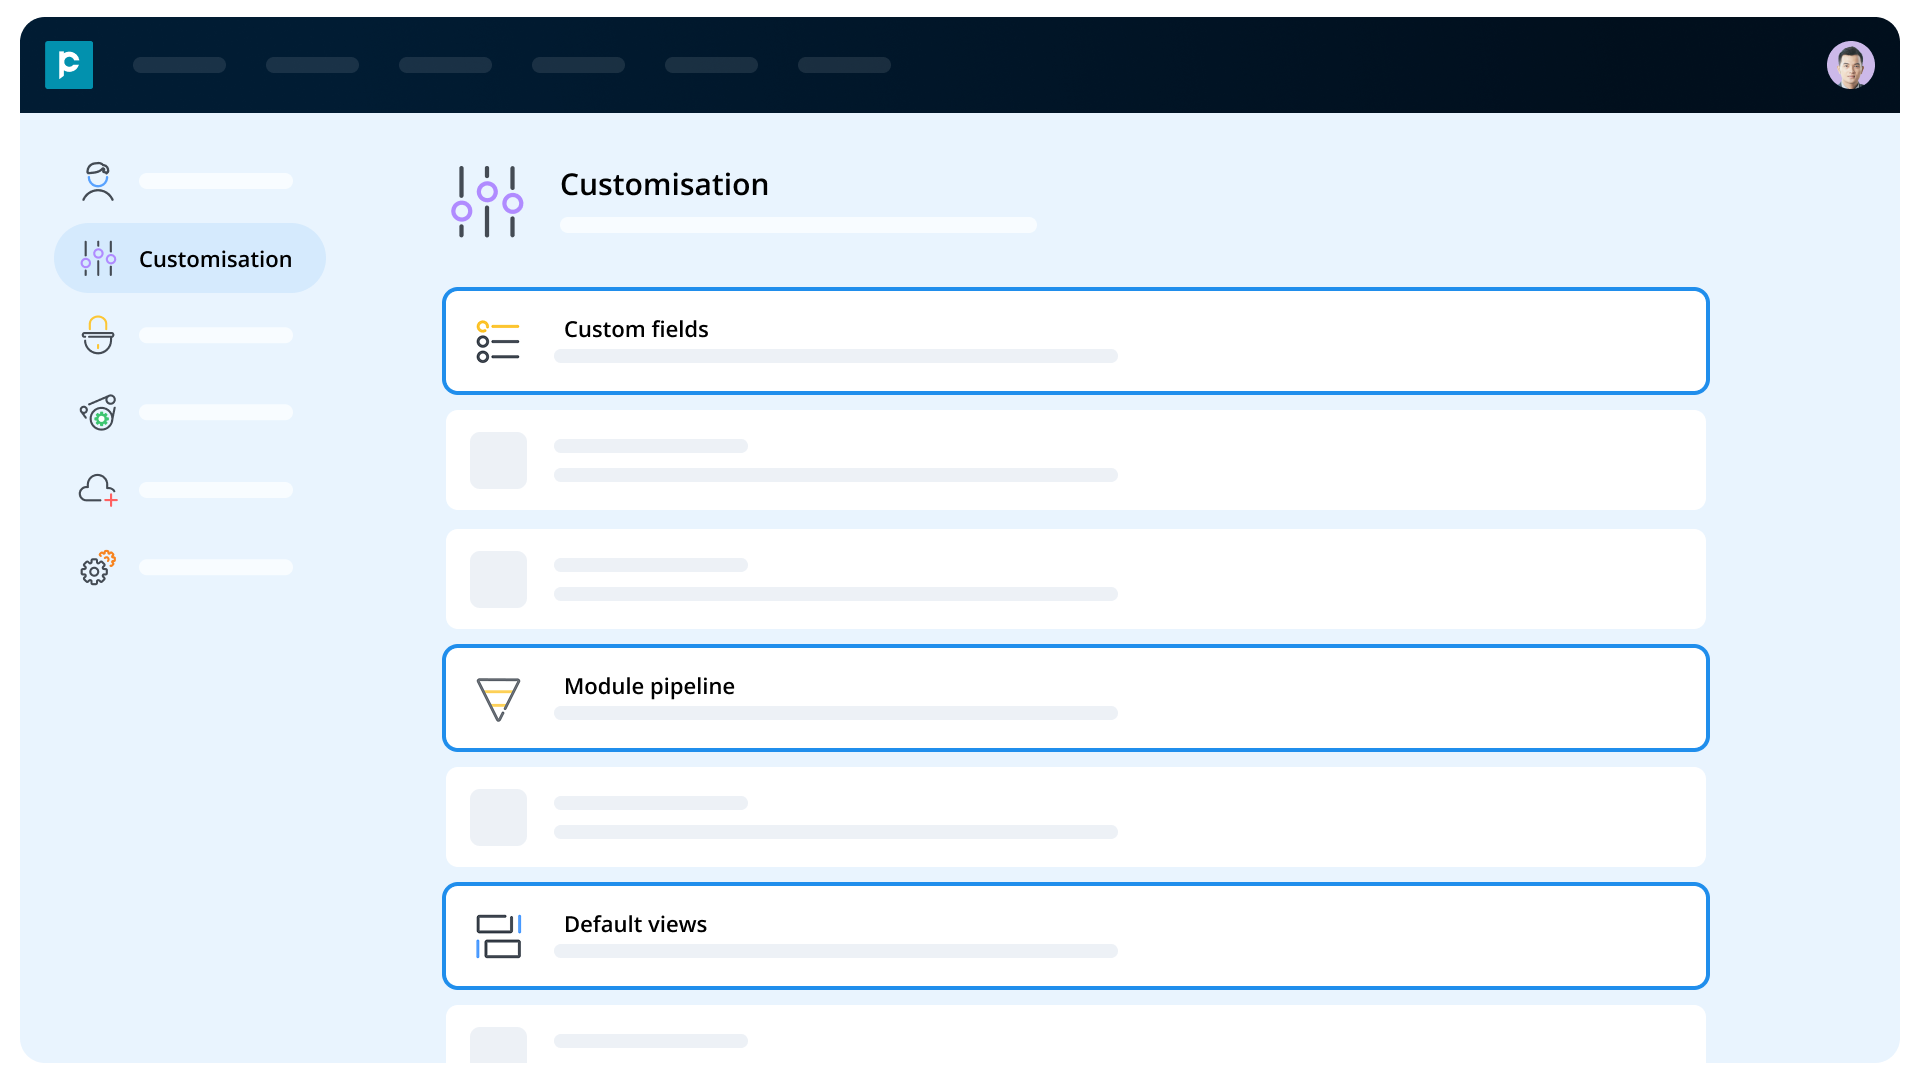
2.3. Customise the ticket module
Customisation allows you to tailor the Ticket module to your business needs.
2.3.1. Configure custom fields
You can create custom fields to capture information that is specific to your business or support process. For example, you might want to track issue type, priority level, product category, or customer segment.
- You can define whether a field is mandatory or optional
- You can ensure important information is always captured before progressing a ticket
- You can standardise the data collected across all tickets
This helps you maintain consistency and improve the quality of your reporting and analysis.
2.3.2. Define ticket pipelines
You can structure your ticket lifecycle by creating pipelines that reflect how your support process works.
- You can create multiple pipelines for different use cases such as support, escalation, or onboarding
- Each pipeline can include multiple stages (up to 12 stages)
- You can map the journey of a ticket from creation to resolution
By doing this, you can clearly track where each ticket stands and quickly identify delays or bottlenecks in your process.
2.3.3. Customise default views
You can control how tickets are displayed in your listing screen by customising table views.
- You can choose which columns to display, such as ticket status, SLA details, sentiment, or assigned user
- You can create different views for different teams or roles
- You can save these views for quick and repeated access
This allows you to focus only on the information that matters most to you, improving efficiency and reducing clutter.
Steps to customise the module:
- Go to Settings > Customisation
- Select the Ticket module
Configure fields, pipelines, and views based on your needs
2.4. Set up SLAs: Global and channel-level
You can now define Service Level Agreements (SLAs) to ensure every ticket is responded to and resolved on time. SLAs can be configured at two levels — a global SLA that applies across your organisation, and channel-level SLAs that let individual channels follow their own rules.
Three SLA parameters are available:
- First Response Time (FRT): The maximum time allowed for the first response after a ticket is created
- Closure time: The maximum time allowed from ticket creation to the ticket reaching Closed status
- SLA time exceeded: When an SLA is breached, an escalation notification is sent to the selected user
2.4.1. Global SLA:
- Acts as the default SLA for all tickets unless overridden
- Applies to both manually created and automatically generated support tickets
- Acts as the default for all channels set to the Global configuration type
Steps to configure:
- Go to settings > Customisation > Tickets > SLA settings
- Configure first response SLA, Closure SLA, and SLA time exceeded values.
2.4.2. Channel-level SLA:
Within each messaging channel’s settings, you can choose how SLAs apply to tickets created through that channel using the SLA configuration type option:
Steps to configure:
- Go to settings > Integration > Channel
- Choose the channel and click “update channel” icon.
- Choose the “Individual channel” to define channel-level SLA.
- Define SLA details.
Note: The SLA configuration is locked at the time of ticket creation. Changes made to global or channel SLAs later will not affect existing tickets — they continue to follow the SLA applied when they were created.
2.5. Set permissions and visibility
You can control who has access to tickets and what actions they can perform by configuring permissions and visibility.
2.5.1. Define profile permissions
- You can assign Read and Export permissions
- You can ensure that only authorised users can access or download ticket data
2.5.2. Configure visibility
You can set visibility as:
- Public: All users can access tickets
- Private: Only selected users can access tickets
This helps you protect sensitive information while still enabling collaboration where needed.
2.5.3. Steps to configure:
- Go to Settings > Manage users > Profile/Permissions & Visibility
- Define access for the Ticket module
3. How to use the ticket module
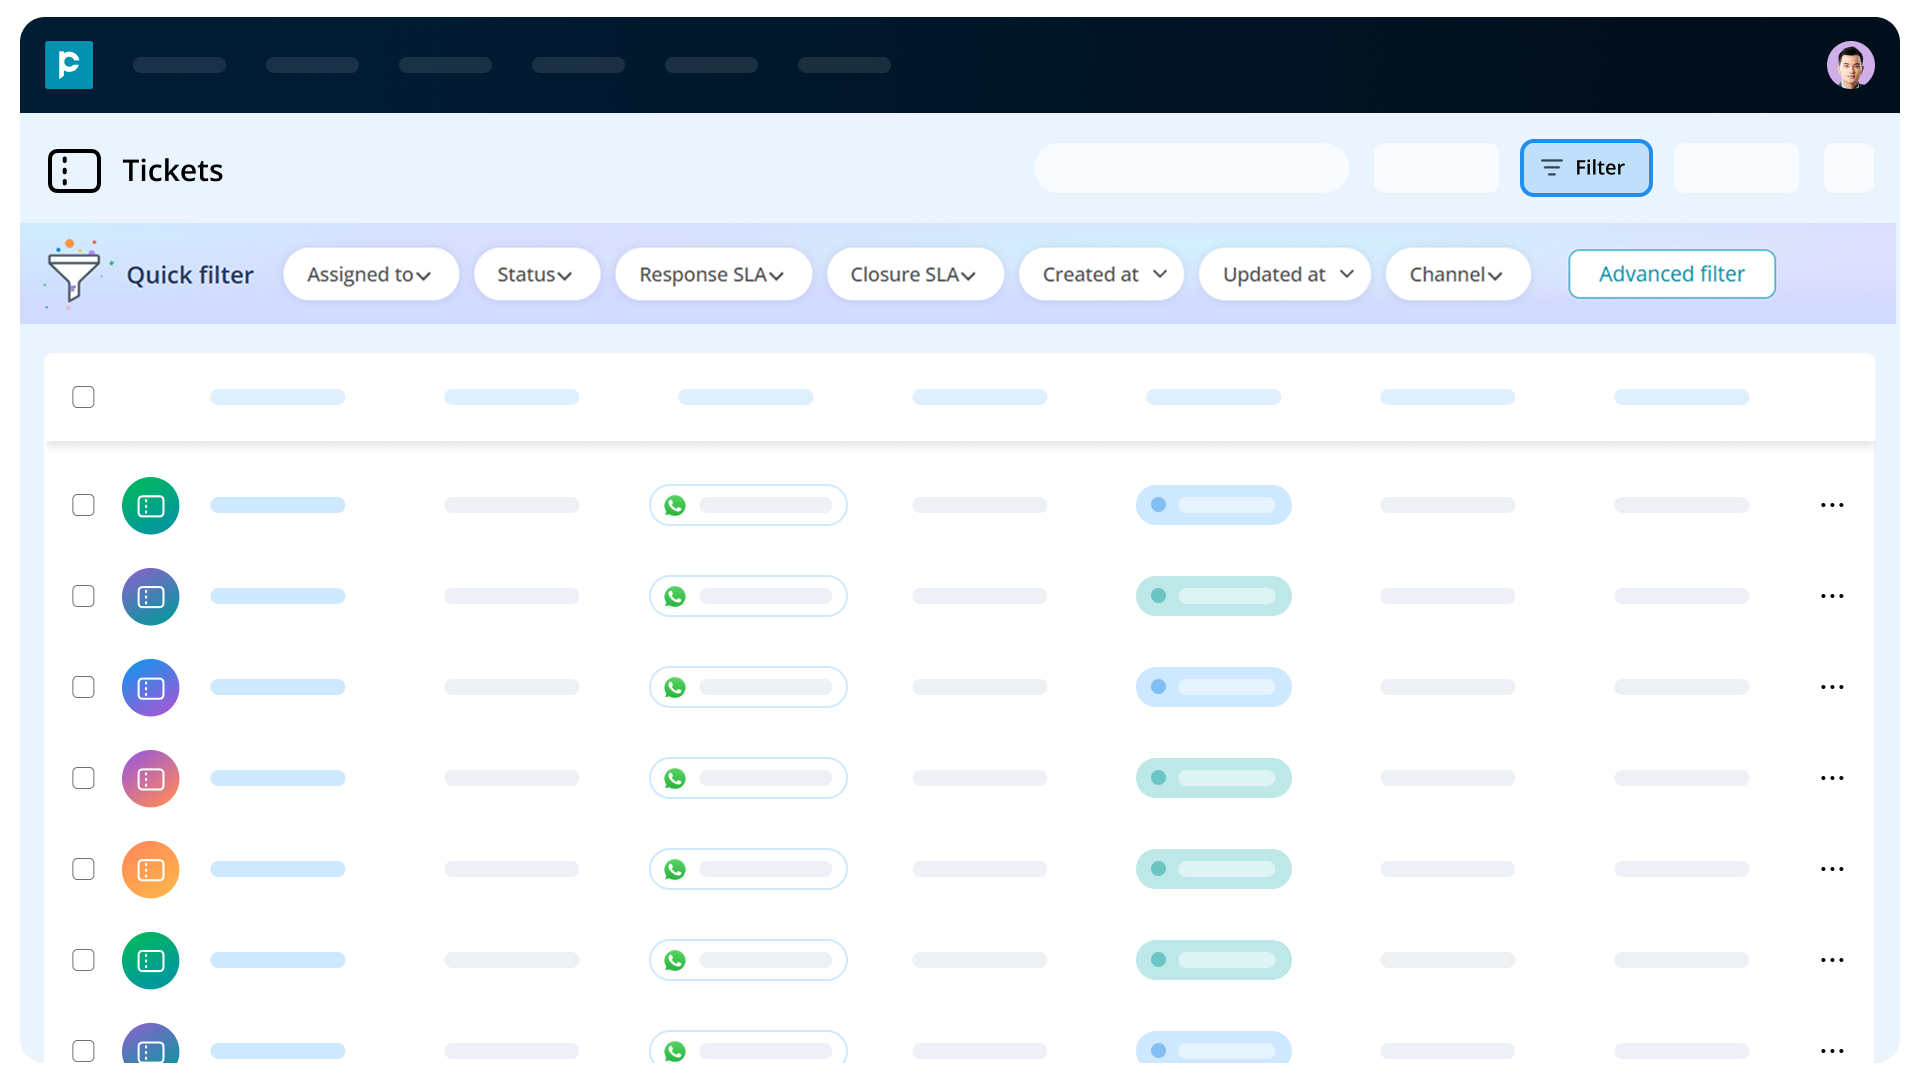
The ticket listing screen is where you will spend most of your time managing tickets.
3.1. Listing screen:
- View your ticket list:
You can see all your tickets in a structured table that includes key details such as ticket ID, subject, status, and assigned user.
- Search tickets easily:
You can quickly find tickets by searching using Ticket ID and Subject.
- Filters:
You can apply quick or advanced filters to narrow down tickets based on: Status, Assigned user, SLA conditions, Pipeline stages, etc.
- Customise views:
You can also customise and save views so that you can return to them without reapplying filters each time. This helps you quickly identify high-priority or overdue tickets and take action.
3.2. Find tickets with a global search:
Tickets are now part of global search, appearing alongside Leads, Contacts, Accounts, Tasks, and other modules. A dedicated Tickets tab is available in the search results, and ticket results are also included in the "All" tab.
- You can search by ticket name, Ticket ID, ticket description, conversation name, and text-based custom fields
- Search results respect your ticket visibility permissions — you only see tickets you are allowed to access
- Use the "Show only my records" option to narrow results to tickets assigned to you
4. Manage ticket details
When you open a ticket, you get a complete view of all relevant information in one place.
4.1. View ticket information
You can access detailed data such as timestamps, assigned user, pipeline stage, and custom fields.
4.2. Modify ticket details from within the pipeline
You can now edit ticket details directly — from the Ticket Details page, from the listing screen, or from within the pipeline — without switching to the Message module.
- You can change the pipeline, stage, and status of the ticket
- You can edit the ticket subject — for auto-created tickets, the subject is prefilled with the conversation name and can be changed later without affecting the conversation
- Updates reflect in real time in the Message module
Note:
- System fields such as SLA, Channel, Created at, and Updated at cannot be edited.
- Once a ticket is closed, its details can no longer be edited.
- If a mandatory field is empty, you can’t save the ticket.
4.3. Associate tickets with CRM records
You can link a ticket to your CRM records to keep the full customer context in one place. Supported record types are Lead, Contact, Opportunity, and Account.
- You can associate one record of each type with a ticket — for example, a Contact and an Account simultaneously
- Associations are optional and can be added or changed from the Ticket Details page while the ticket is open
- The Associations panel on the Ticket Details page shows each linked record with a hyperlink for quick navigation
- Associated tickets also appear on the record details page, alongside other activities such as tasks — so your sales and support teams always see the complete picture
4.4. Associate tickets with CRM records
You can link a ticket to your CRM records to keep the full customer context in one place. Supported record types are Lead, Contact, Opportunity, and Account.
- You can associate one record of each type with a ticket — for example, a Contact and an Account simultaneously
- Associations are optional and can be added or changed from the Ticket Details page while the ticket is open
- The Associations panel on the Ticket Details page shows each linked record with a hyperlink for quick navigation
- Associated tickets also appear on the record details page, alongside other activities such as tasks — so your sales and support teams always see the complete picture
4.5. Add checklists and comments
The activity panel on each ticket helps your team collaborate and stay on top of resolution steps.
Comments:
- You can add comments scoped to the ticket — for example, noting a workaround discussed with the customer over a call
- You can mention colleagues in comments, and mentioned users receive an in-app notification
Checklists:
- You can create a checklist on a ticket to track sub-tasks or resolution steps — such as account setup, data migration, and confirmation call
- You can check off items as they are completed, so any agent picking up the ticket midway can immediately see what is done and what is pending
4.6. Track the ticket timeline with ease
Every ticket maintains a chronological history of all events, giving you a complete audit trail without relying on memory.
4.7. Track sentiment insights
After a ticket is closed, you can view AI-powered sentiment analysis. This helps you understand how the customer felt during the interaction and identify areas for improvement.
4.8. Take action on tickets
- You can close tickets once they are resolved
- You can view the full conversation linked to the ticket
This ensures that you always have full context when managing customer issues.
5. Monitor performance with a dashboard
You can use the Ticket dashboard to gain insights into your support operations and team performance.
What you can track
- Ticket status distribution across stages
- SLA performance, including met and unmet cases
- Individual and team performance
With these insights, you can identify inefficiencies, improve processes, and ensure that your team meets service expectations.
How to access the ticket dashboard?
- Go to “Dashboard”
- Navigate “Tickets” and access the required details.
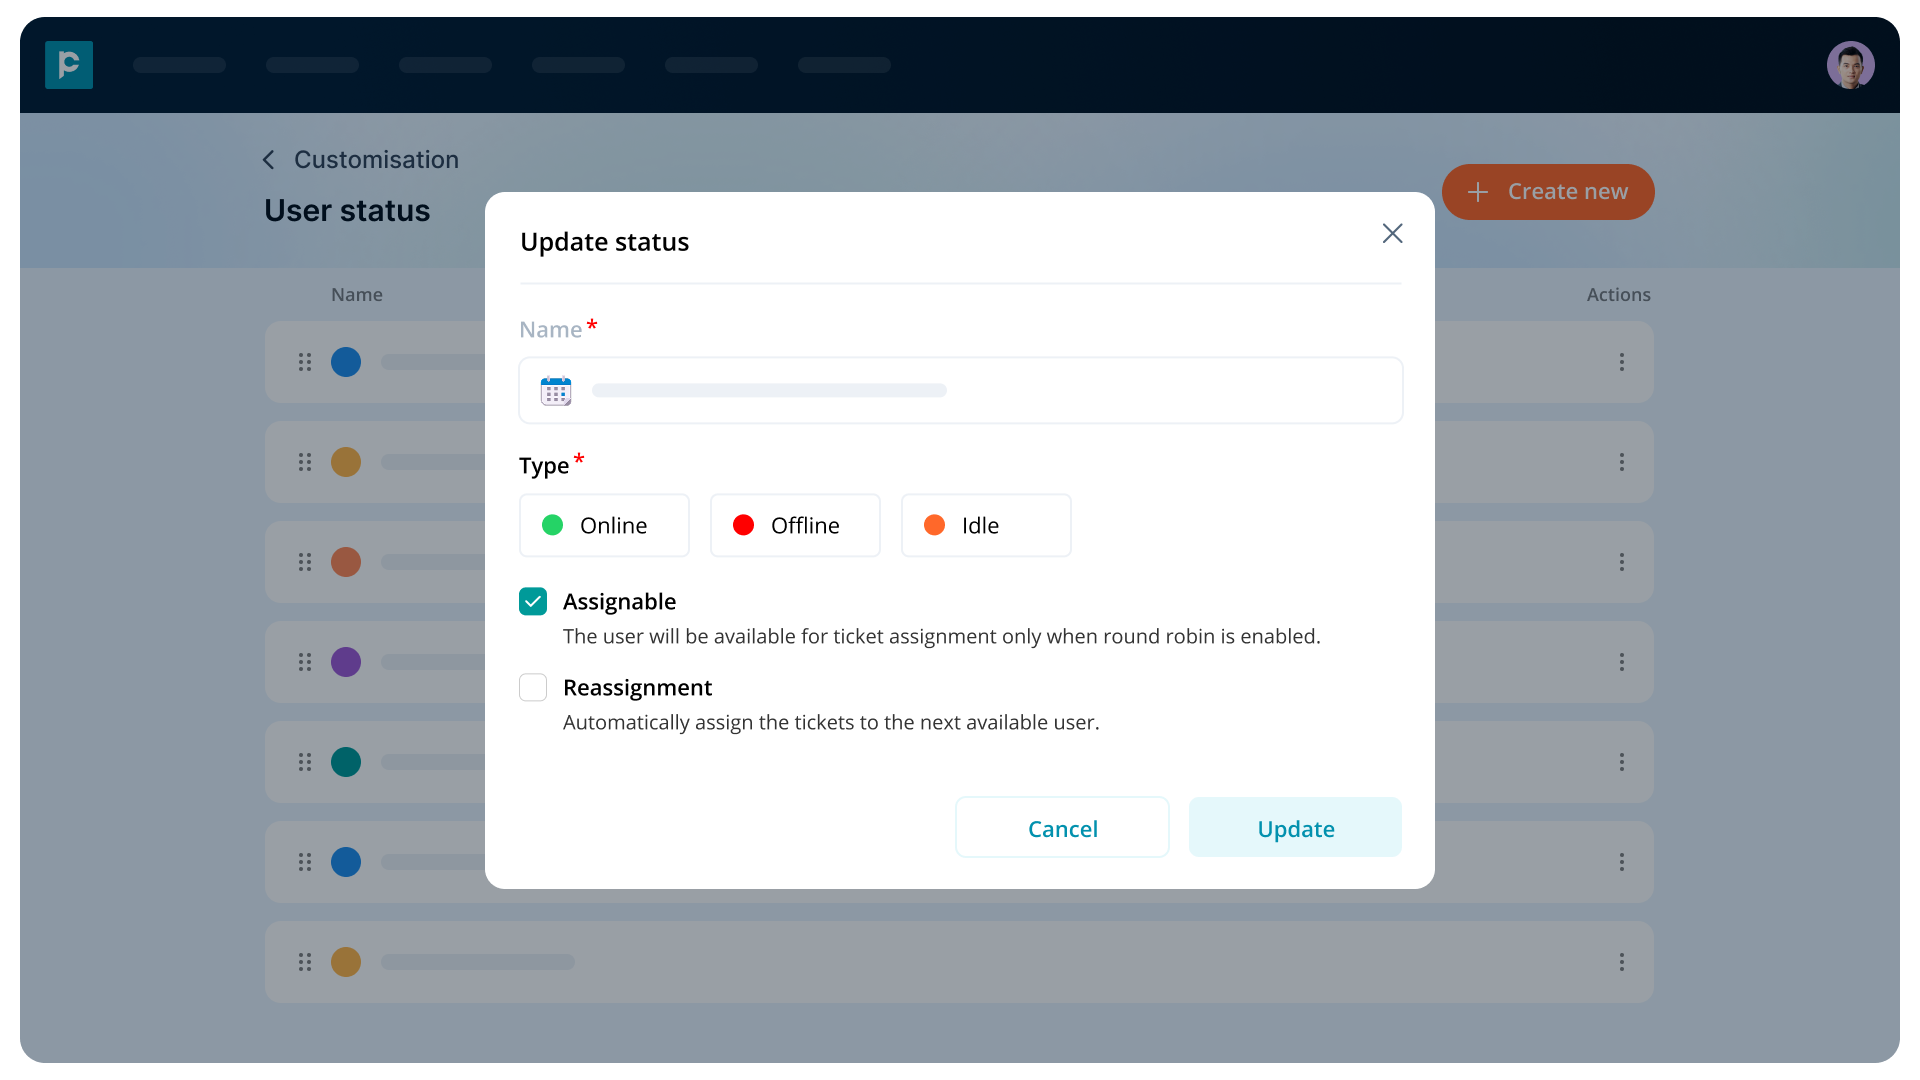
6. Enable ticket reassignment
To ensure continuous support, you can enable automatic ticket reassignment. For this
Steps to enable
- Go to Settings > Customisation
- Navigate to User status
- Create a user status or edit the user status
- Enable Ticket reassignment.
Once enabled, tickets are automatically reassigned whenever the assigned user chooses the specific user status, ensuring that your customers always receive timely responses.
7. Troubleshooting
- Tickets are not being created automatically
- Check if ticket creation is enabled in conversation settings
- Ensure new conversations are being initiated
- You cannot see the ticket module
- Verify that you have Message Module permission
- Contact your administrator if access is missing
- You cannot access certain tickets
- You can only view tickets linked to conversations you have access to
- Review visibility and permission settings
- Ticket reassignment is not working
- Ensure the feature is enabled
- Check user availability status
- Dashboard data is not visible
- Confirm you have the required permissions
- Ensure there is sufficient ticket data
8. Frequently asked questions (FAQs)
- Can you create tickets automatically?
Yes, you can enable automatic ticket creation for every new conversation session. You need to enable ticket creation by navigating to Settings > Customisation > Conversation > Ticket creation
- Can you customise ticket fields?
Yes, you can create custom fields and decide whether they are mandatory or optional.
- What permissions can you configure?
You can configure Read and Export permissions, along with Public or Private visibility.
- Can you track team performance?
Yes, you can use the dashboard to monitor ticket status, SLA performance, and user productivity.
- What insights can you see in ticket details?
You can view pipeline stages, ticket data, associated conversations, and sentiment analysis after closure.
9. Conclusion
With the Ticket module, you can take full control of your support operations. You can automate ticket creation, customise workflows, manage access, and gain valuable insights from your data.
By using these features effectively, you can reduce response times, improve team productivity, and deliver a more consistent and reliable customer support experience.
