


WhatsApp Cloud integration: Generate Permanent token
Tokens help you connect your WhatsApp Cloud API with your CRM. Here is a step-by-step guide to generate a permanent token.
Access tokens often have a limited lifetime. This would create recurring issues after integrating the WhatsApp Cloud API with Pepper Cloud CRM. To save you from unnecessary trouble, here is a step-by-step guide to generating a permanent access token, after getting WhatsApp Cloud API for your business.
Steps to generate a permanent token
1. Login to the Facebook Business manager
2. Click “App Dashboard” and navigate to “Business settings”.

3. Navigate to “System users” (Business Settings > Users > System Users) and click “Add”.
4. Enter System Username and choose the System User Role for the user. Click “Create System User”.
Note: System User Role should be selected as Admin.

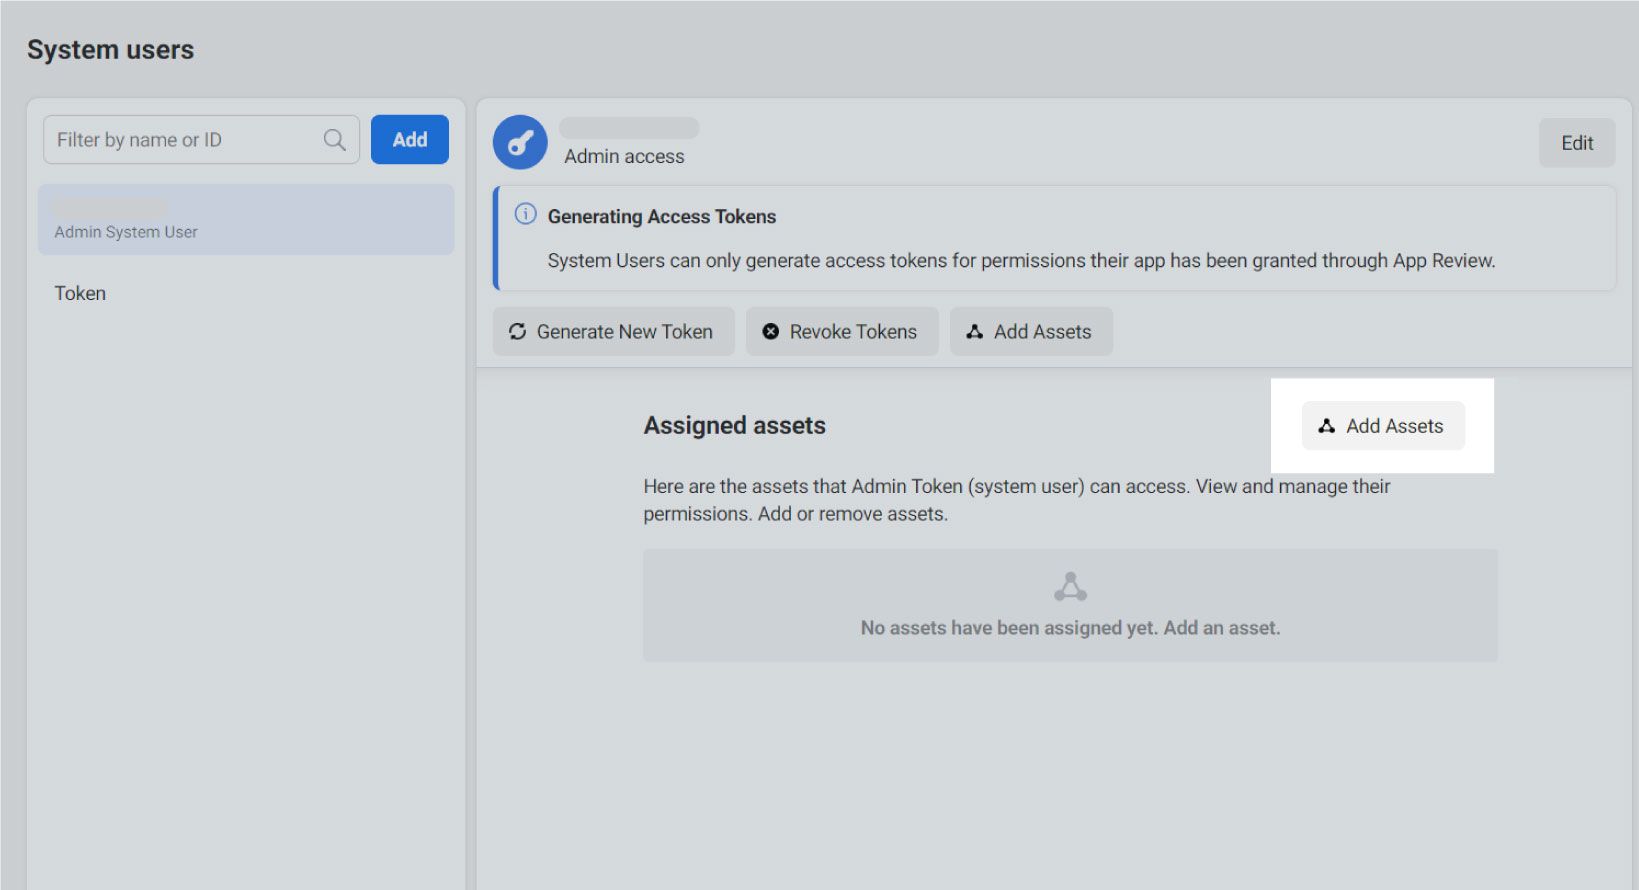
5. Go to “Add Assets” and navigate to Apps.
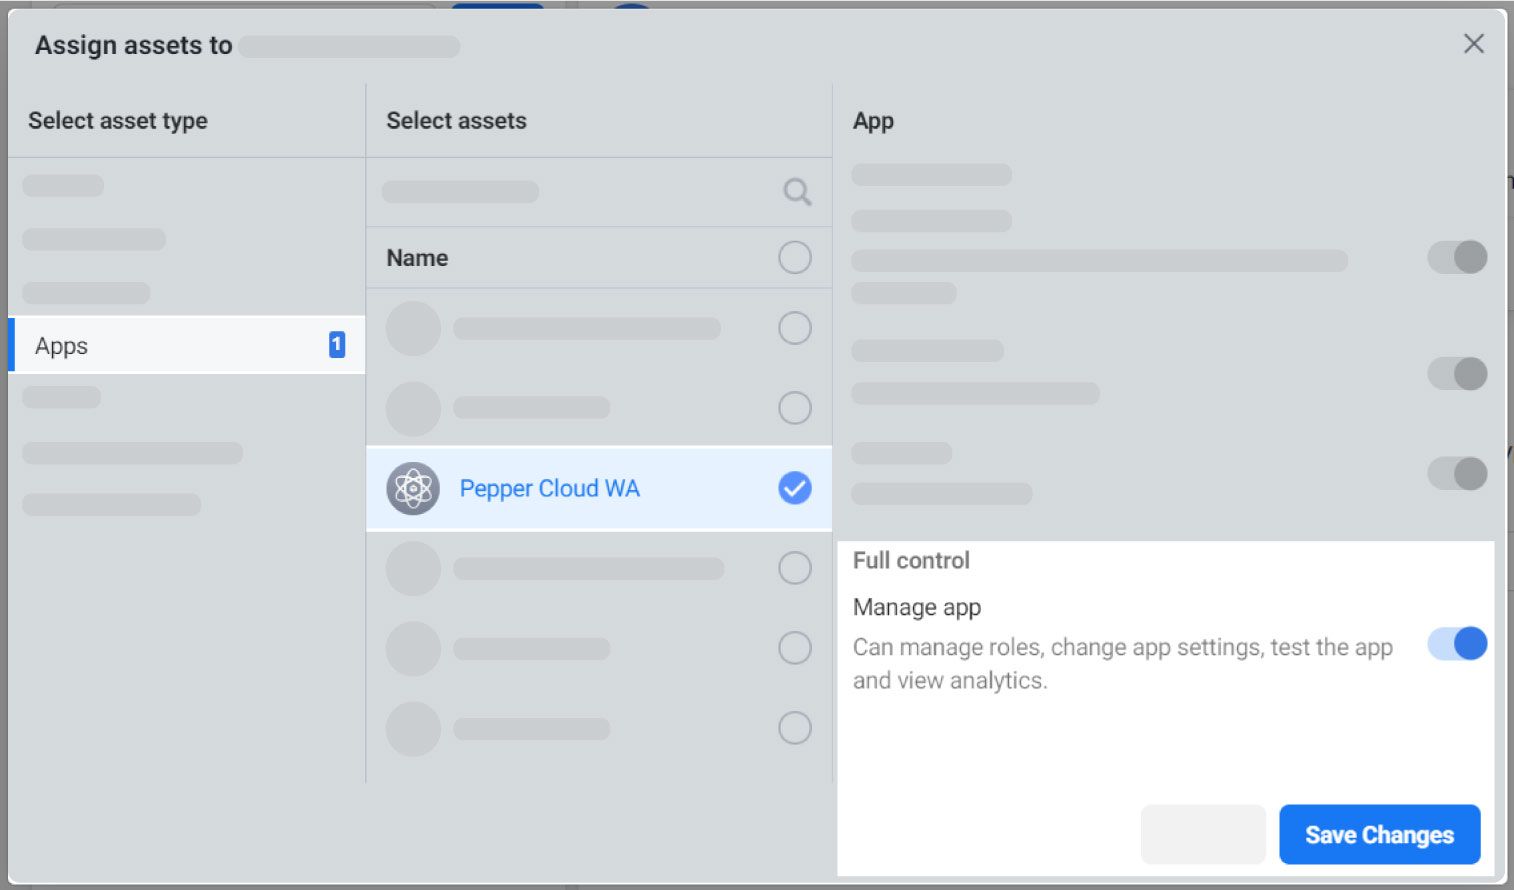
6. Find and choose your app and then, enable the toggle of “Manage app”. Click on “Save Changes”

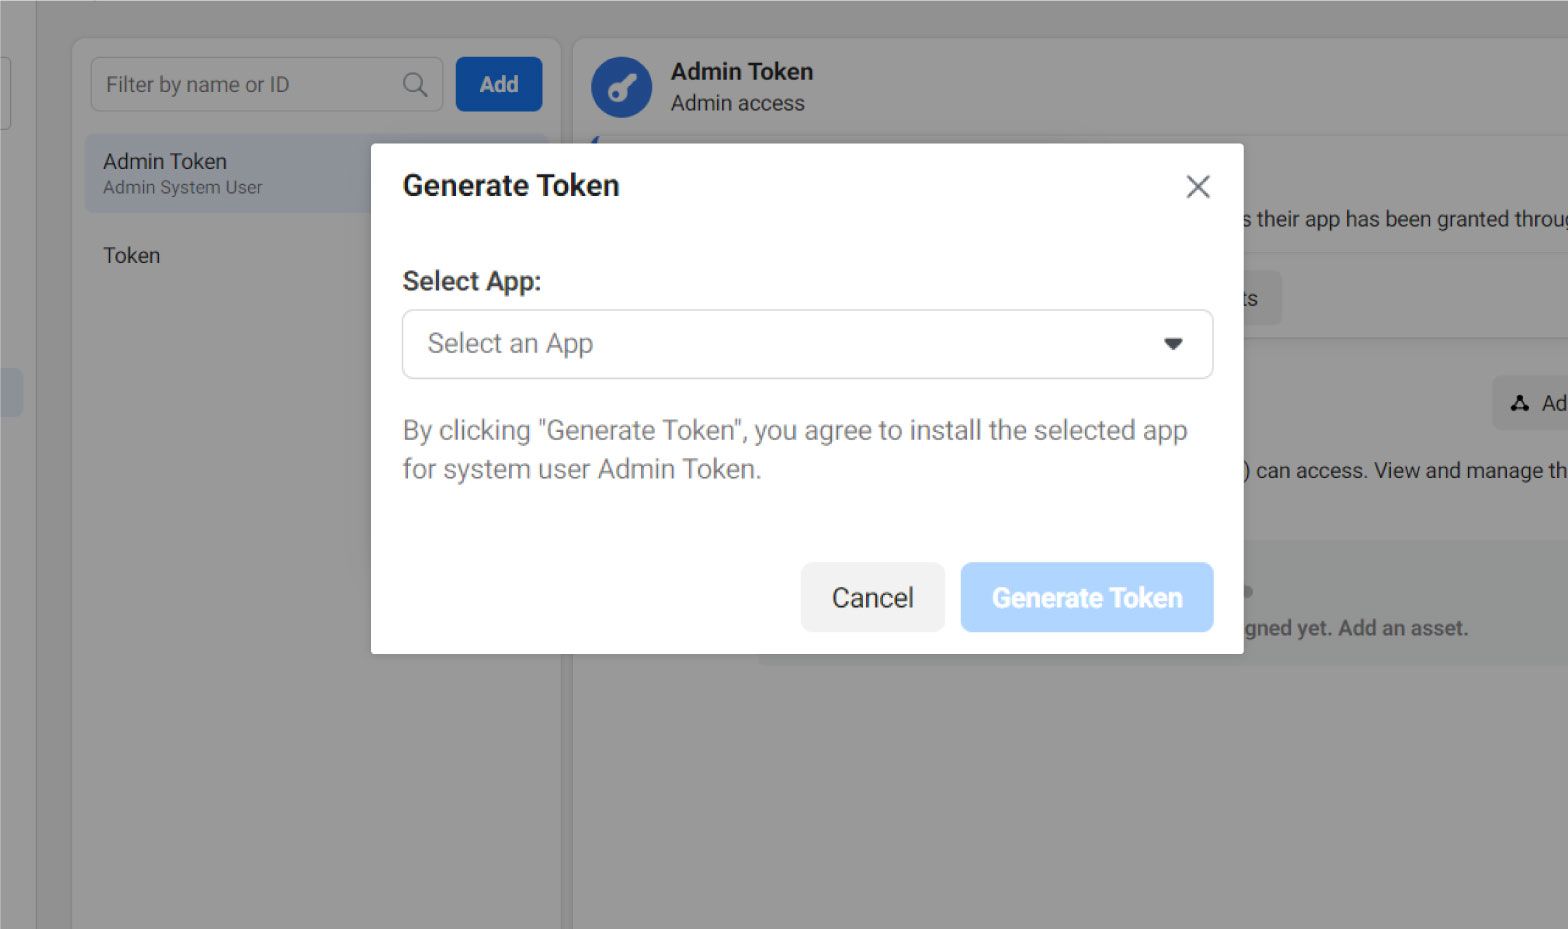
7. Click “Generate New Token” and choose your app to generate a token.
8. Select the “Never” option.
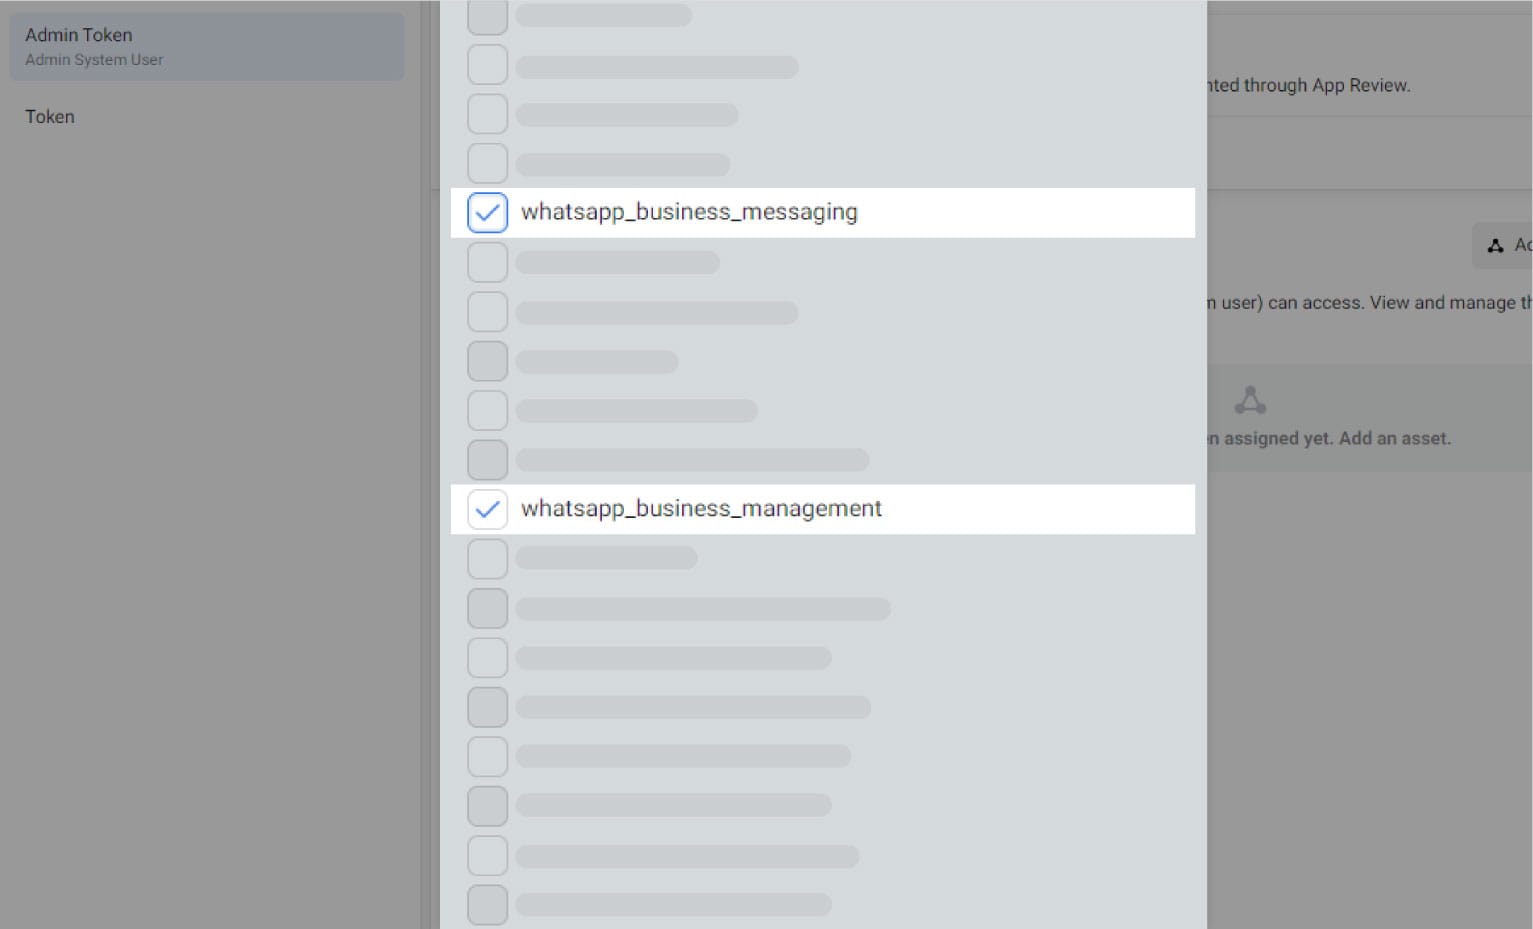
9. Check "catalog_management", “whatsapp_business_messaging”, and “whatsapp_business_management”.
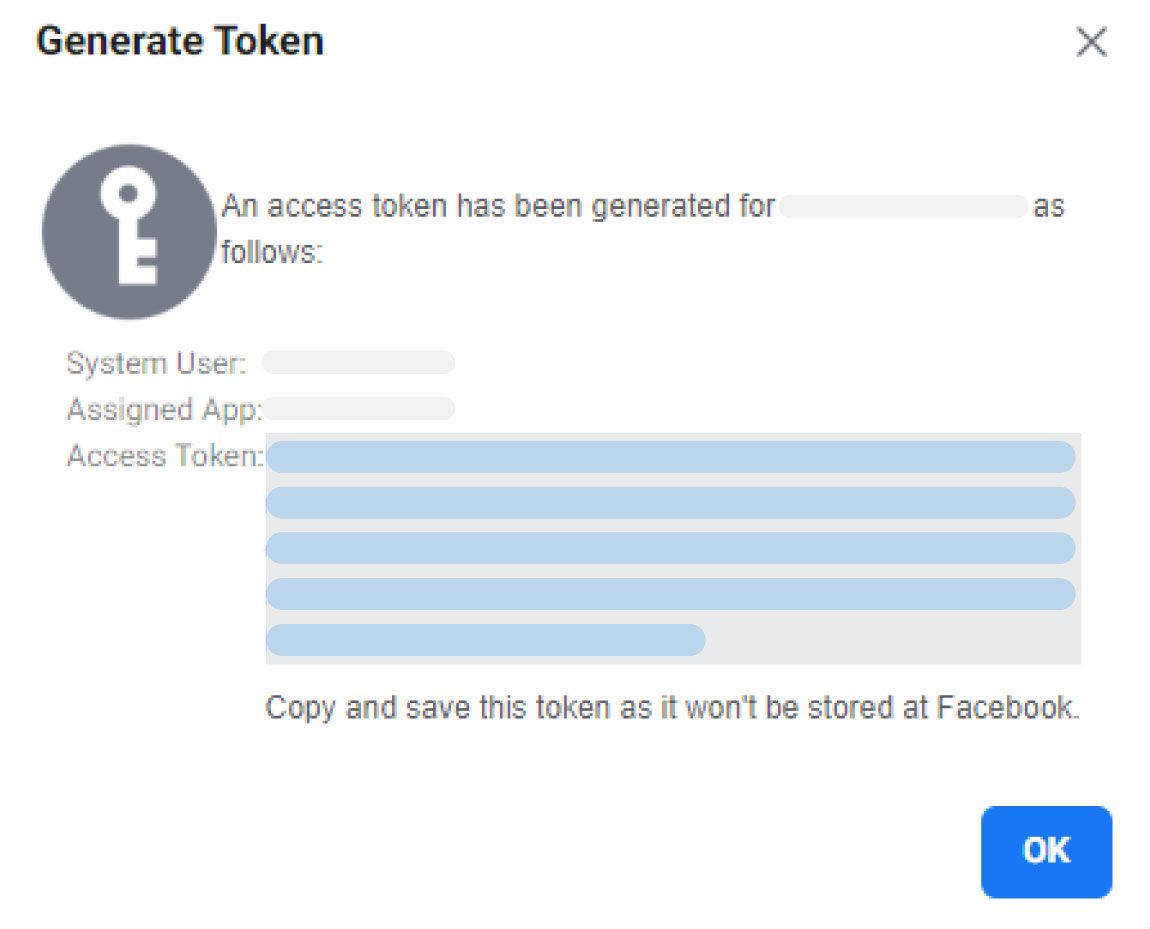
10. Click “Generate Token” and use it to integrate WhatsApp Cloud API with Pepper Cloud API.
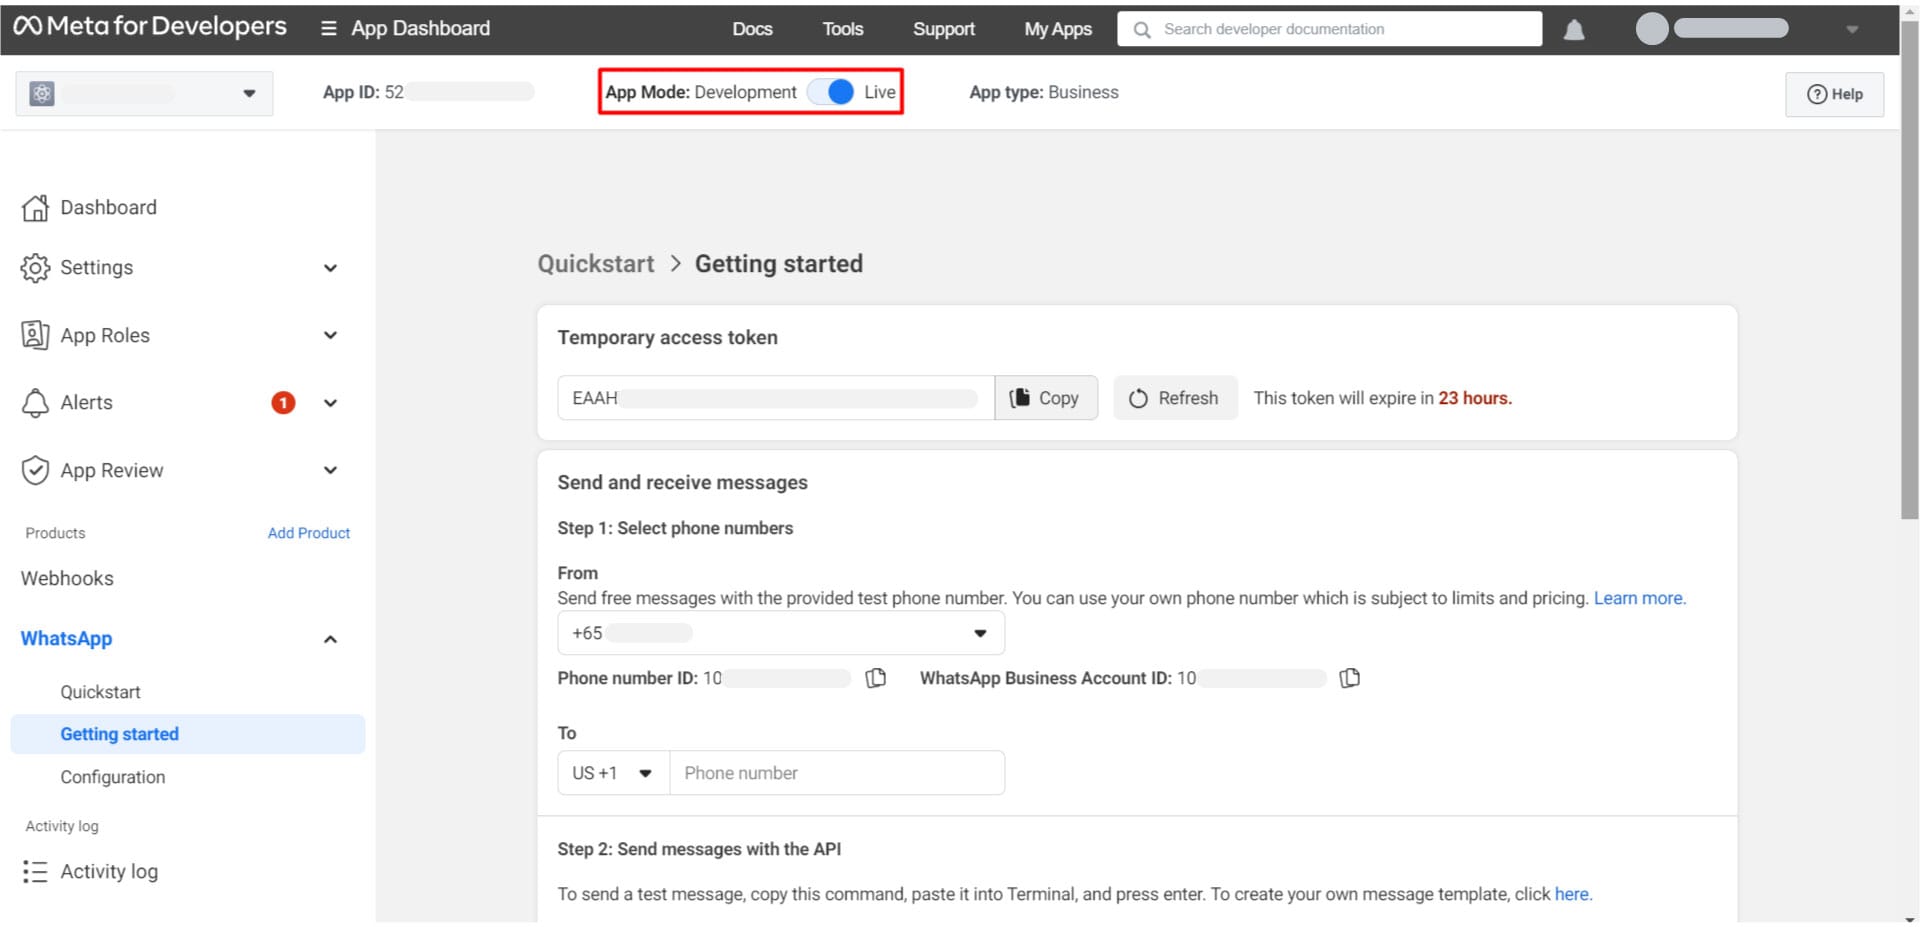
11. After capturing the token, you need to make your app live. Here are the steps for the same.
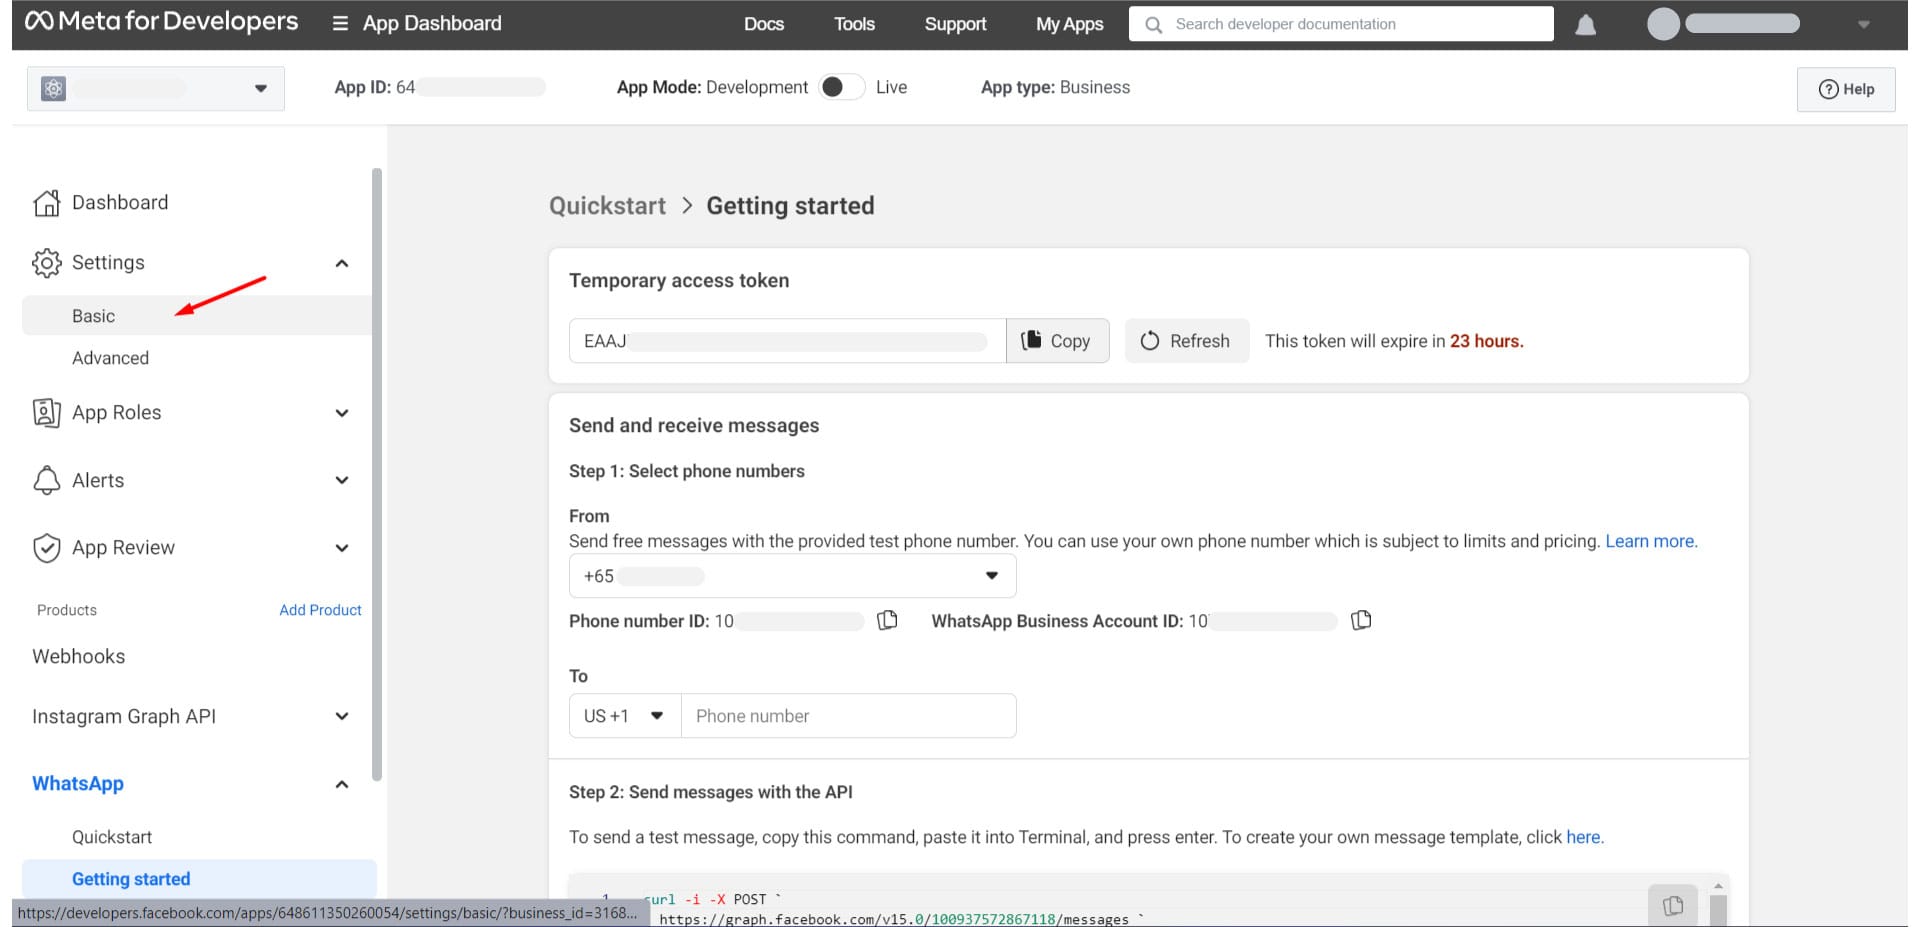
a) In your Facebook developer account, go to “Settings”.
b) Click “Basic” from the left panel.
c) To make the app live, enter your Privacy policy URL and Terms of Service URL from your website here and click “Save Changes”.
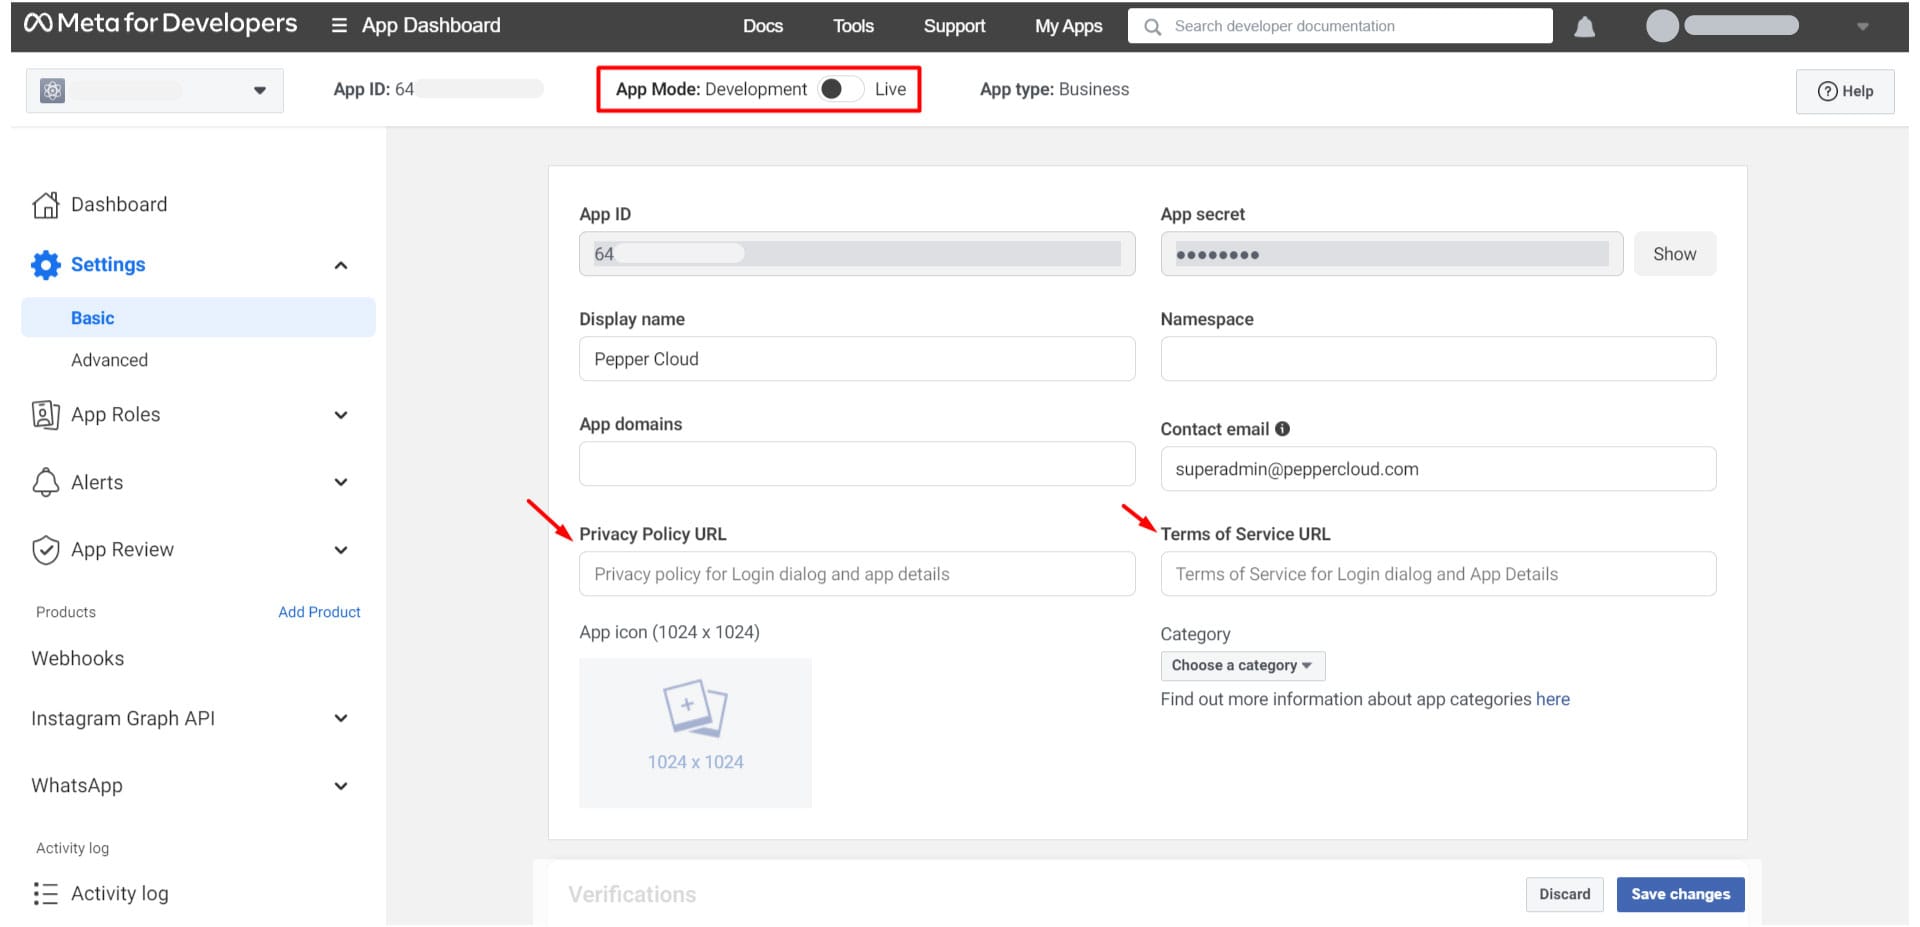
d) The app is now live.
After generating the permanent token and making your app live, go ahead and use it to integrate WhatsApp Cloud API with Pepper Cloud CRM.
