


WhatsApp Cloud integration: Get WhatsApp account on Facebook
Businesses can now easily get a WhatsApp Business account through Cloud API. Here is a simple and easy step-by-step guide to help you out in the process.

WhatsApp Business API has been assisting growing businesses to boost their sales growth. But recently, on 19th May 2022, Meta announced that it will open the WhatsApp Cloud API to all businesses.
What does it mean?
It means, now WhatsApp Cloud API allows businesses to send and receive messages through a cloud-hosted version of WhatsApp Business API, without involving WhatsApp business solution providers. In other words, businesses can directly apply for WhatsApp Business API through Meta.
Wondering how to get WhatsApp Cloud API for your business? Here is a step-by-step guide.
Pre-requisites to get WhatsApp Cloud API
- Facebook developer account
- A phone number for WhatsApp communication that can receive incoming calls
Steps to get WhatsApp Cloud API
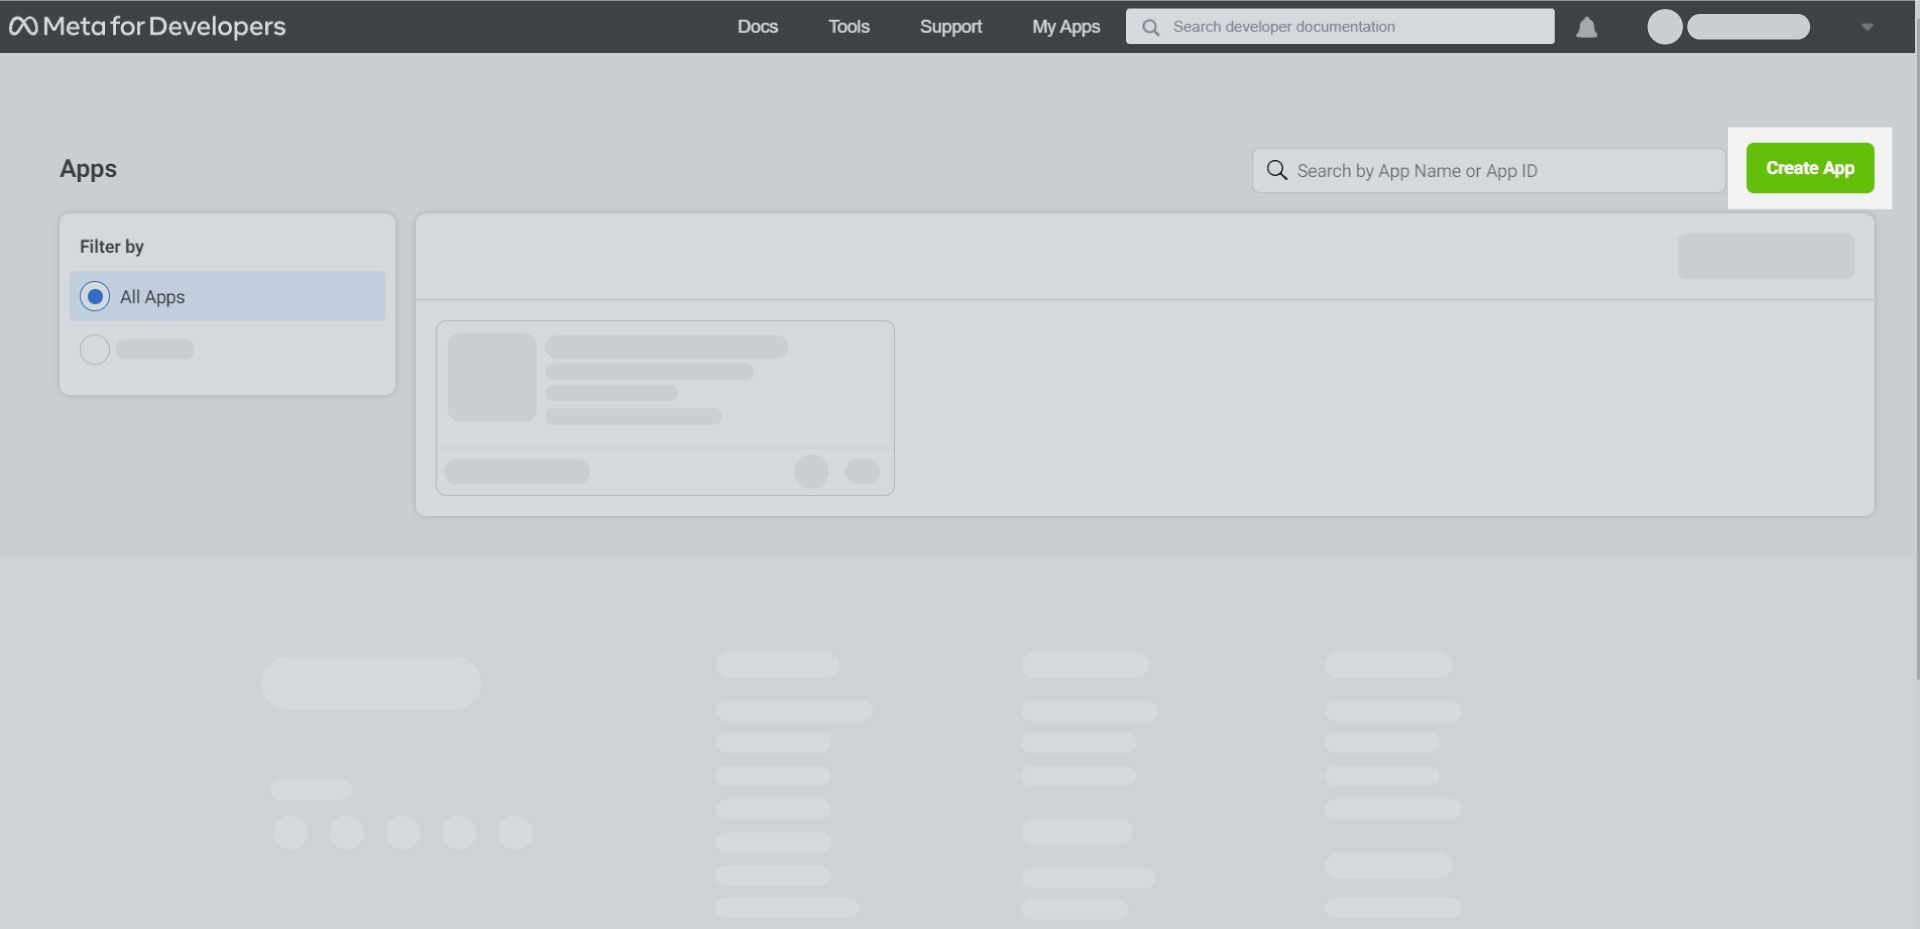
1. Create a developer account on Facebook. If you already have a developer account, log in to the account.
2. Click on “Create App”.
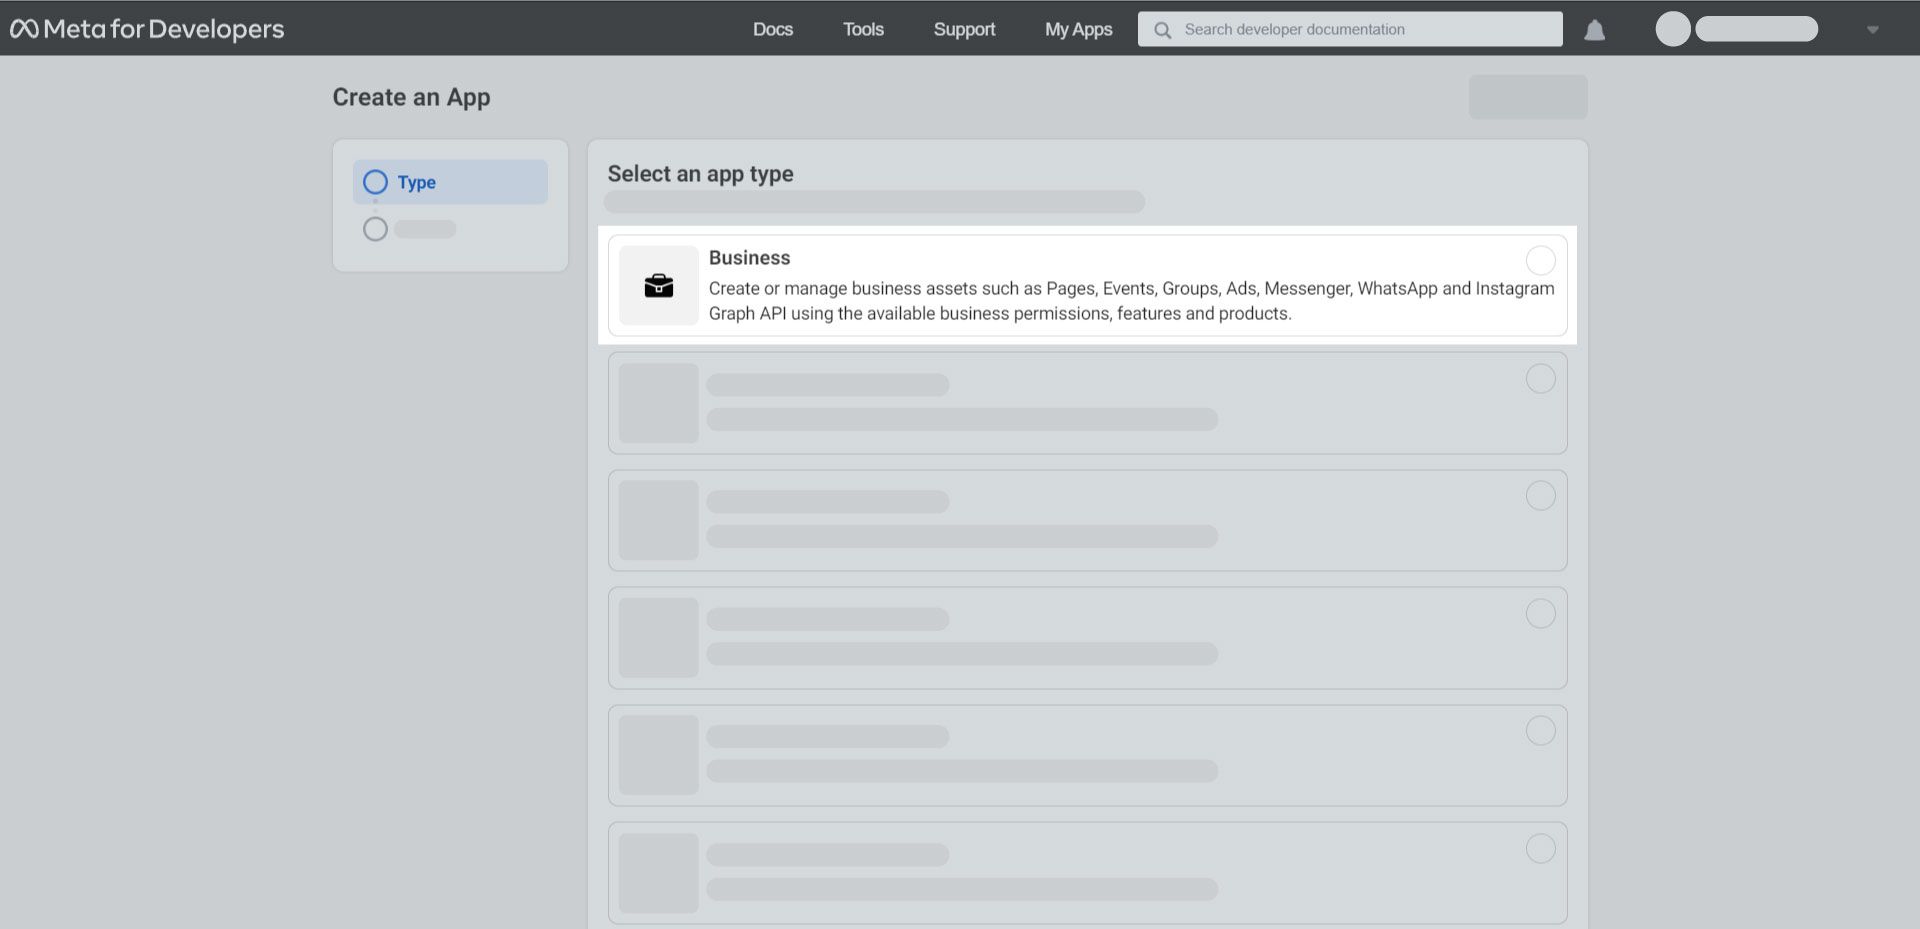
3. Choose “Business” as your app type.
Note: To integrate WhatsApp Cloud API, you have to choose the app type as “Business”. Other app types can’t be integrated with WhatsApp Cloud API.
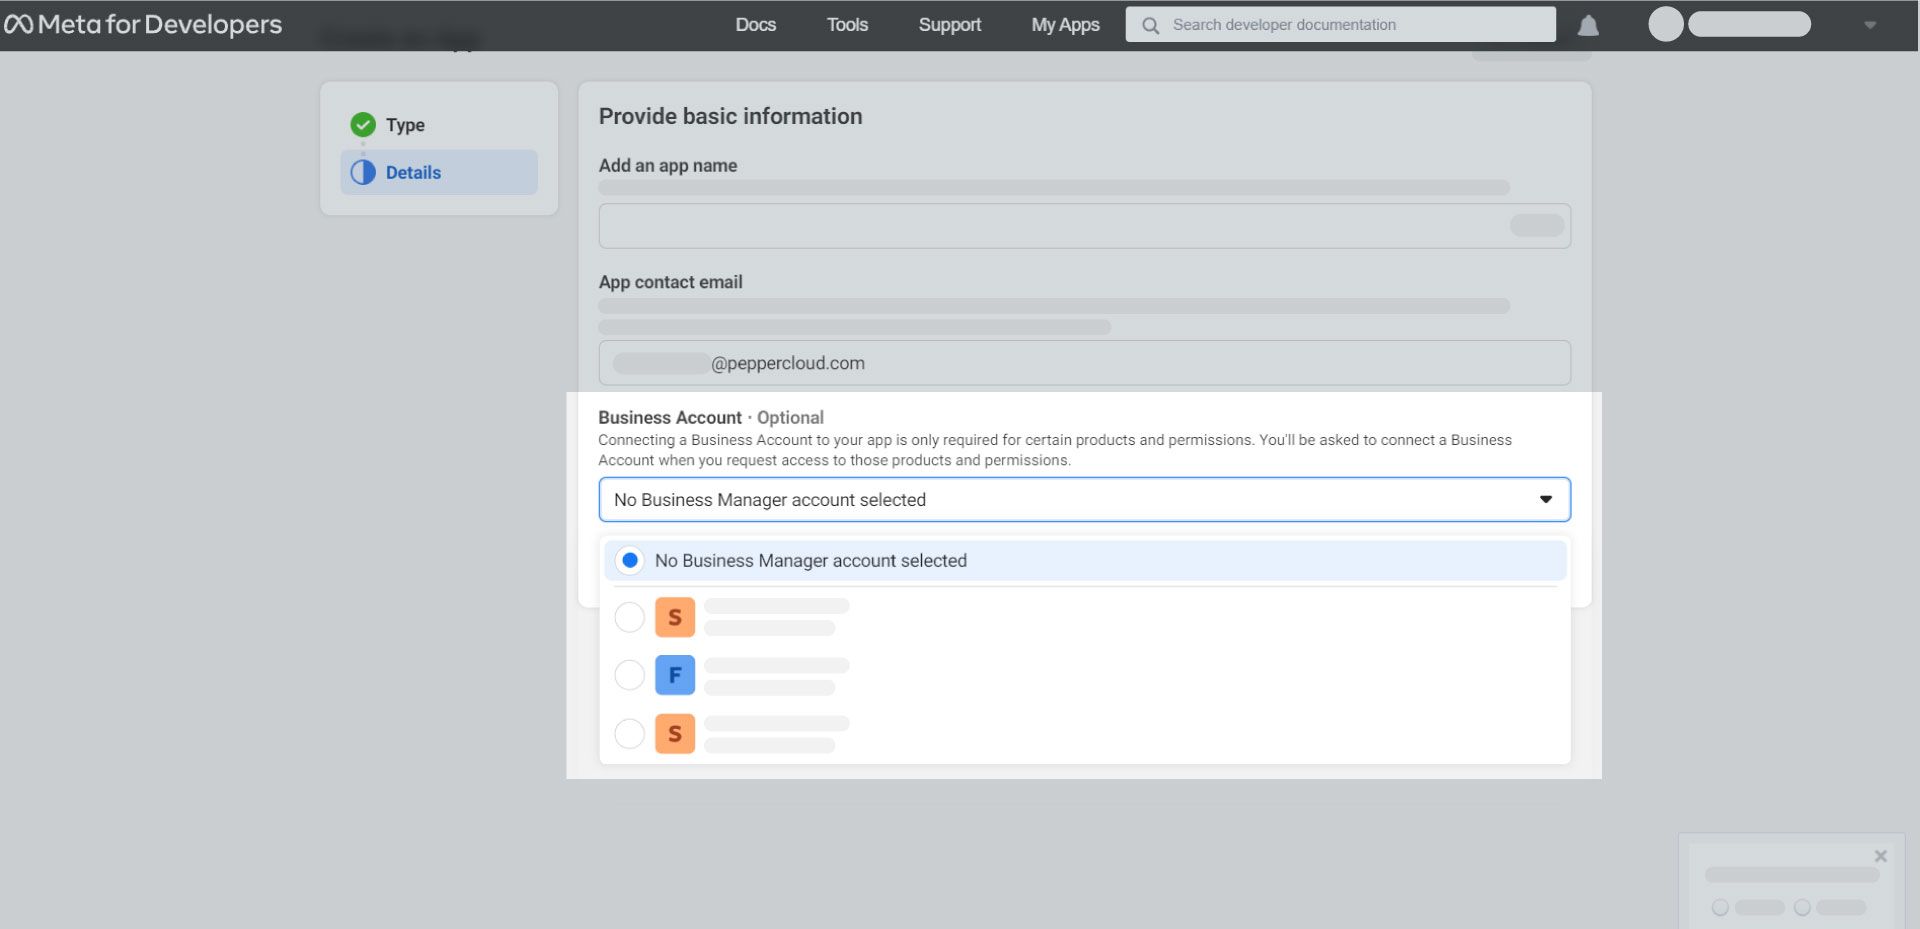
4. Provide the basic information such as Display name, App contact email, etc. about your business. The business account field is optional. You can either choose your business account from the drop-down or if you don’t have a business account, you may leave it unselected. Then, click “Create app”.
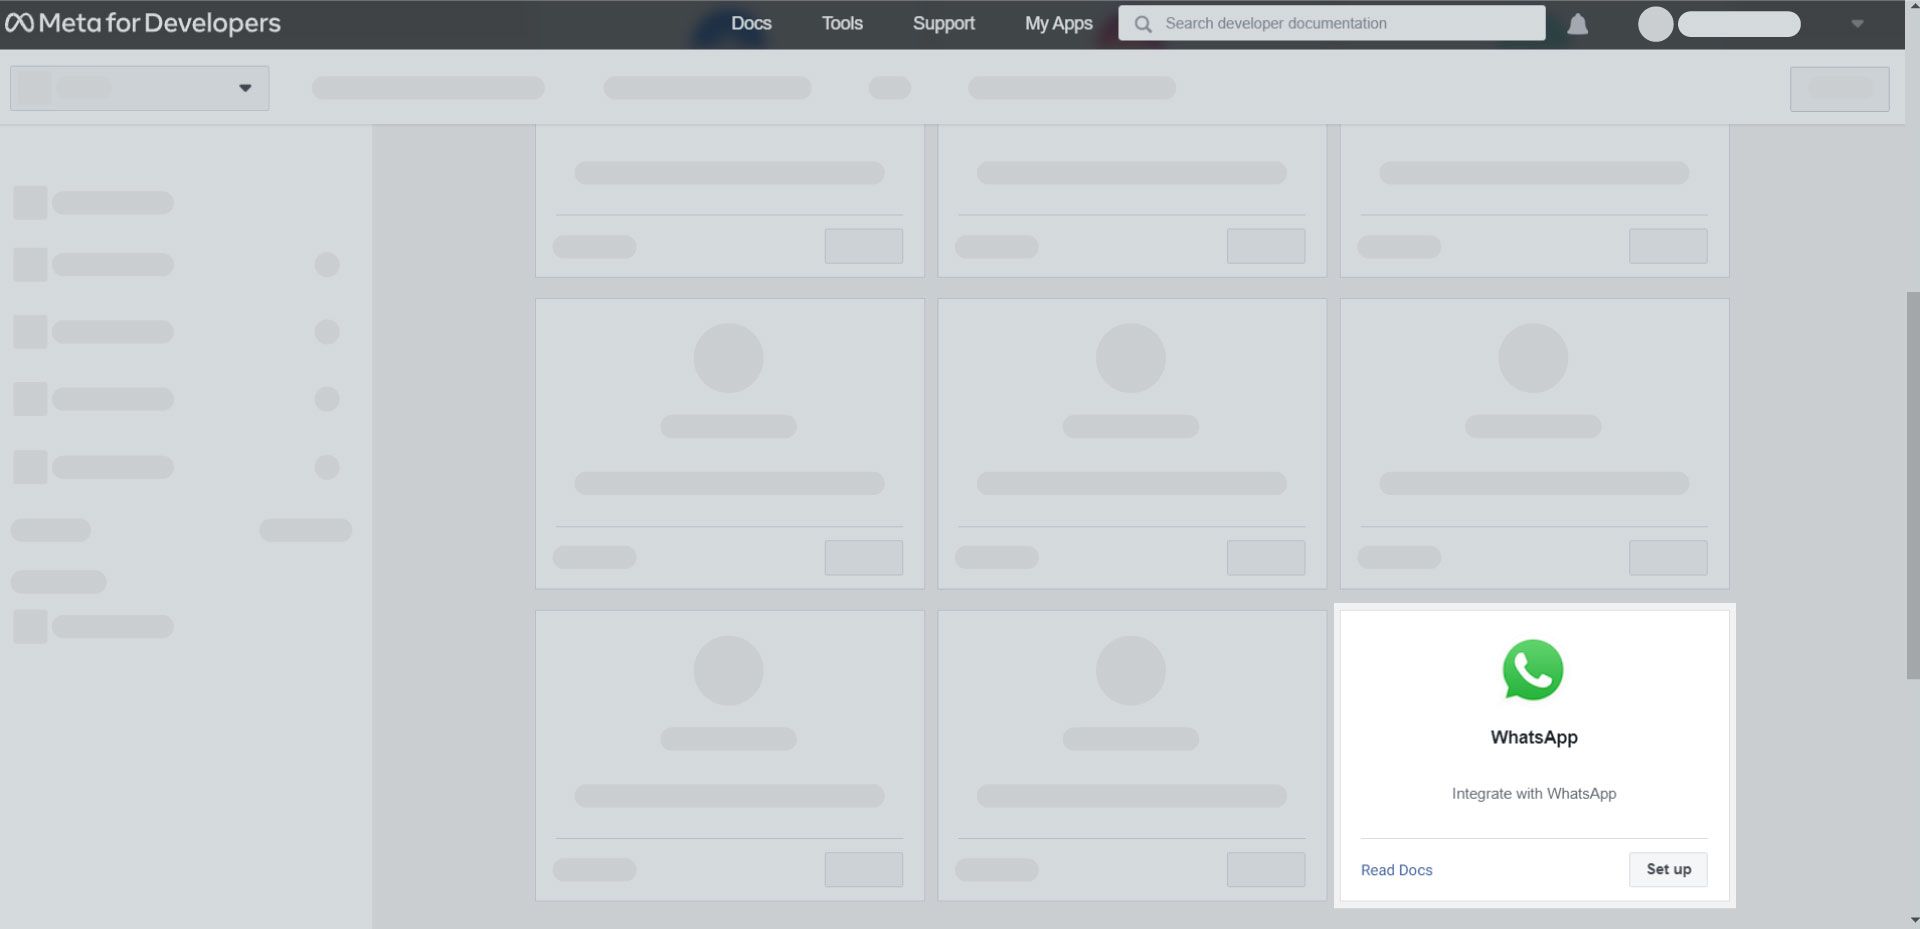
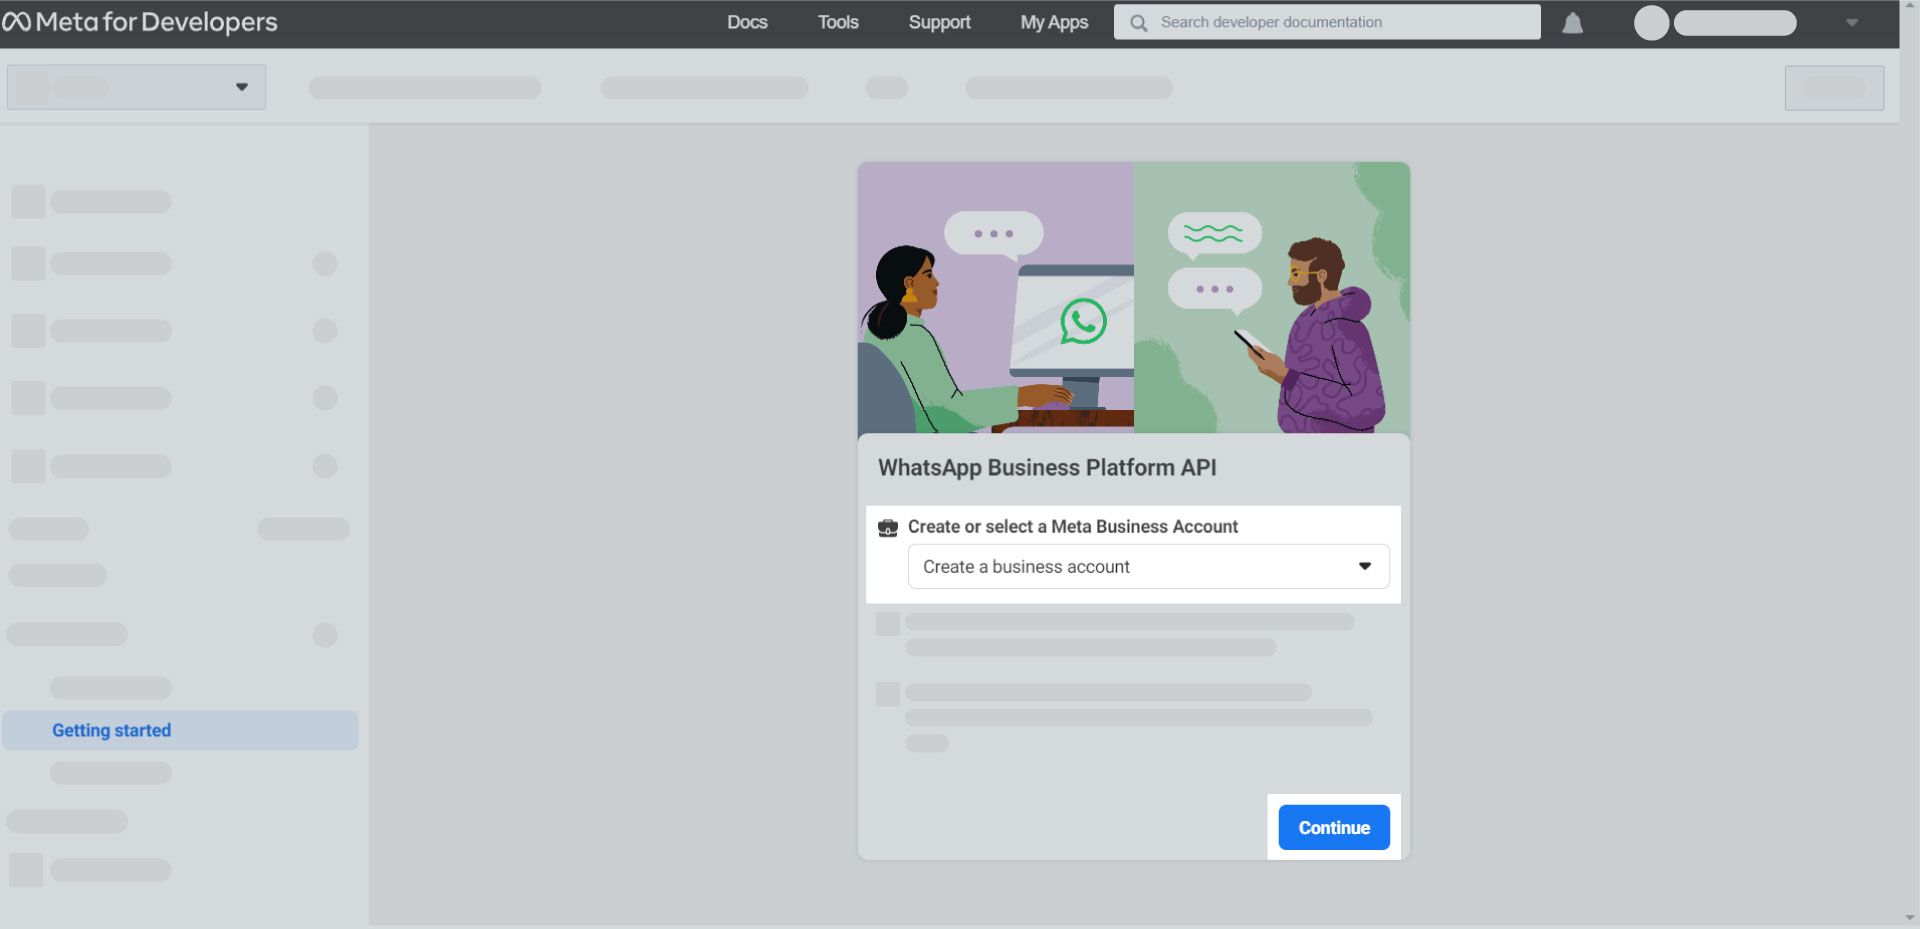
5. You will be redirected to the Meta dashboard. Click “Set up” on the WhatsApp card.
6. If you have left the business account unselected in Step 4, you can leave the business account unselected here as well. Facebook will automatically create a business account later for your business. Click “Continue” to proceed.
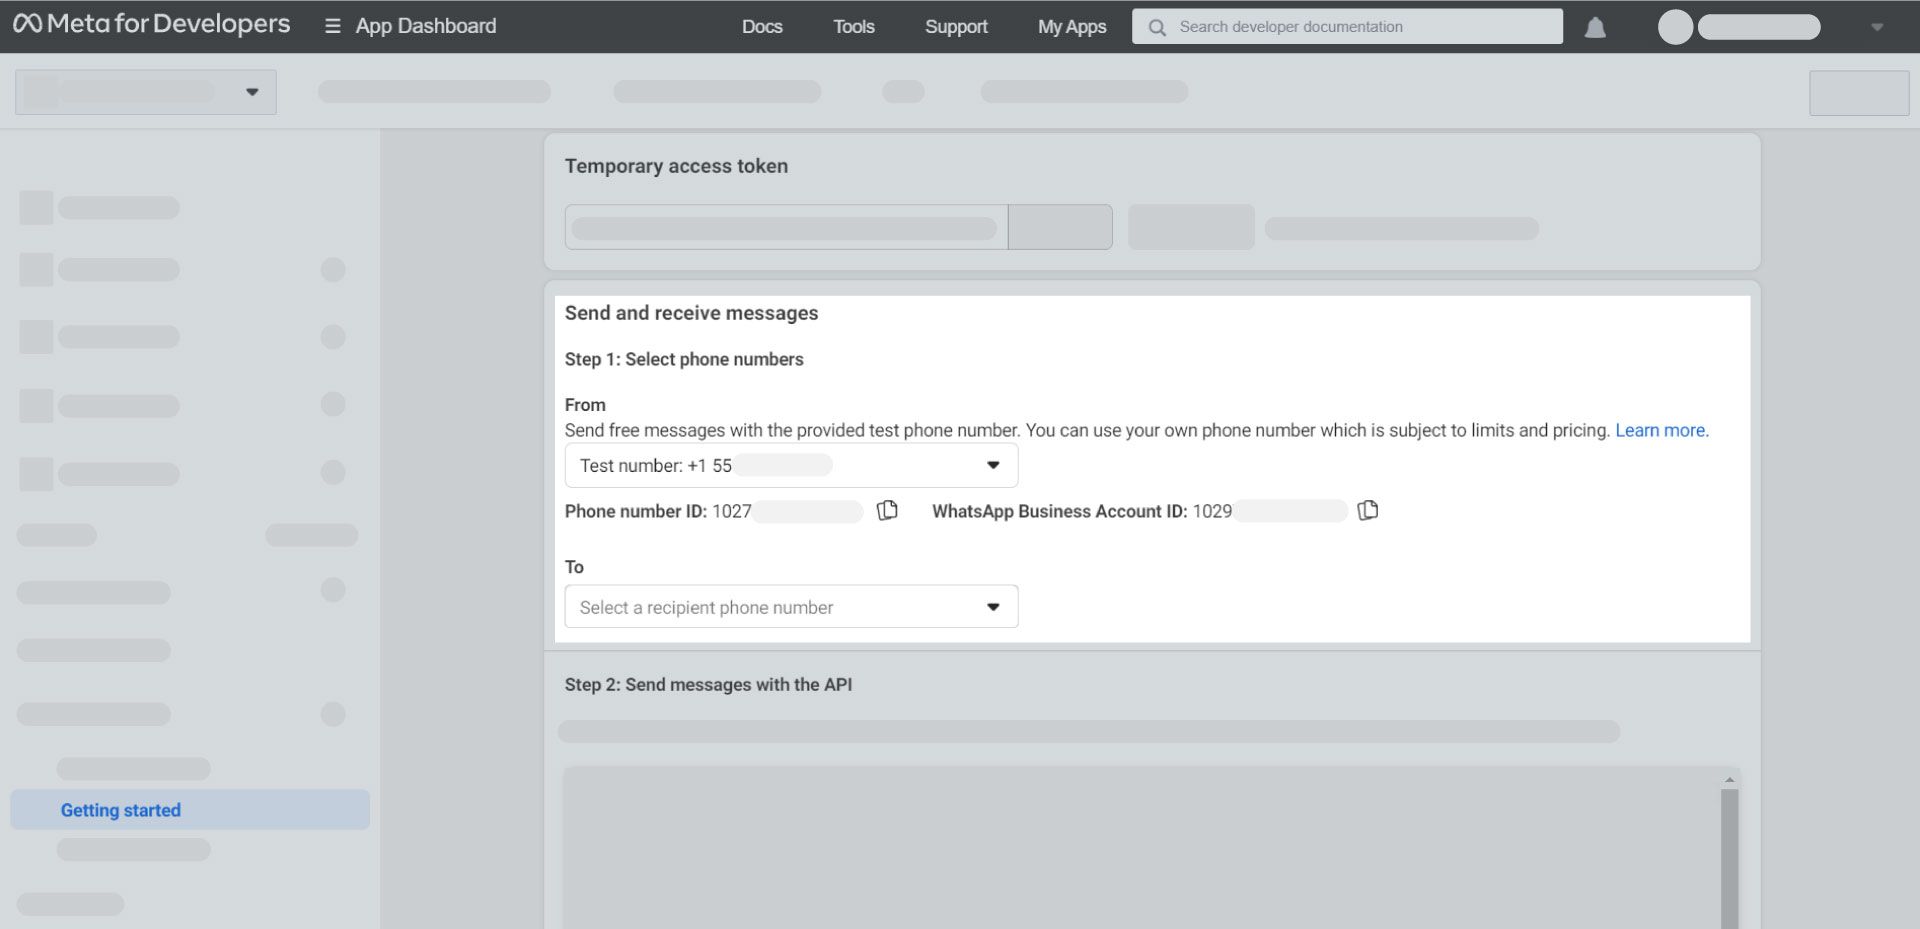
7. WhatsApp generates a test number for you. Send a message from that number to your other WhatsApp number to confirm if WhatsApp is integrated successfully.
Note: Step 7 is optional. You can either use the number generated by WhatsApp for you or you can add your phone number. Check the following steps to add your phone number.
Connecting phone number
If you are using your phone number, ensure it doesn’t have an active WhatsApp account and has never been utilised for WhatsApp API before.
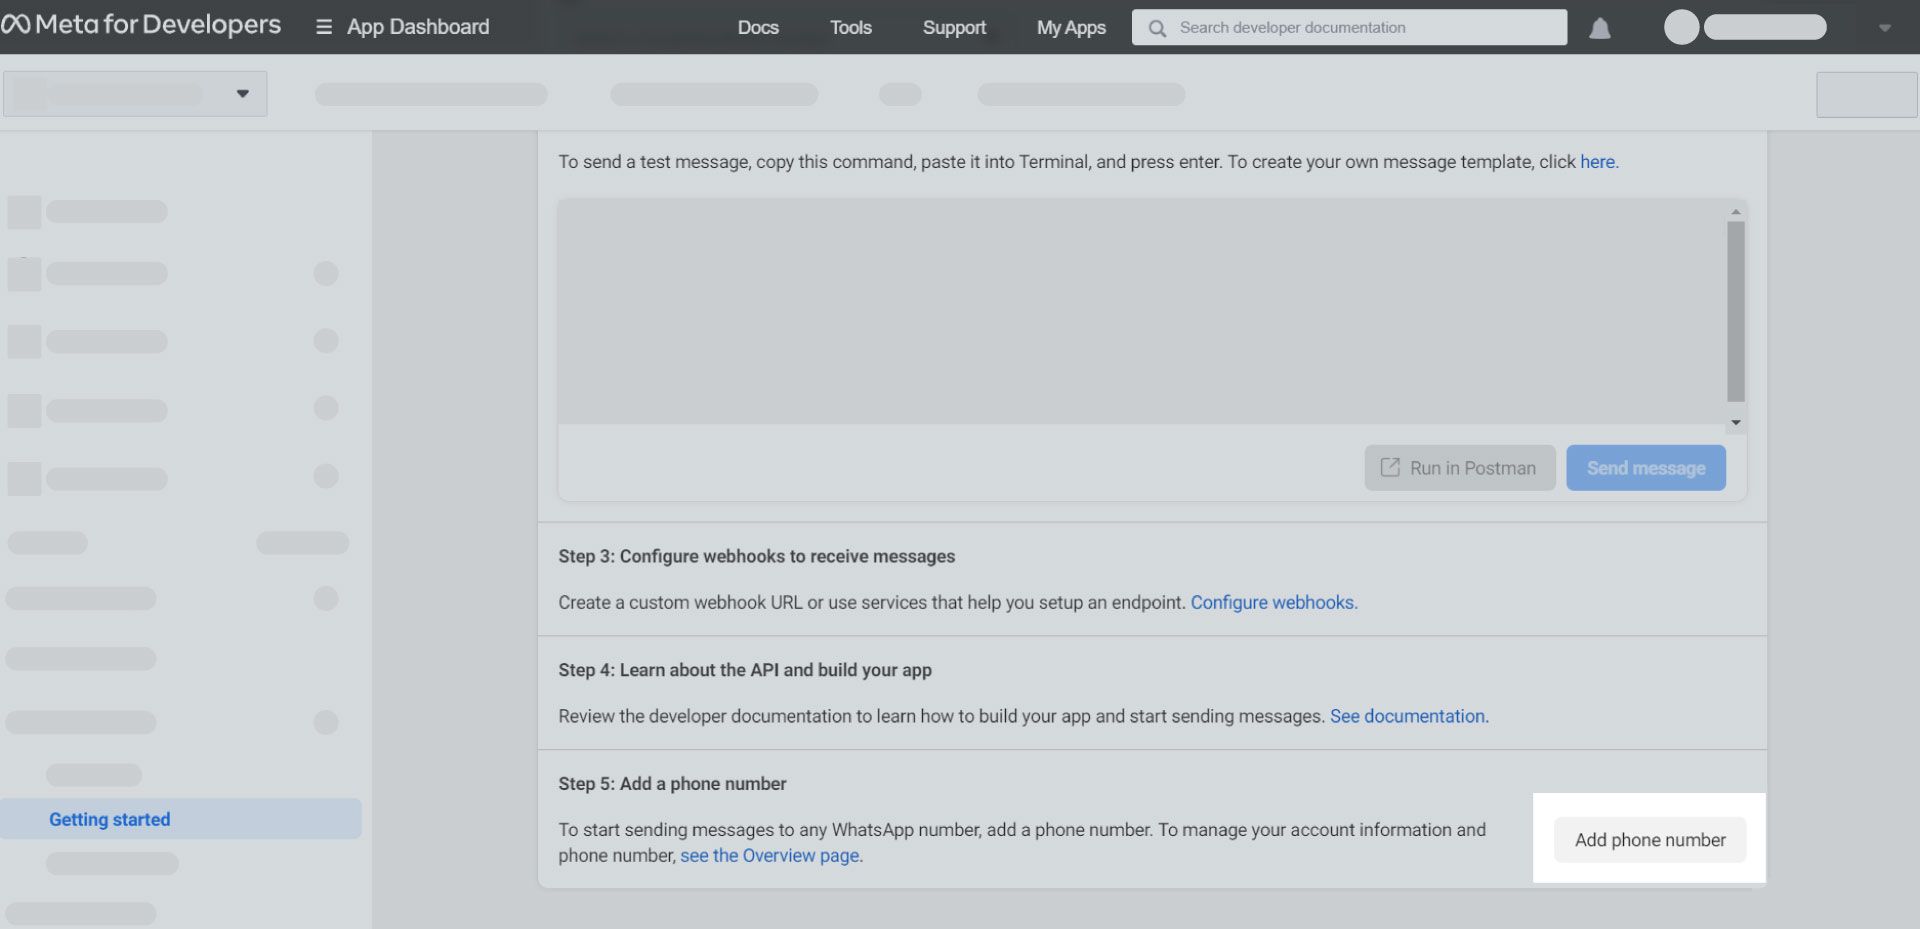
1. Click “Add phone number” to connect your phone number to your WhatsApp Cloud API account.
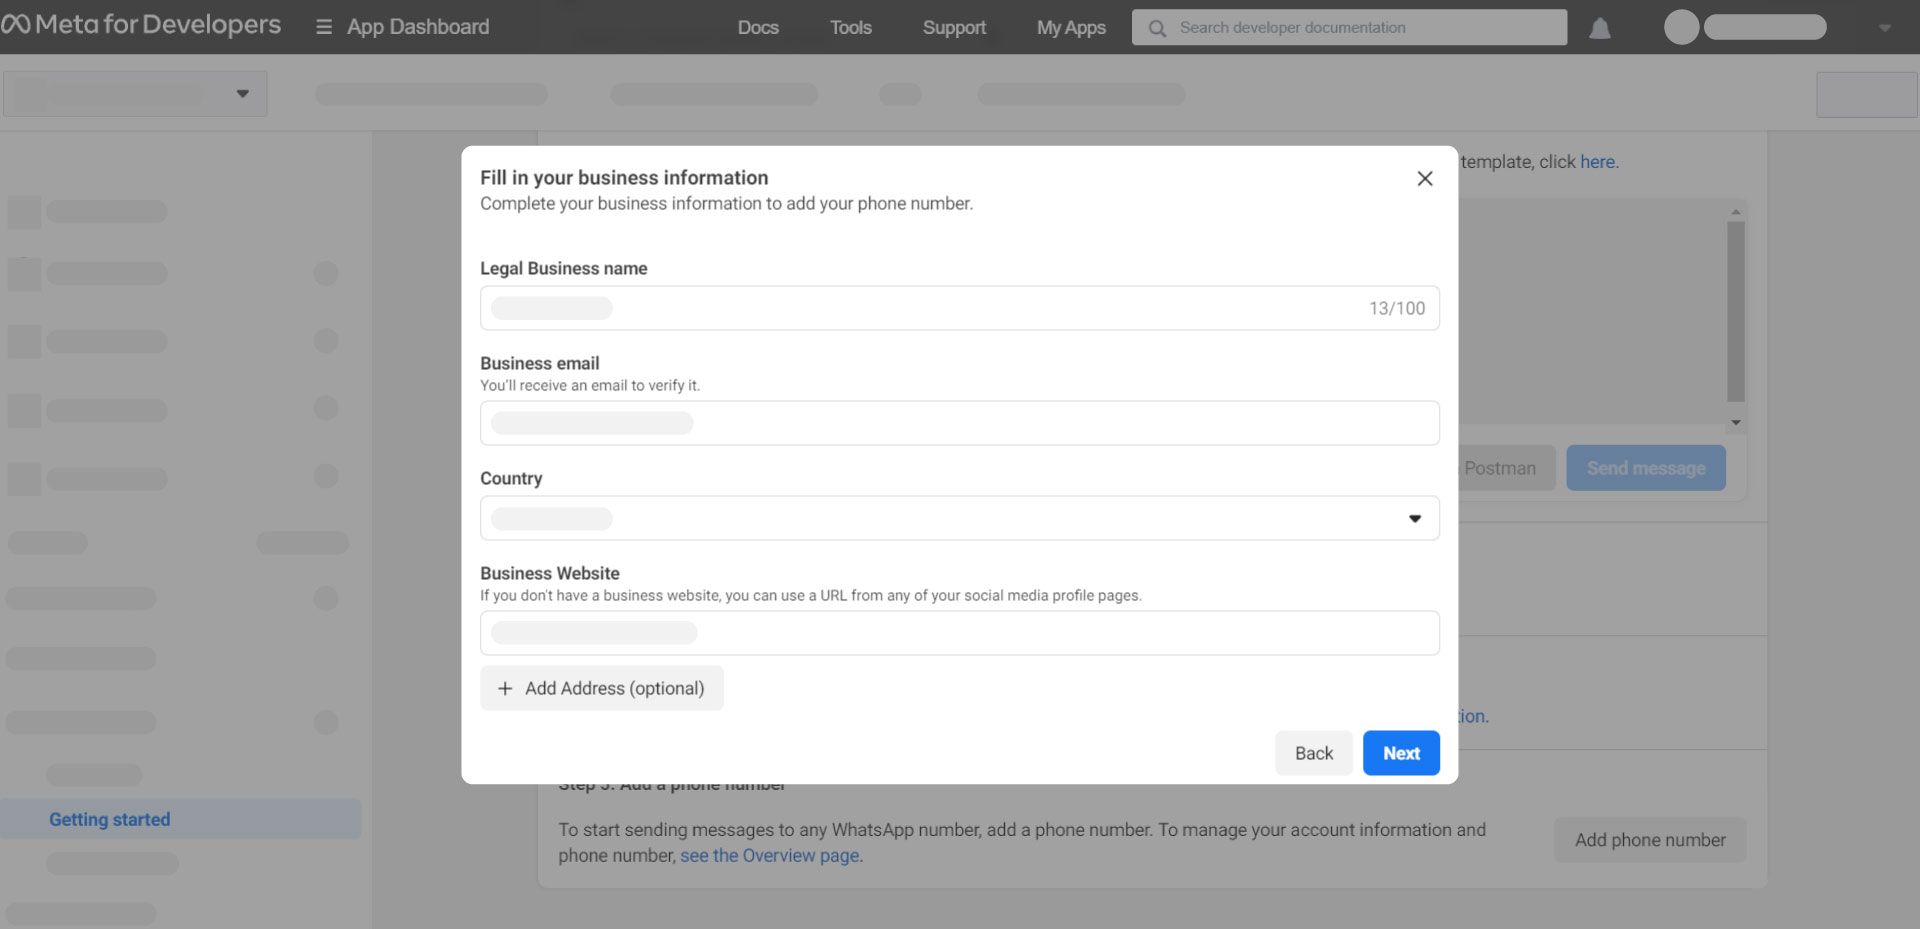
2. In the popup, fill in the information about your business and click “Next”.
Note: The display name should be unique. This helps in registering your phone number quickly. Otherwise, it will take time longer time for registering. Refer to Facebook display name guidelines here.
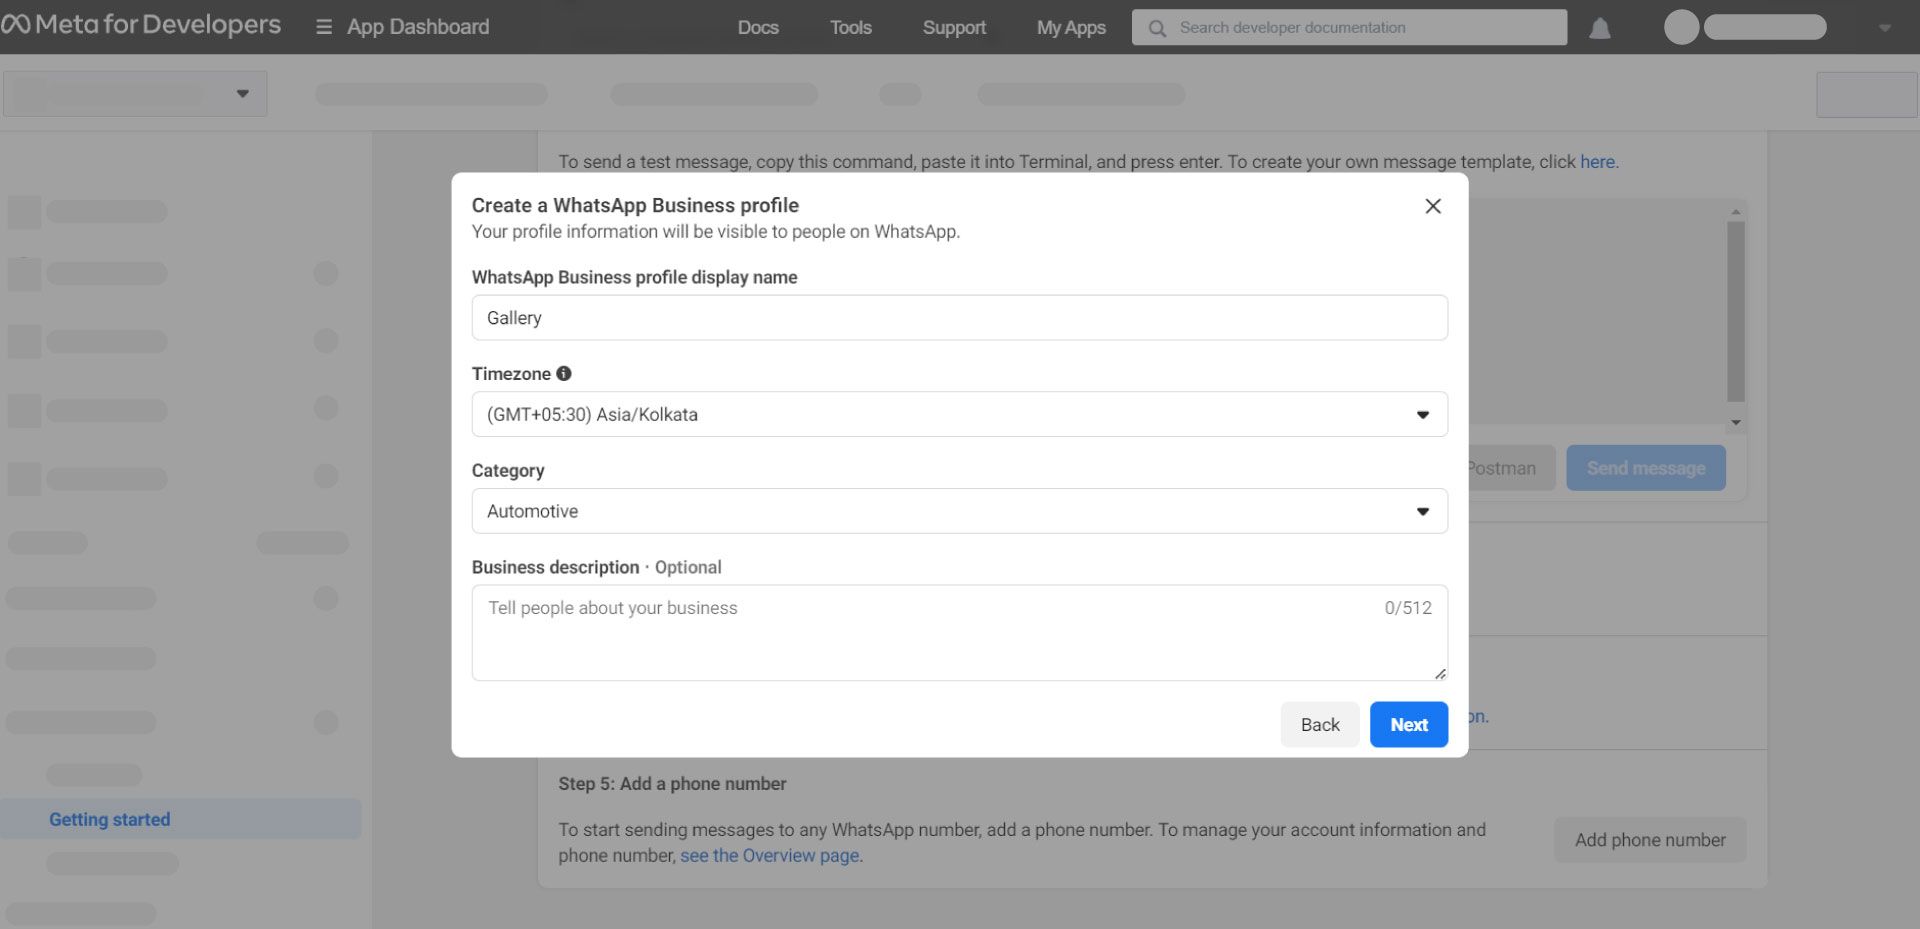
3. Create your WhatsApp business profile to associate with your number by filling in the information. Click “Next”.
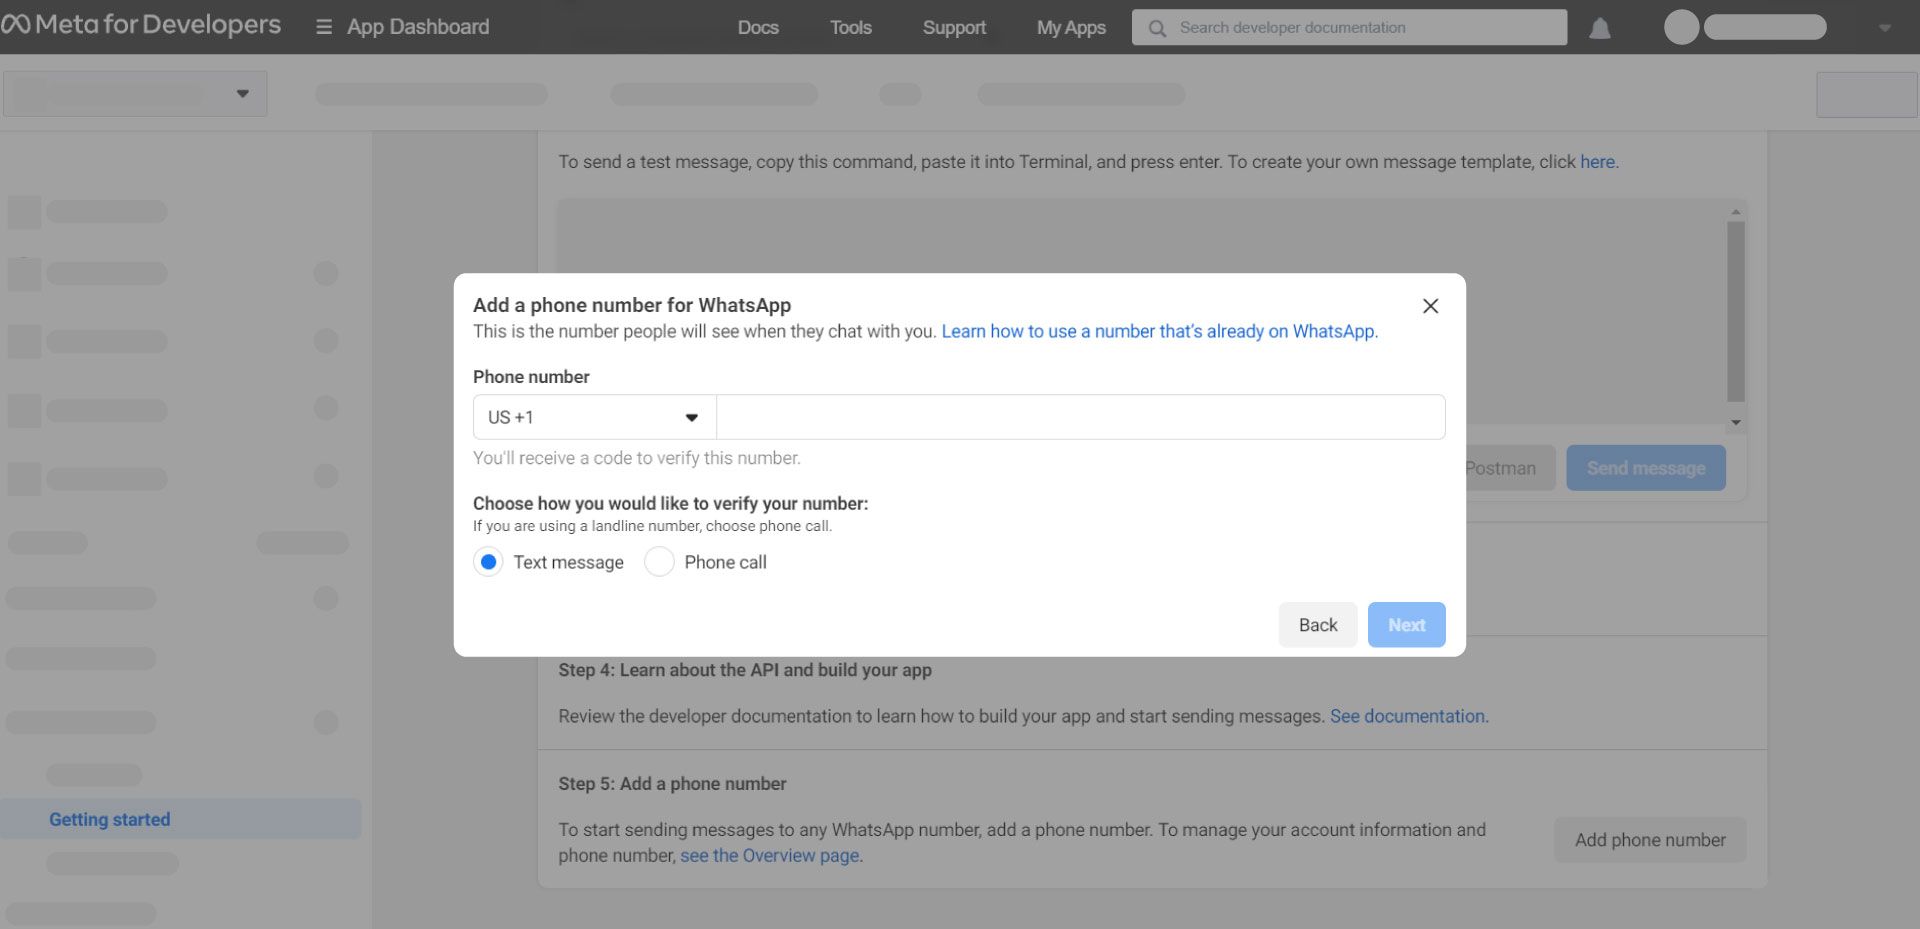
4. Add your phone number which you want to link with your WhatsApp Cloud API and choose how you would like to get your number verified.
Note: Your number shouldn’t have a WhatsApp account tied with it already.
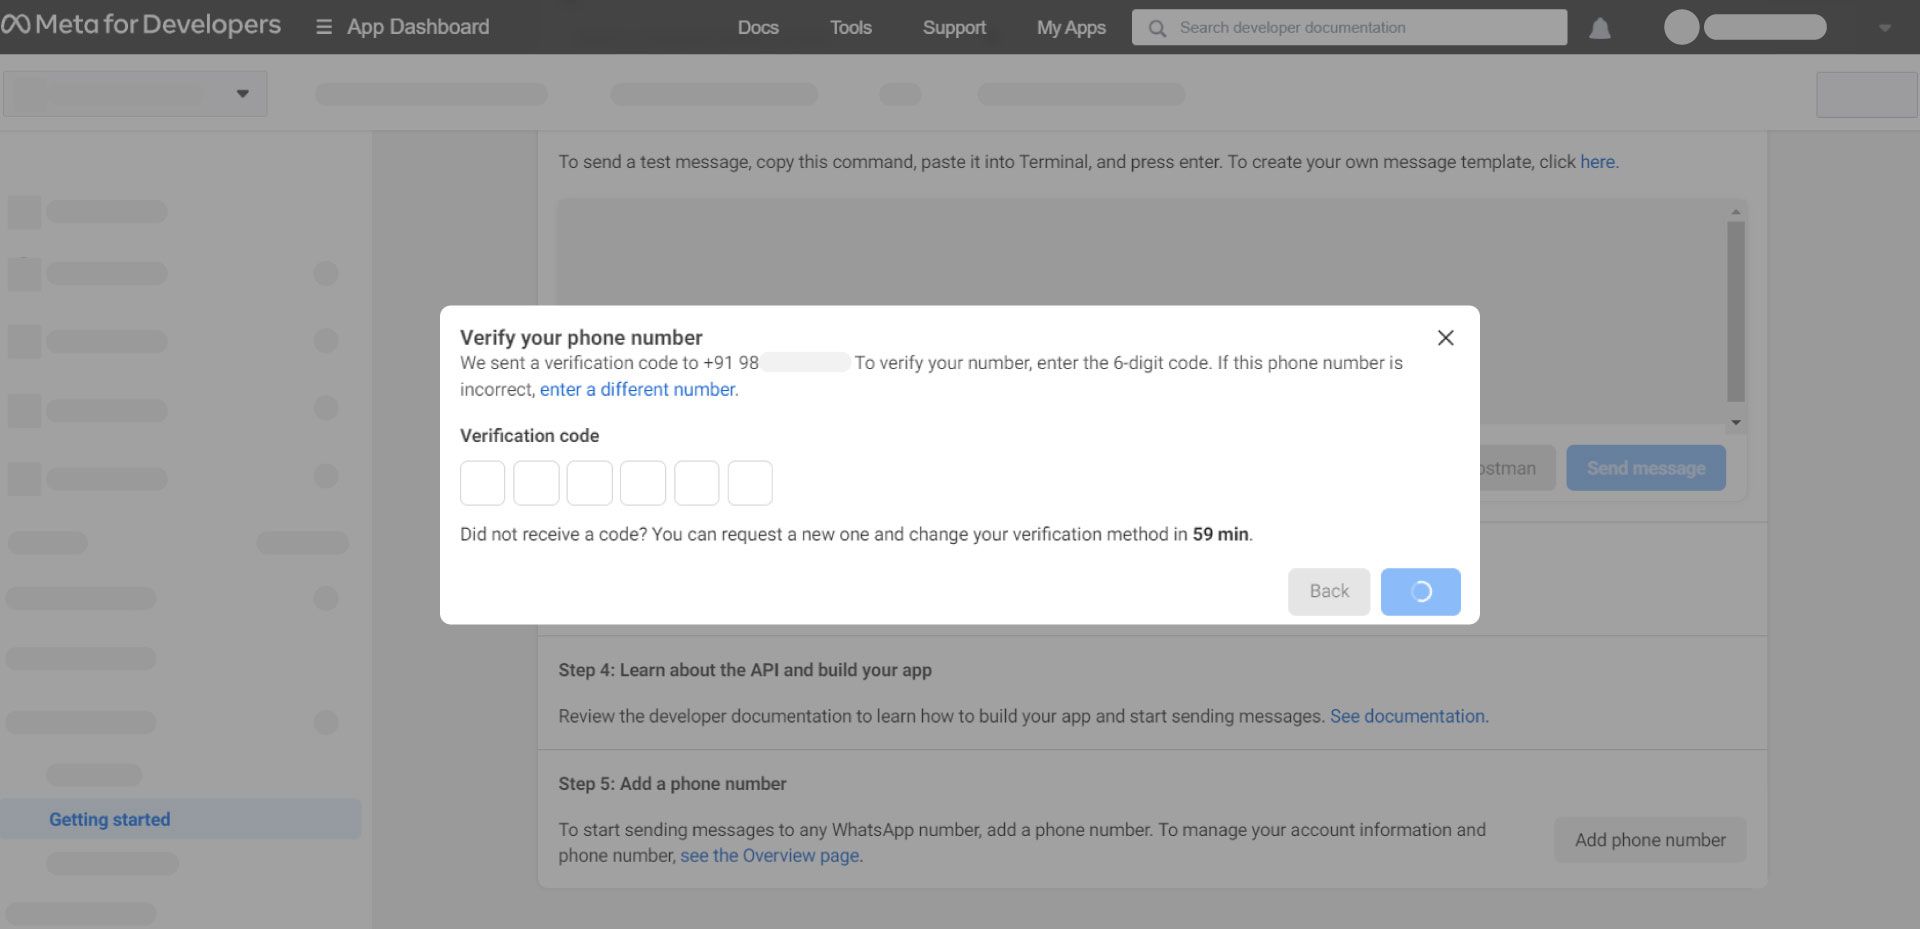
5. Based on what you have chosen (text message or phone call), your number will be verified. A 6-digit verification code will be sent to your number and you need to verify your phone number by entering it and clicking “Next”.
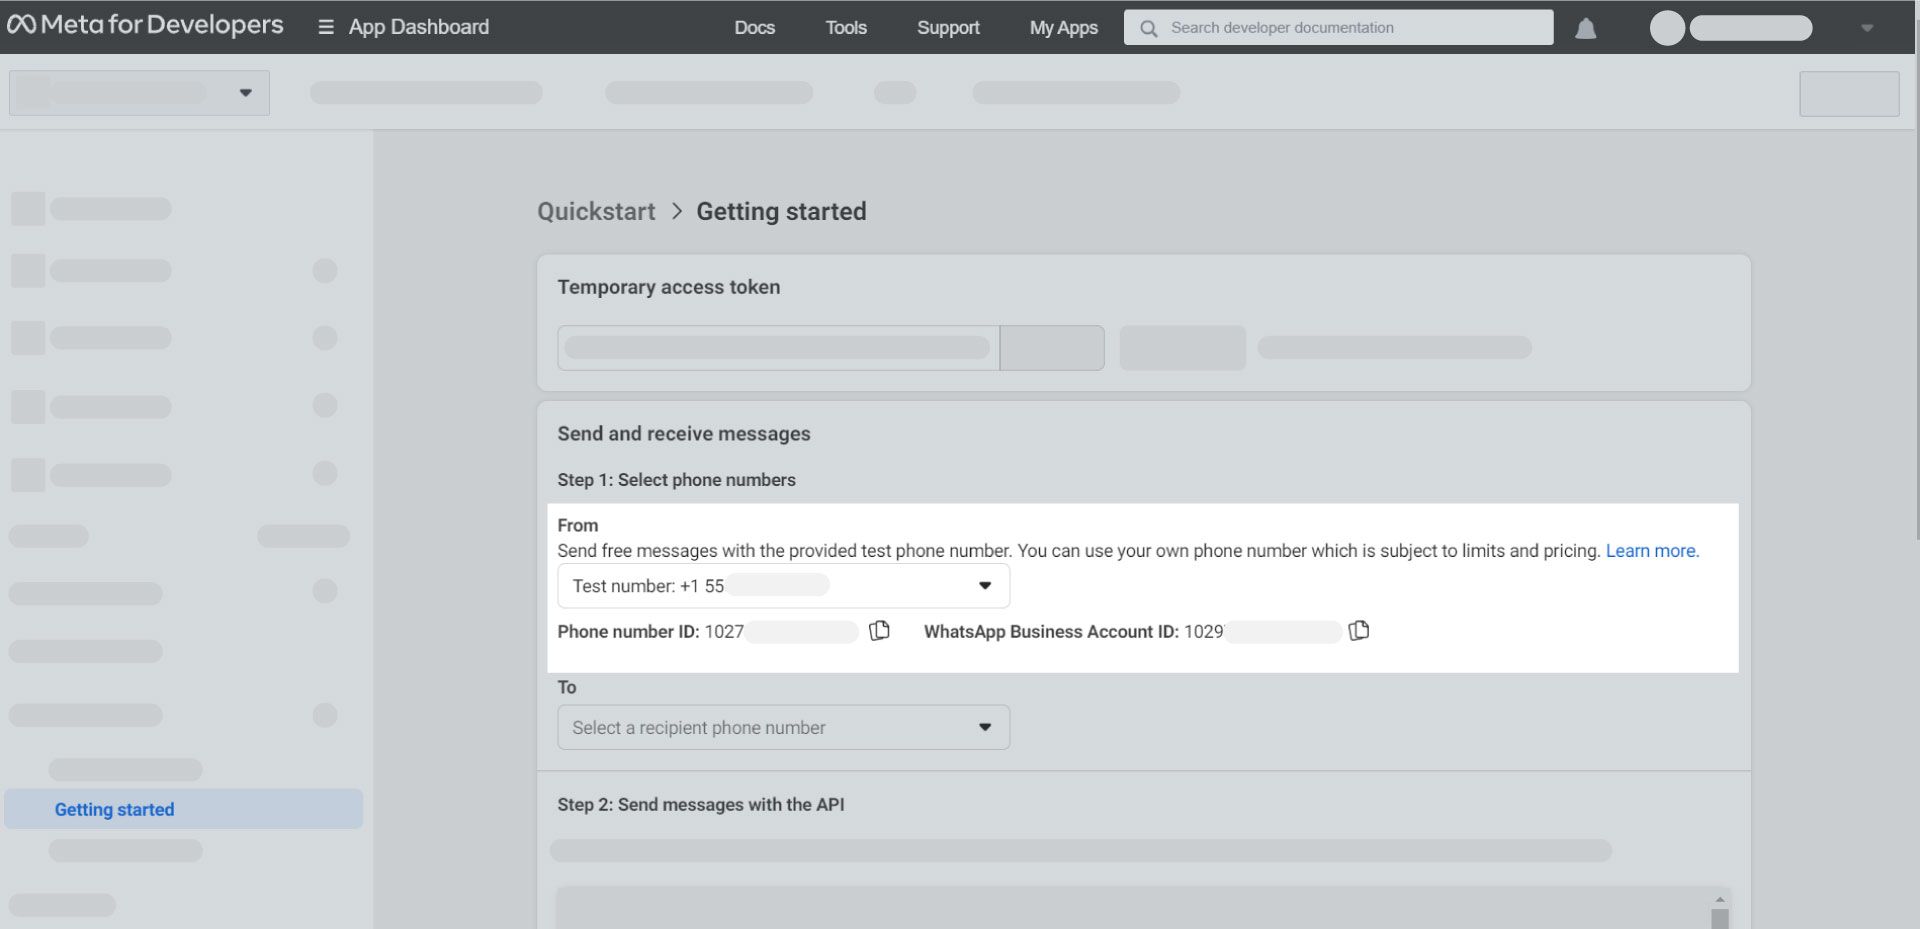
6. Check if your number is added in the “Send and receive messages” section. If it is, the number is successfully integrated with your WhatsApp Cloud API.
If your phone number has failed to register, a message shows "Please register your phone number to send messages." Click on the link to access the configuration screen and restart the registration.
Note:
- You can register up to 25 phone numbers per WhatsApp Business API.
- You can also migrate an existing WhatsApp phone number to a business account. However, it is not recommended otherwise.
- You can also migrate your phone number to a different WhatsApp Business Account.
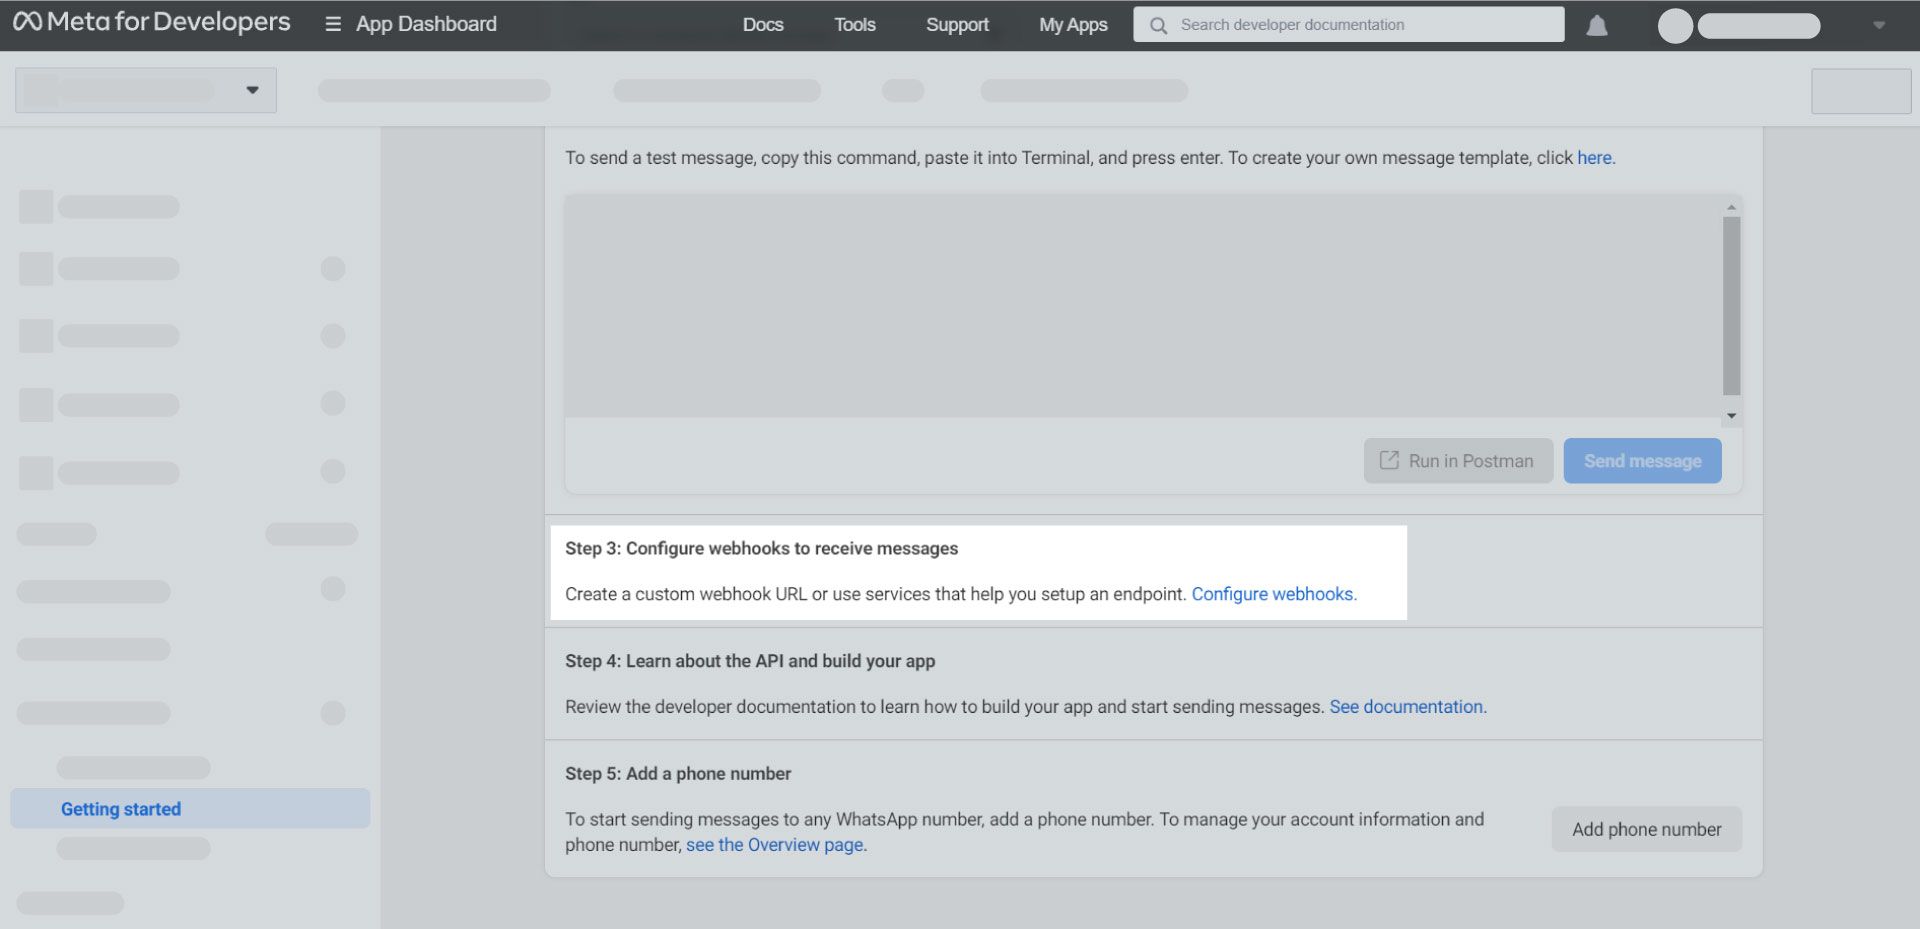
7. In the next step, configure webhooks to receive messages.
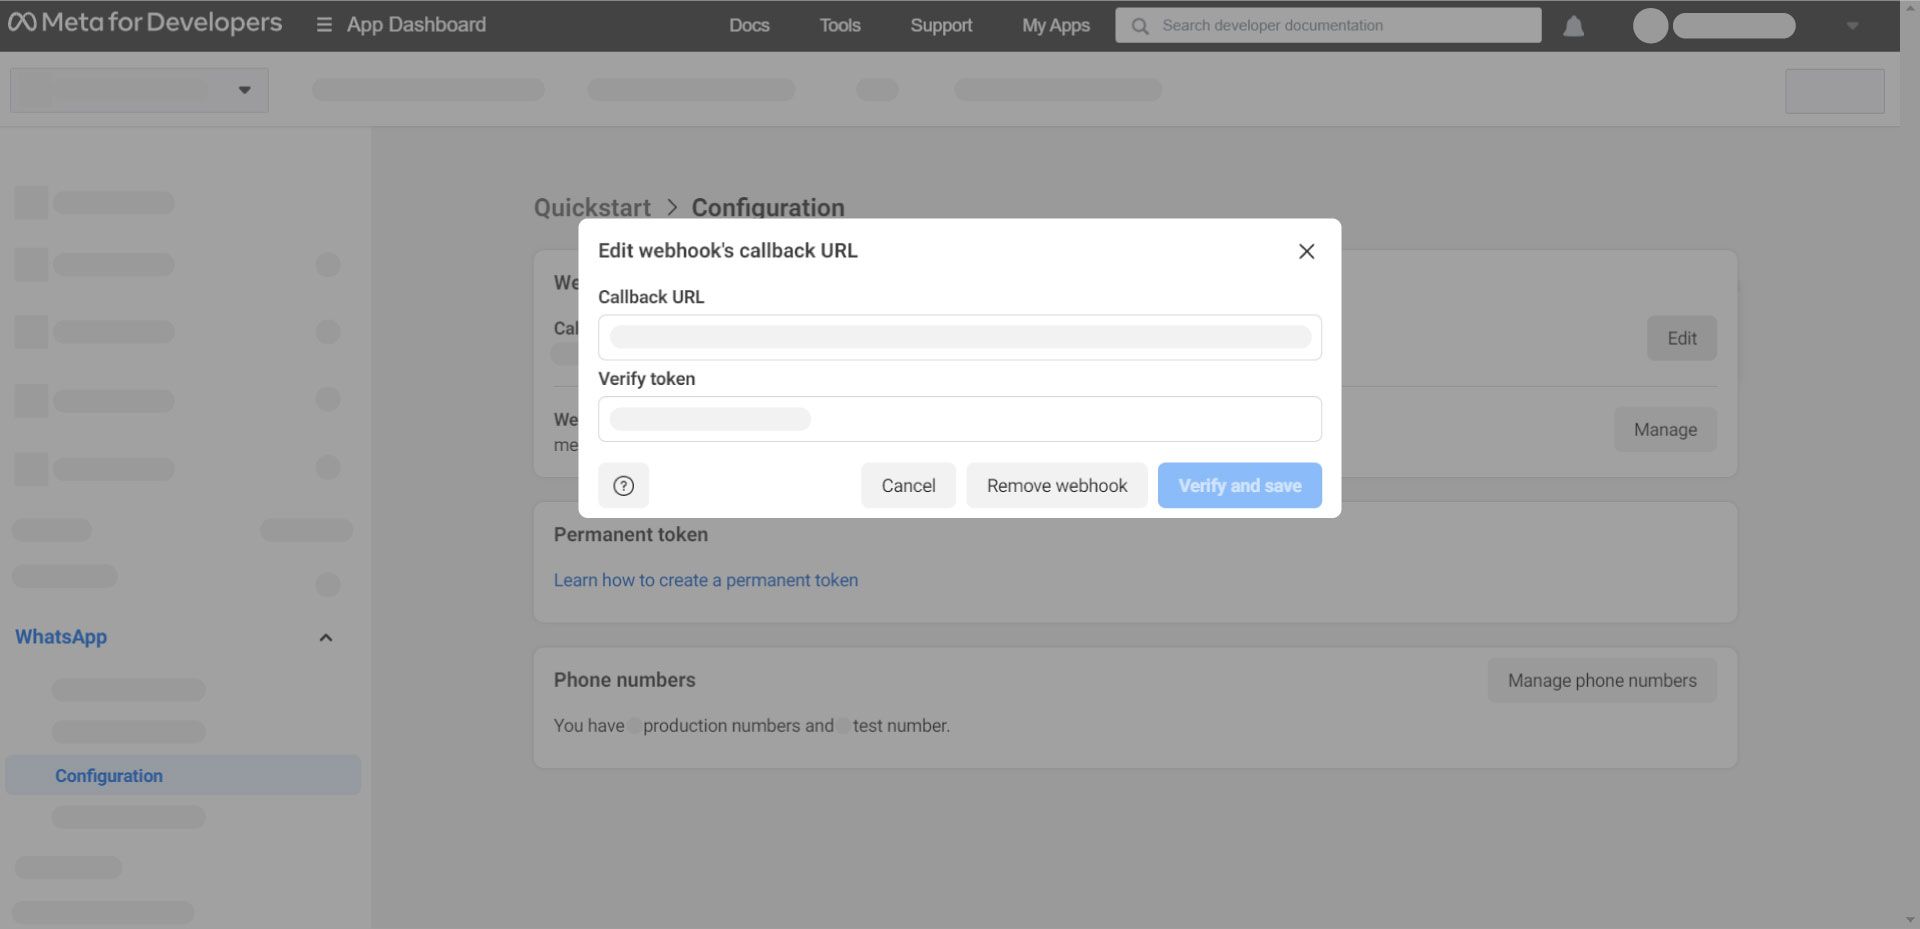
8. Navigate to “Edit” and paste the URL and Verify token from your CRM.
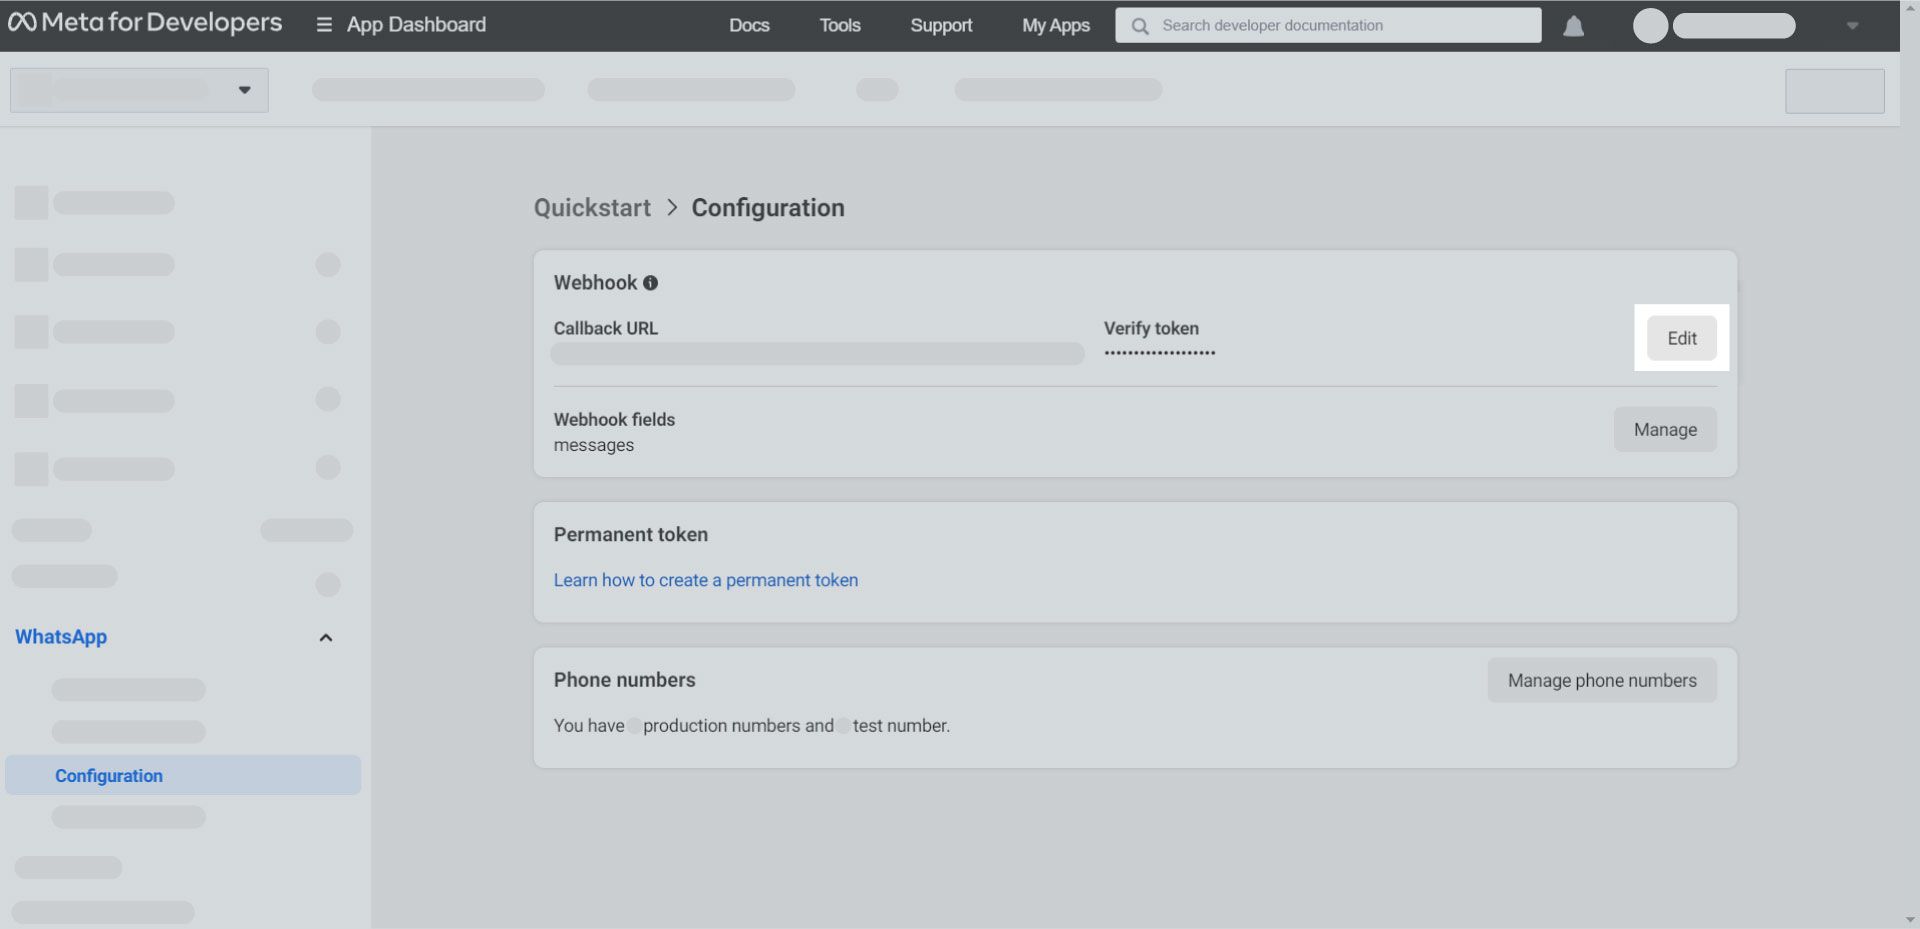
9. Click the “Verify and save” button.
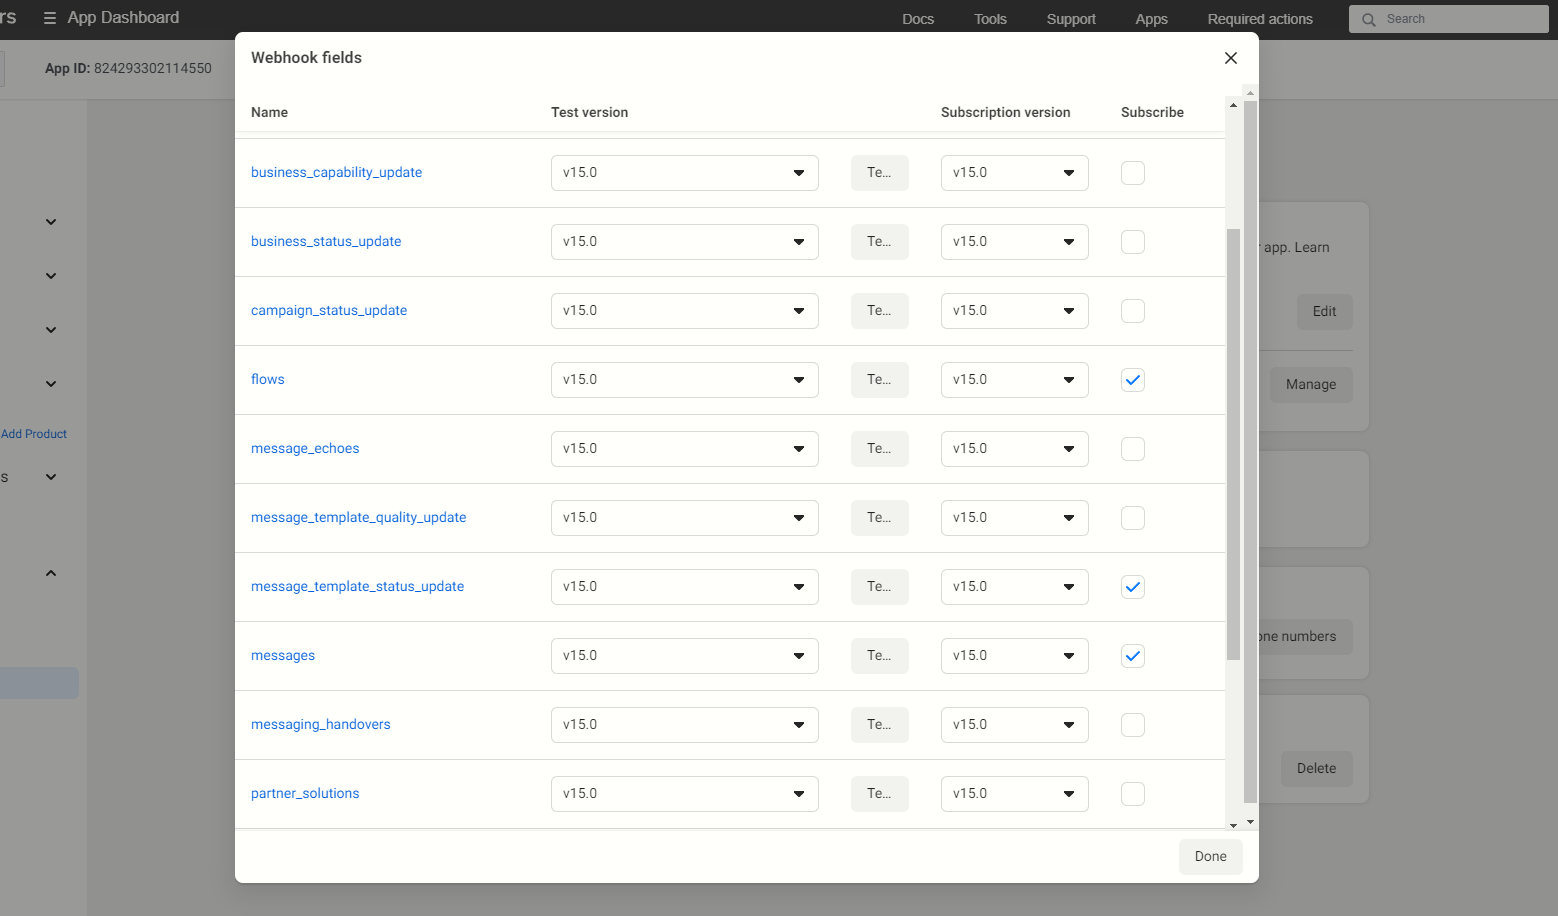
10. Click on the “Manage” button to subscribe to webhooks.
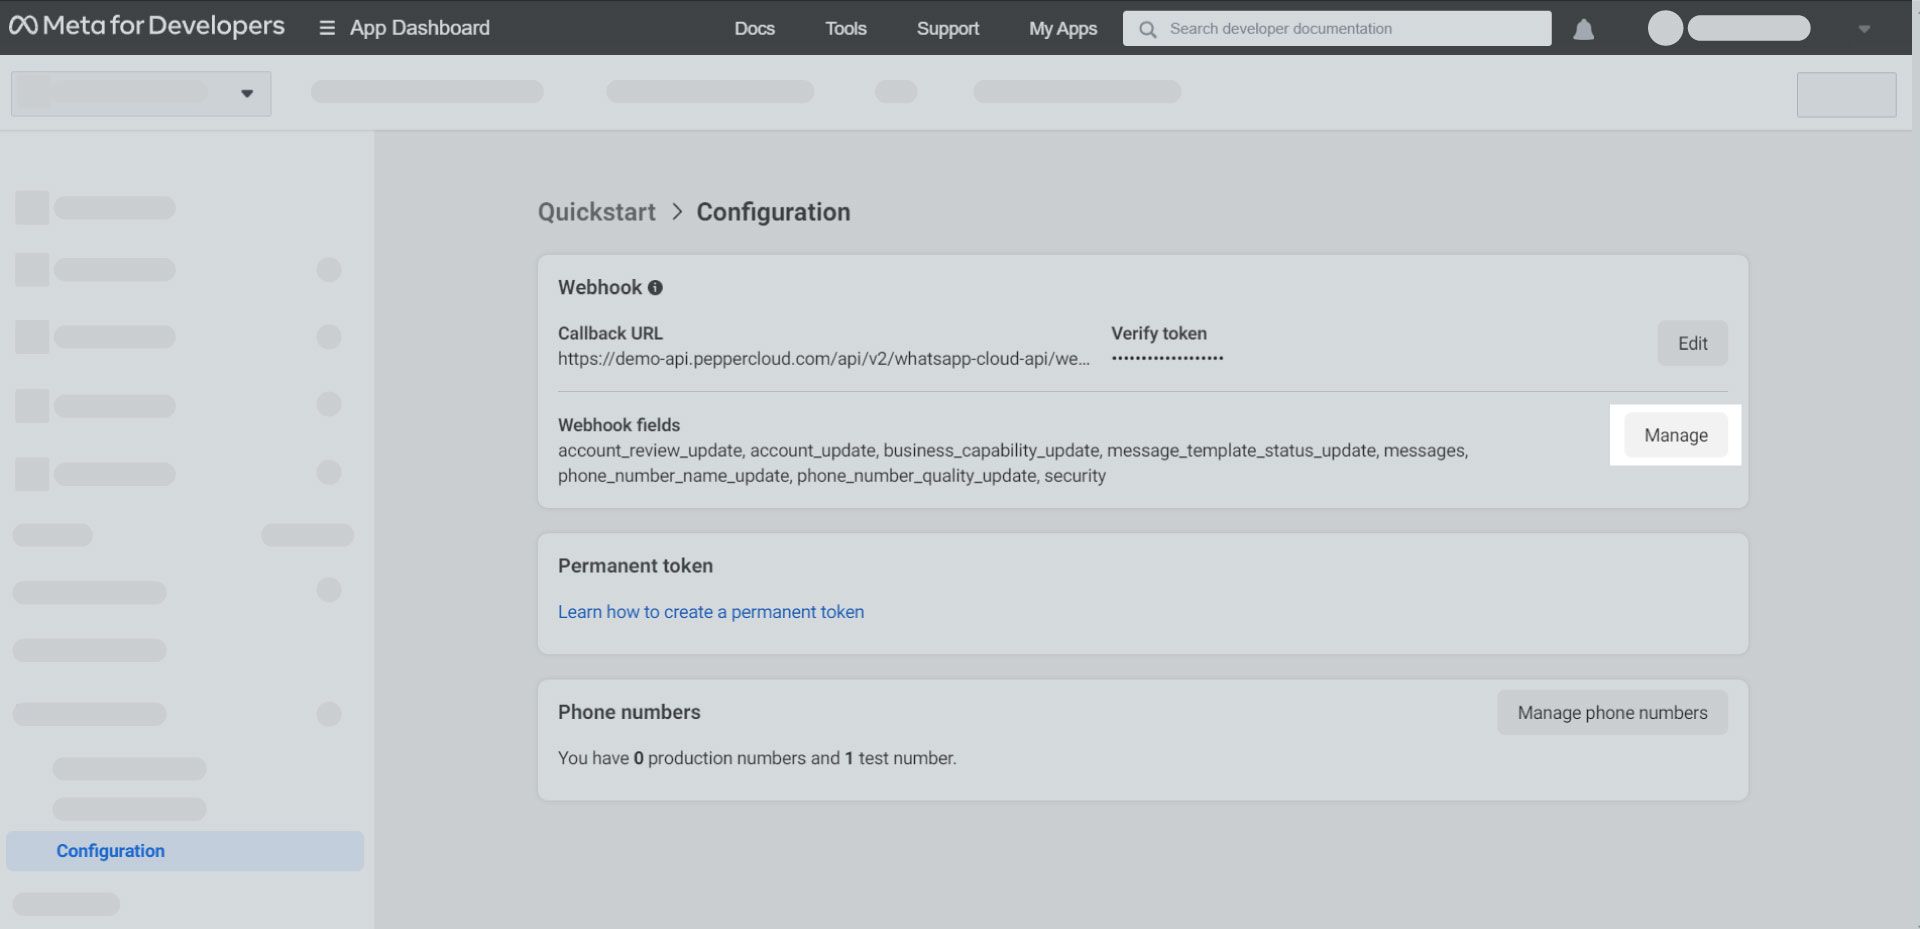
11. Subscribe to "flows", “message_template_status_update”, "messages" to receive the message in the CRM.
Now, you have successfully got WhatsApp Cloud API for your business and synced it with your phone number, it is time to make it work for your business. For this, you need to generate a permanent token that further helps you to integrate with Pepper Cloud CRM.
