


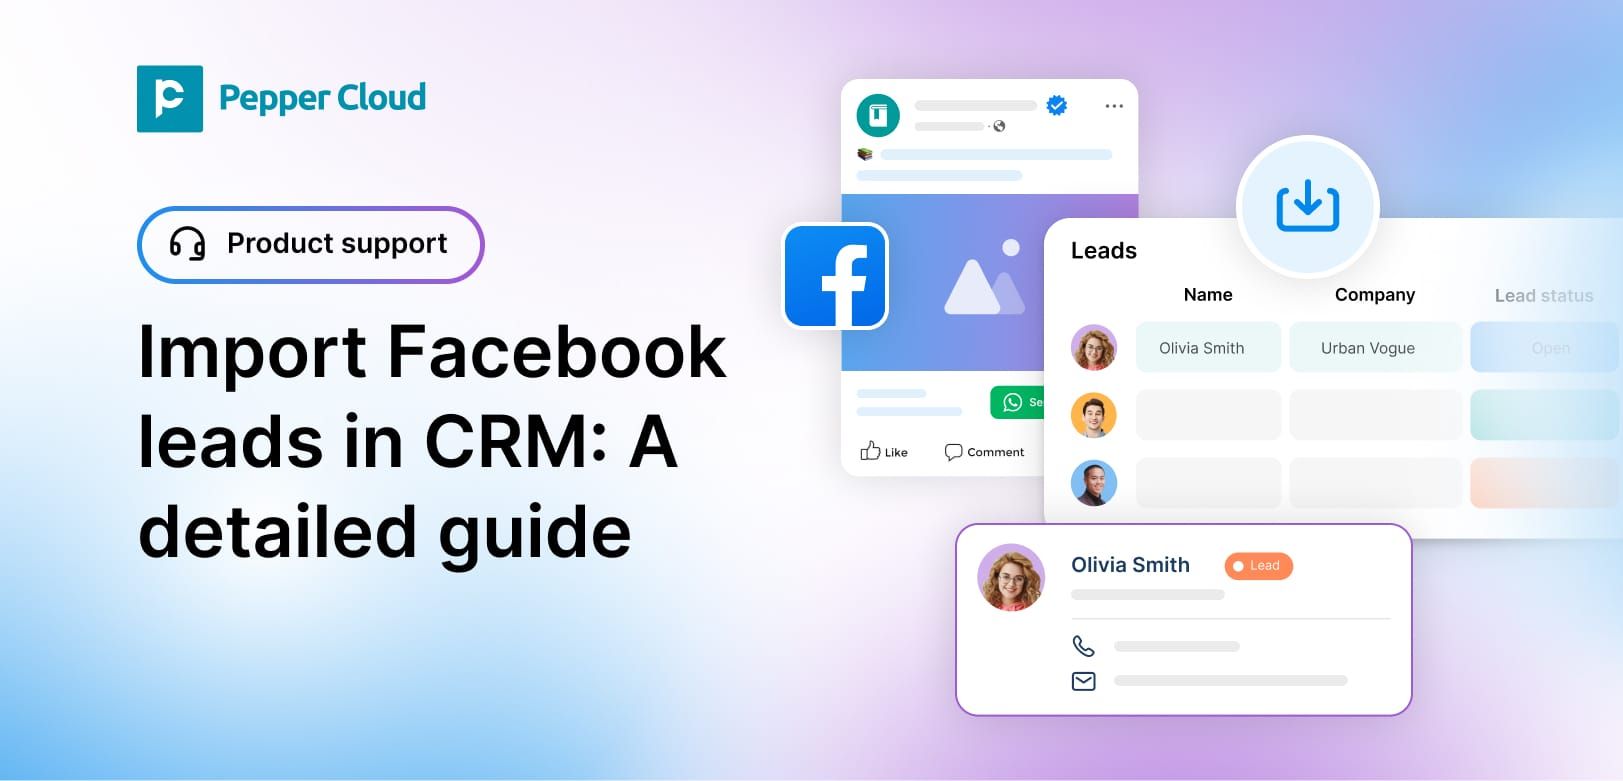
How to import Facebook ad leads into CRM?
Here are the main steps: 1. Integrate your Facebook lead ad form with CRM. 2. Configure the form within the CRM. Read the blog for detailed steps.
Did you know, you are 21 times more likely to qualify a lead if your response time is less than 30 minutes?
That’s right! Your lead response speed can influence your winning of the deals.
With the Facebook lead import feature of Pepper Cloud CRM, your sales team can access the leads immediately right from the CRM and take action in minutes.
Read the blog to understand:
- Facebook lead ads
- Why integrate Facebook lead ads with your CRM?
- How to integrate Facebook lead ad forms?
- Quick ways to get you started
Facebook leads ads
Facebook ads are divided into mainly 3 types based on the ad objective: Awareness ads, Consideration ads, and Conversion ads. Within these 3 types of ads, there are many micro-objectives.
Lead generation ads are a part of Consideration ads where you get your potential customers to start thinking about your business and your offerings and they look for further information about you. The forms associated with these Leads ads are intended to collect emails and other necessary data from potential customers.
Why integrate Facebook lead ads with CRM?
Porting Facebook lead information into your CRM can help you in mainly three ways.
- It drastically increases the probability of your lead conversion.
- It saves your team from having to manage multiple platforms.
- It avoids unnecessary manual errors.
Let’s see how to implement it.
How to import Facebook leads into CRM?
There are two main steps for easy import of Facebook leads into CRM:
1. Integrating Facebook leads ad form with CRM
2. Configuring the form within CRM
To get started with the integration, here are the pre-requisites.
- Facebook business page
- Active ads campaign on Facebook
- Facebook lead ad form in one of your ads
1. Integrating Facebook leads ad form with CRM
1. Login to your CRM account.
2. Navigate to “Settings” by clicking on the settings icon on the top right corner of the screen.
3. Click on “Integration”.
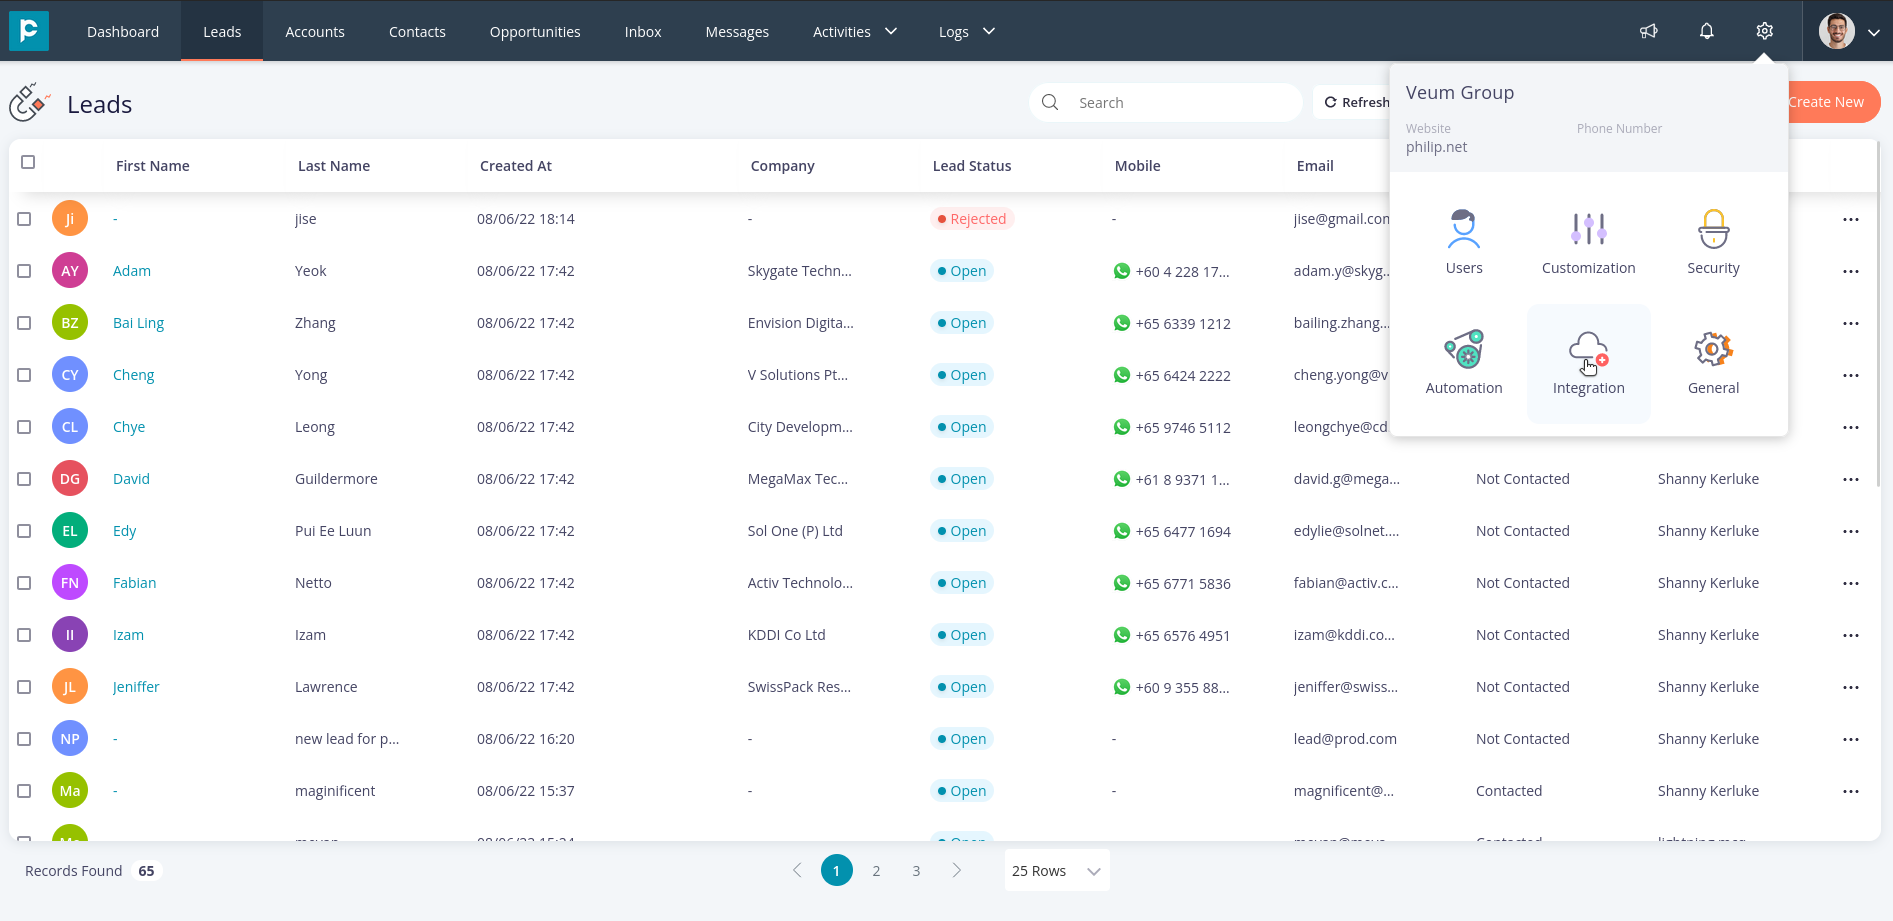
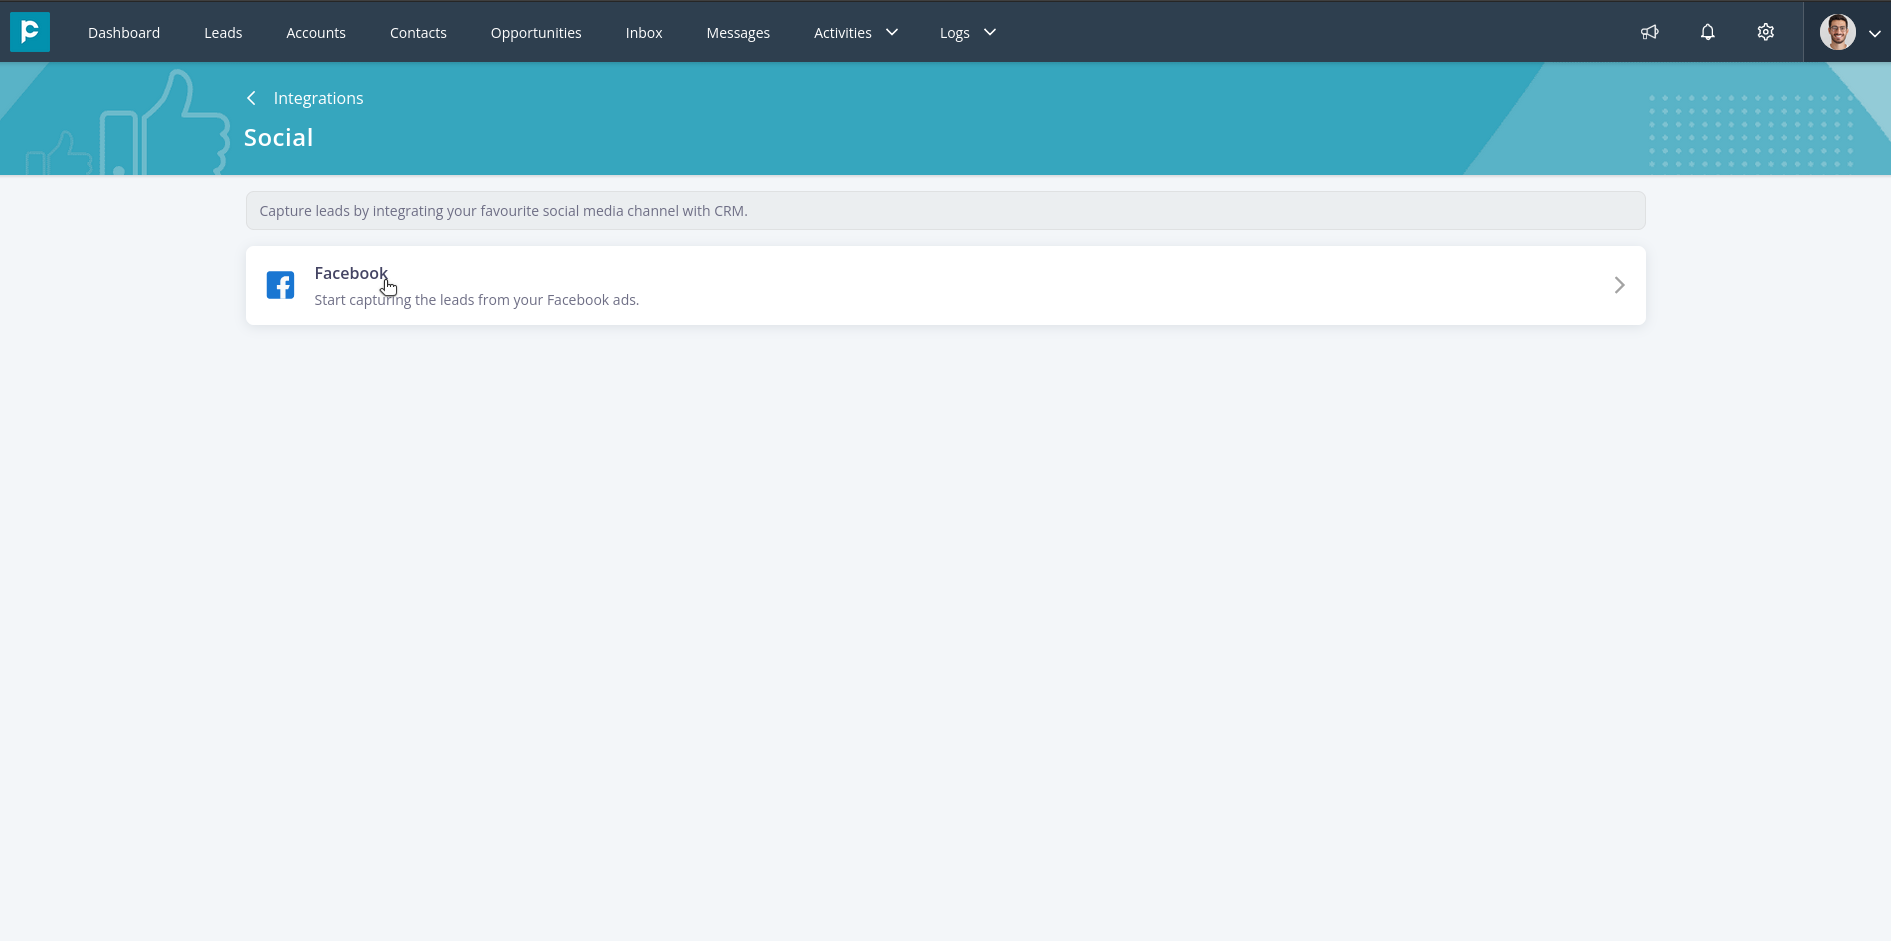
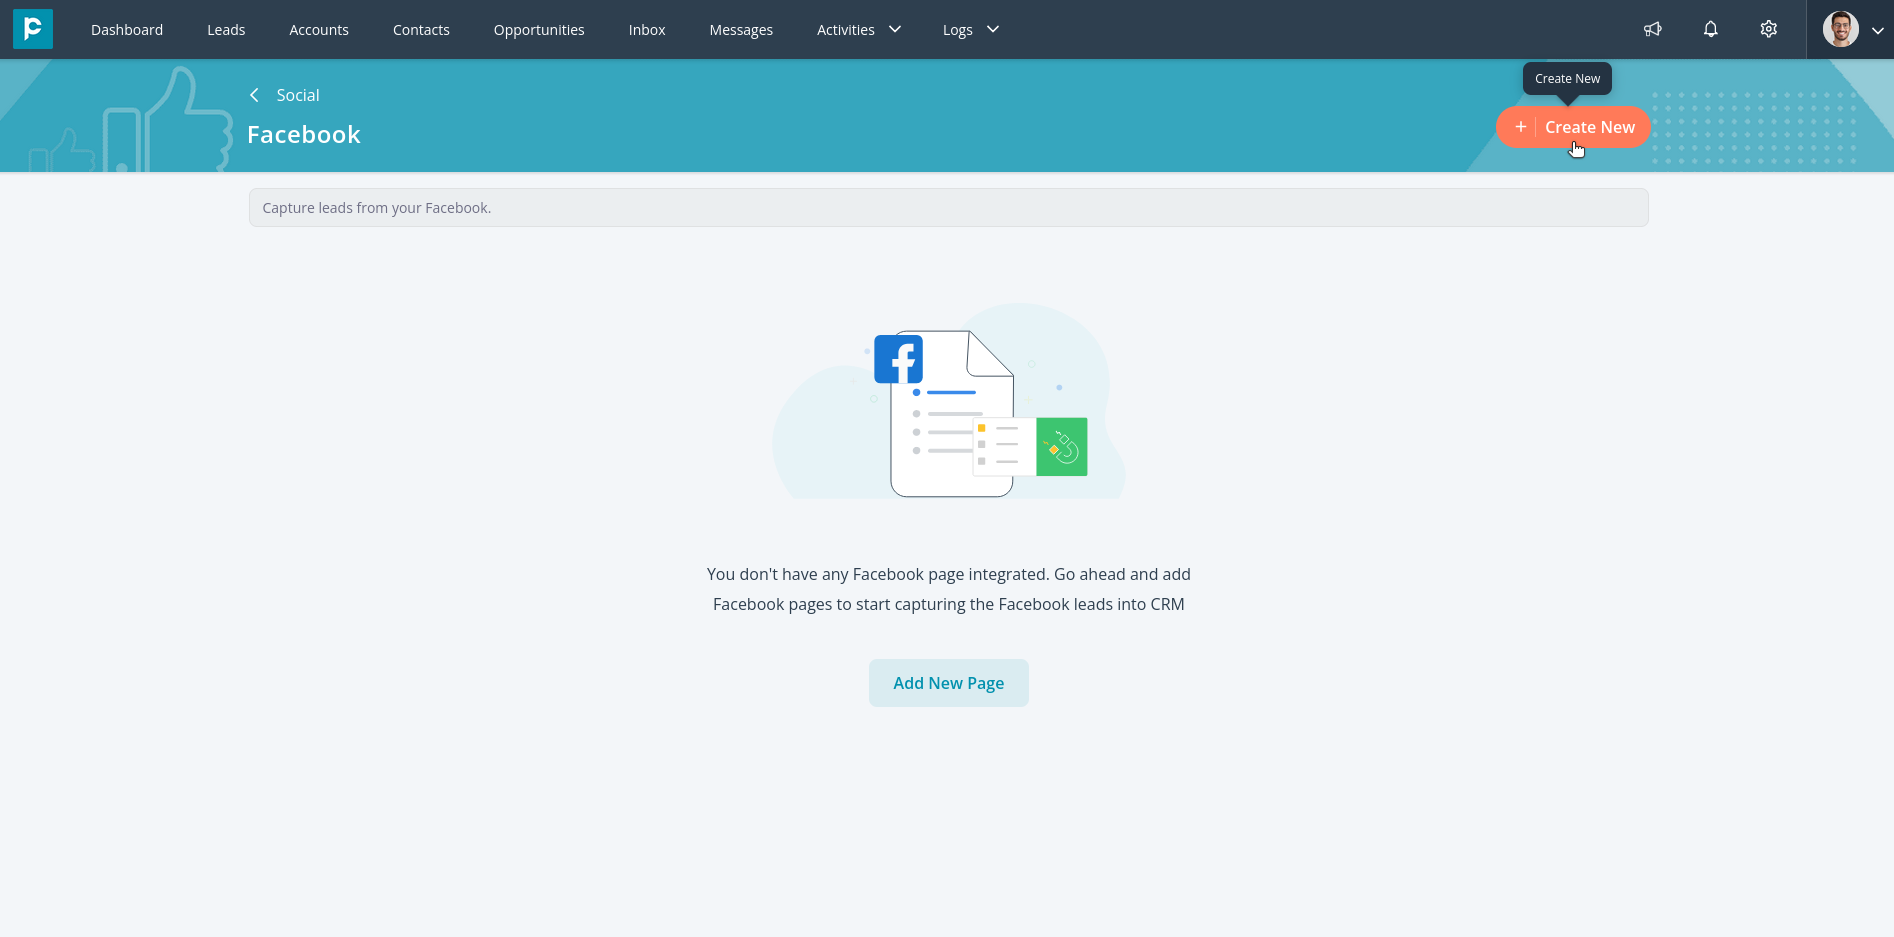
4. Click on “Social”. This will navigate you to the social integrations page.
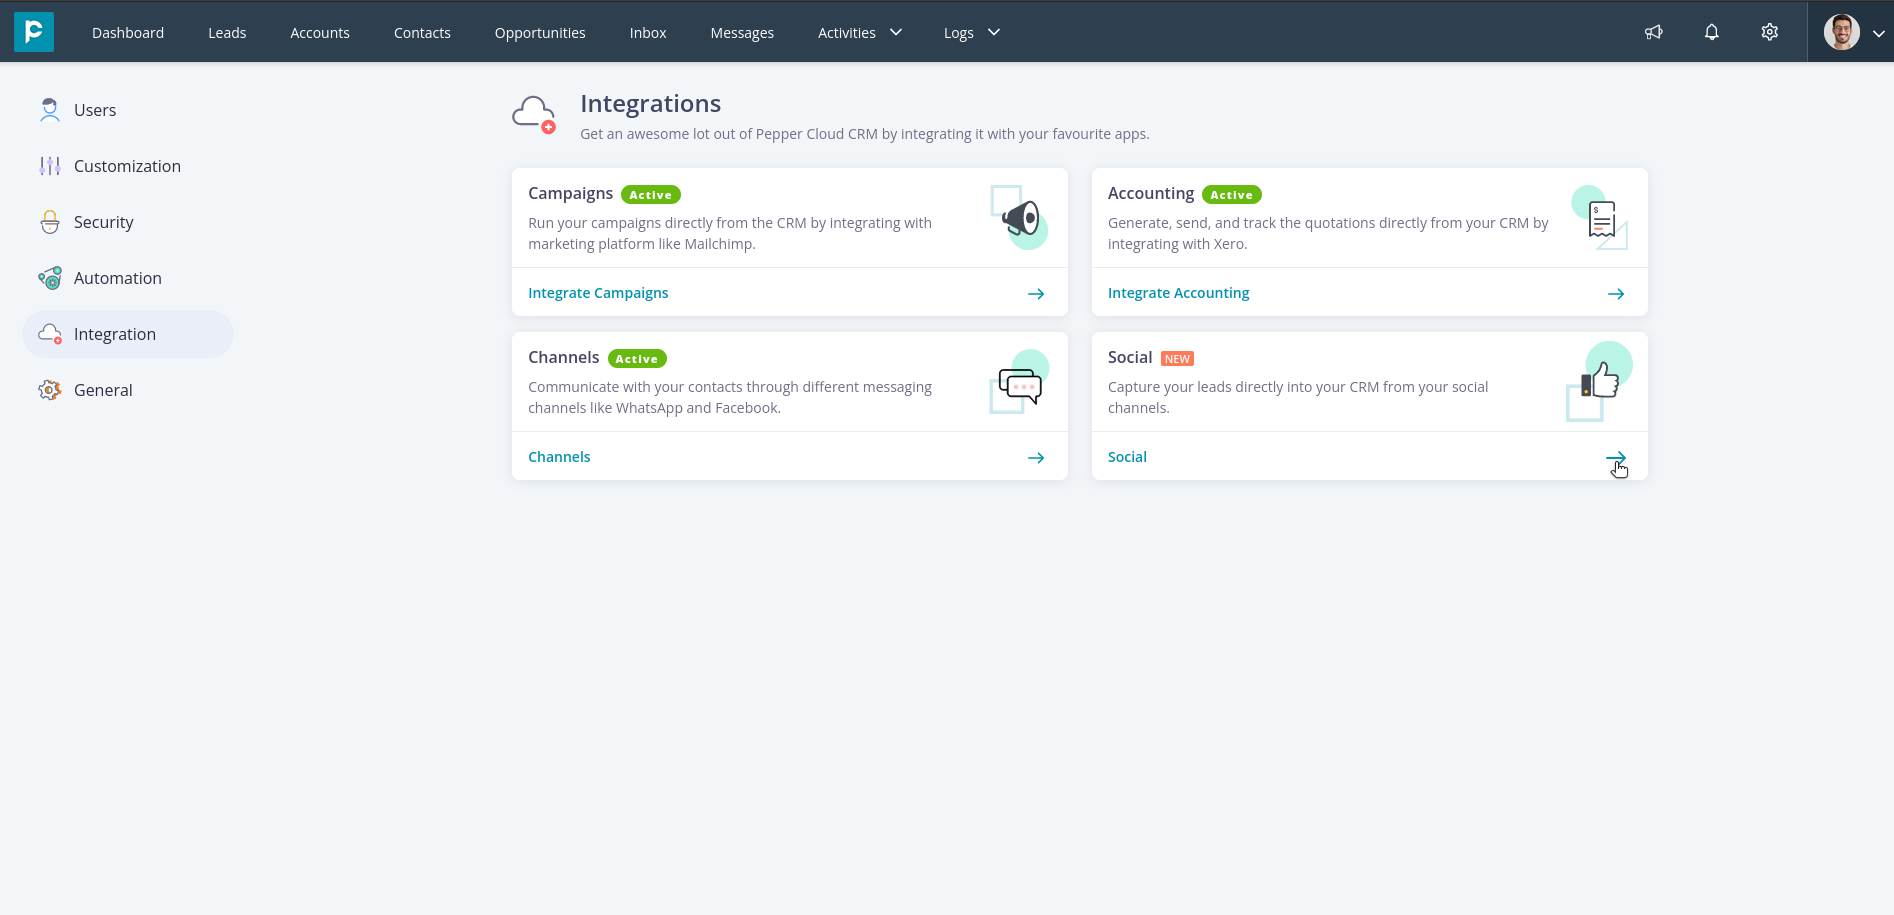
5. Click on “Facebook” to integrate your Facebook pages with CRM.
6. Click on the "Create New" button in the top right to integrate the new Facebook page.
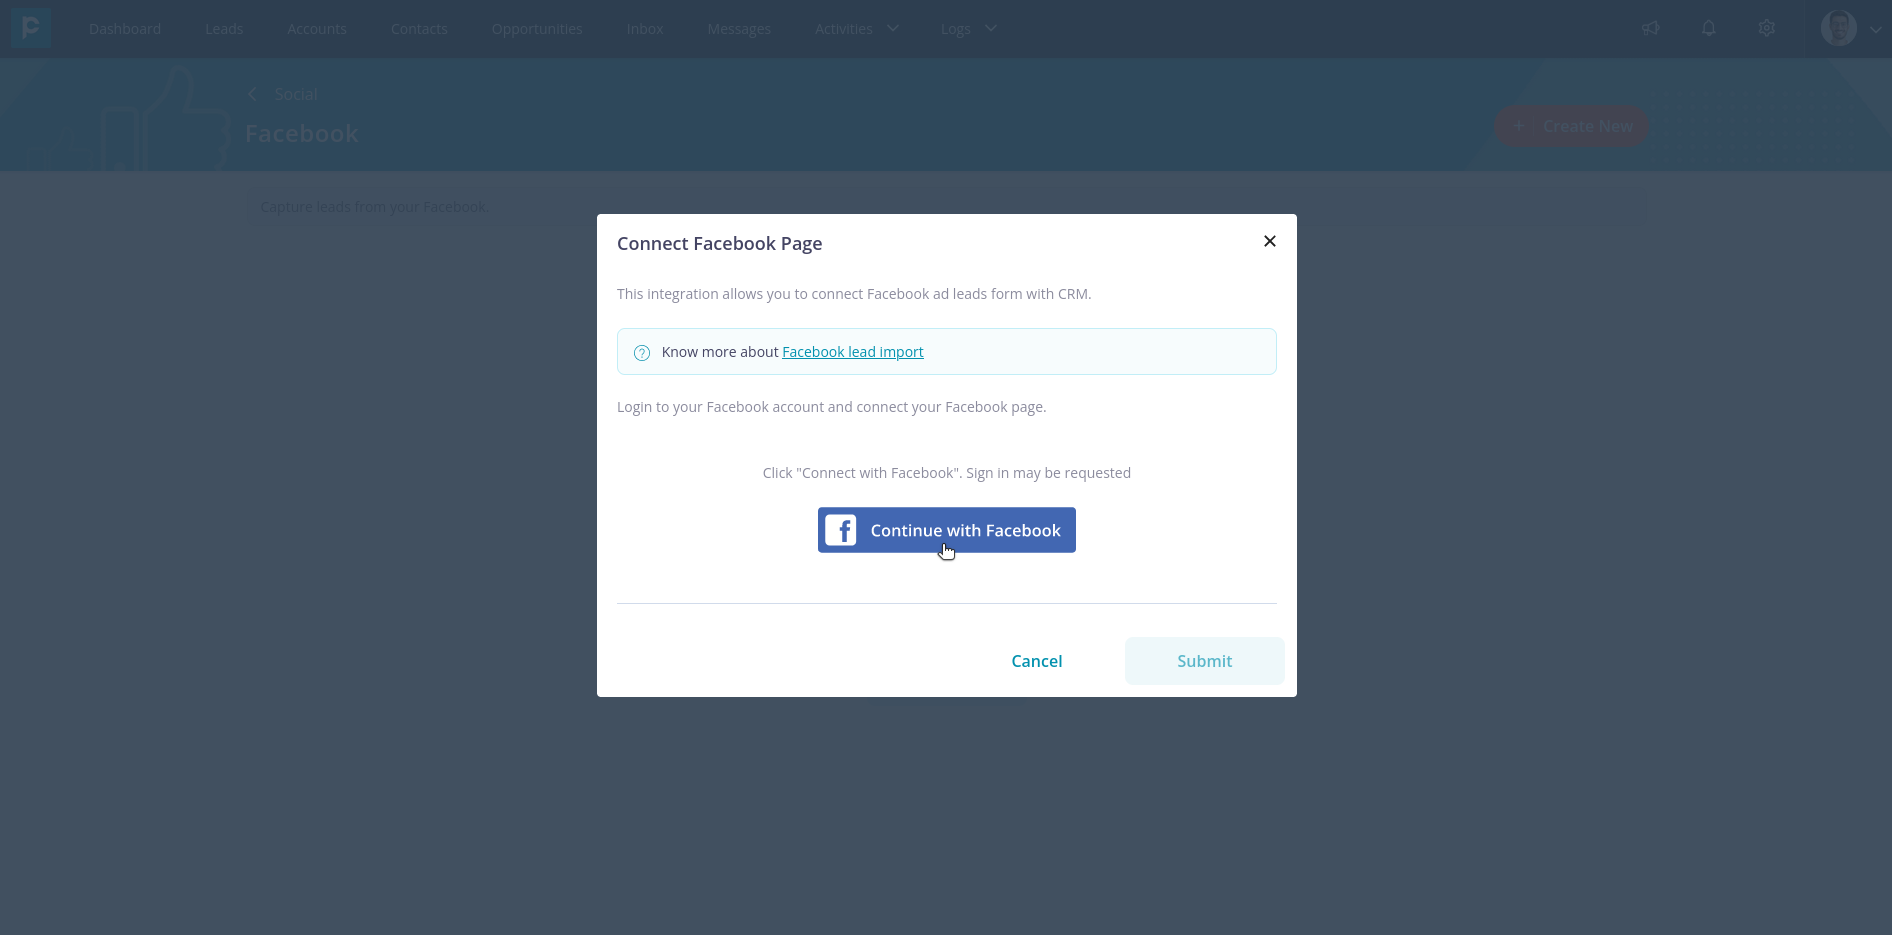
7. A modal for connecting your Facebook page opens up. Click on “Connect with Facebook”
8. It might ask you to log in to your Facebook account. If so, log in and choose the pages you want to integrate with the CRM.
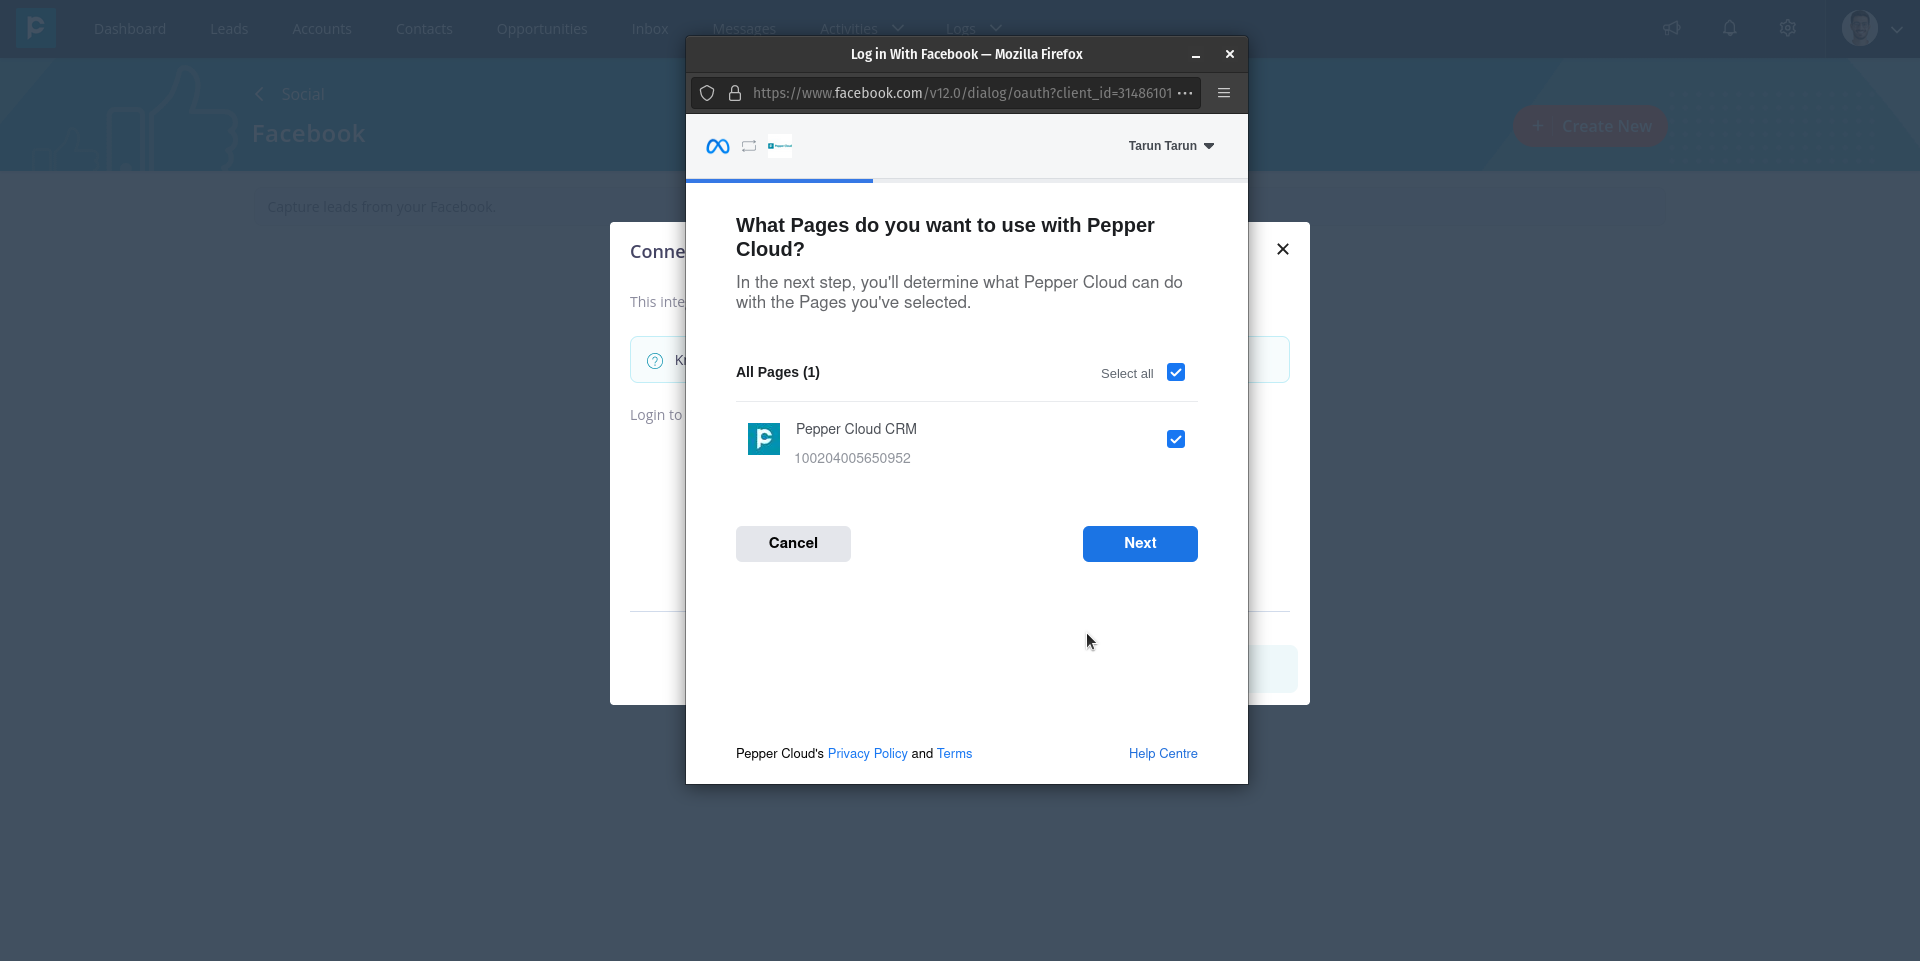
9. After the permission were given, choose the page whose Facebook leads you would like to capture.
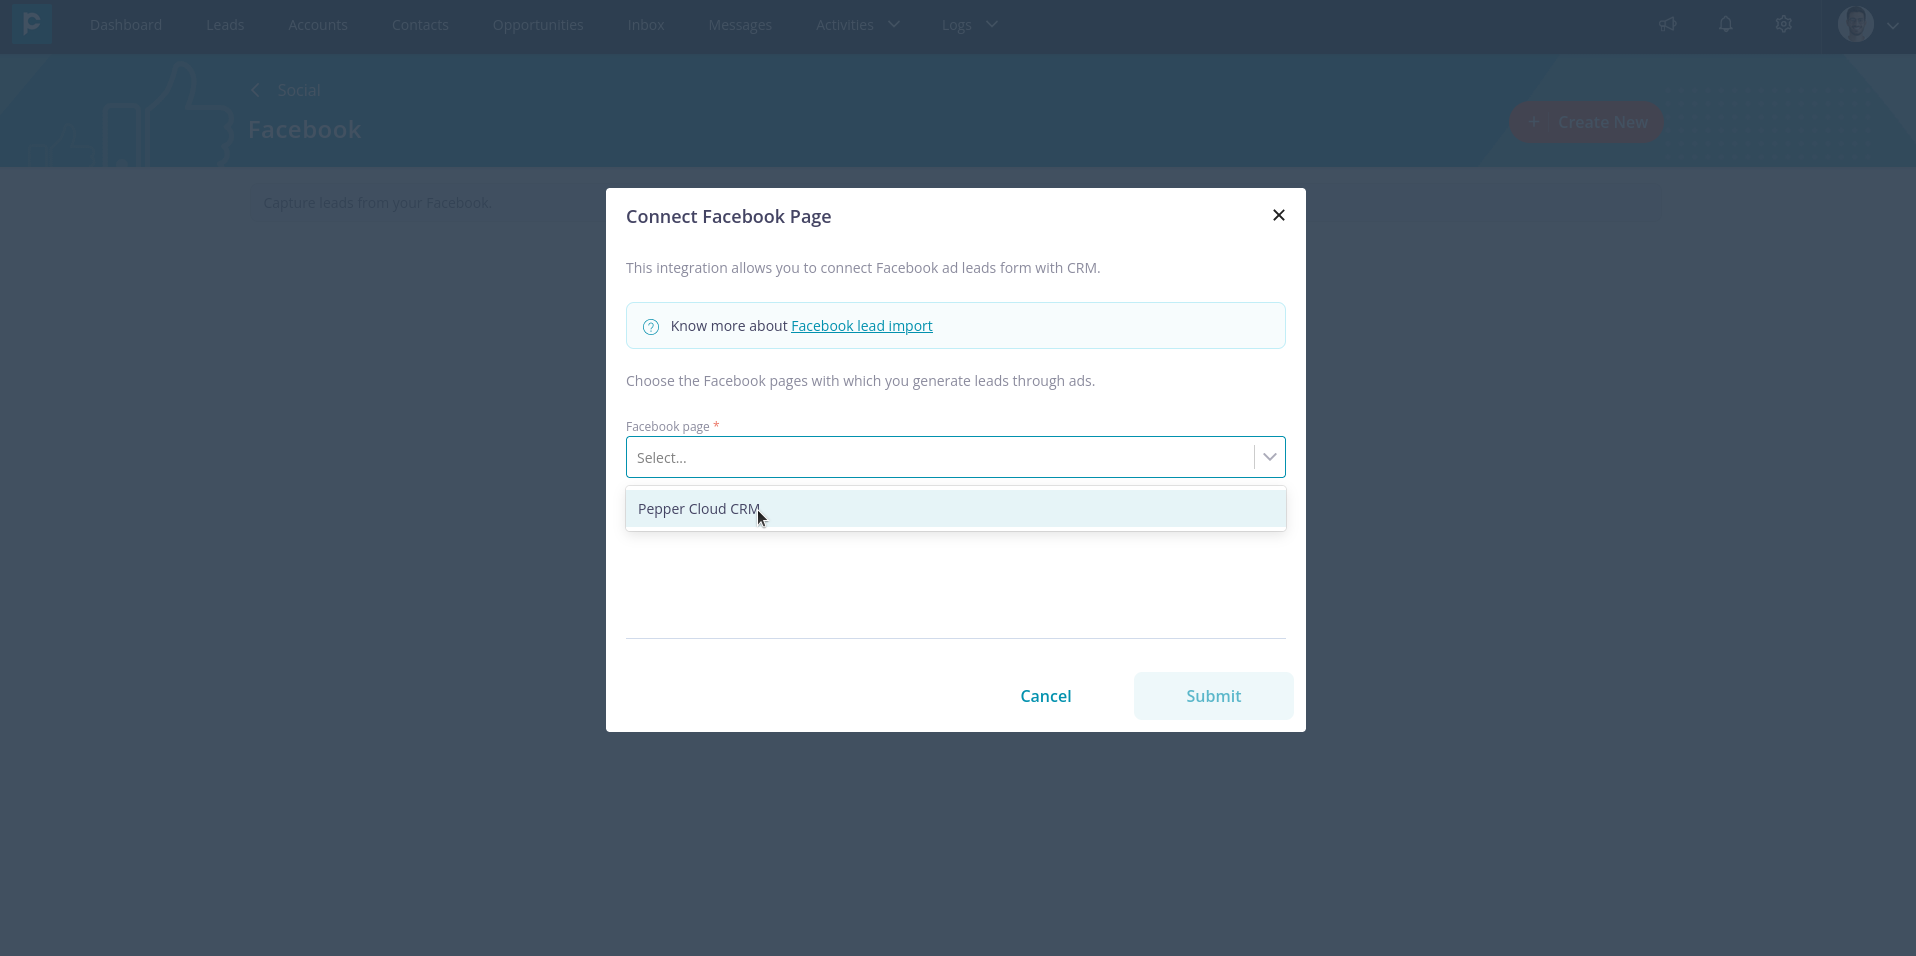
10. Click “Submit” to complete the integration.
2. Configuring the form within CRM
Now that you have integrated your Facebook page, you need to configure the form from which you would like to import leads. Here are the steps:
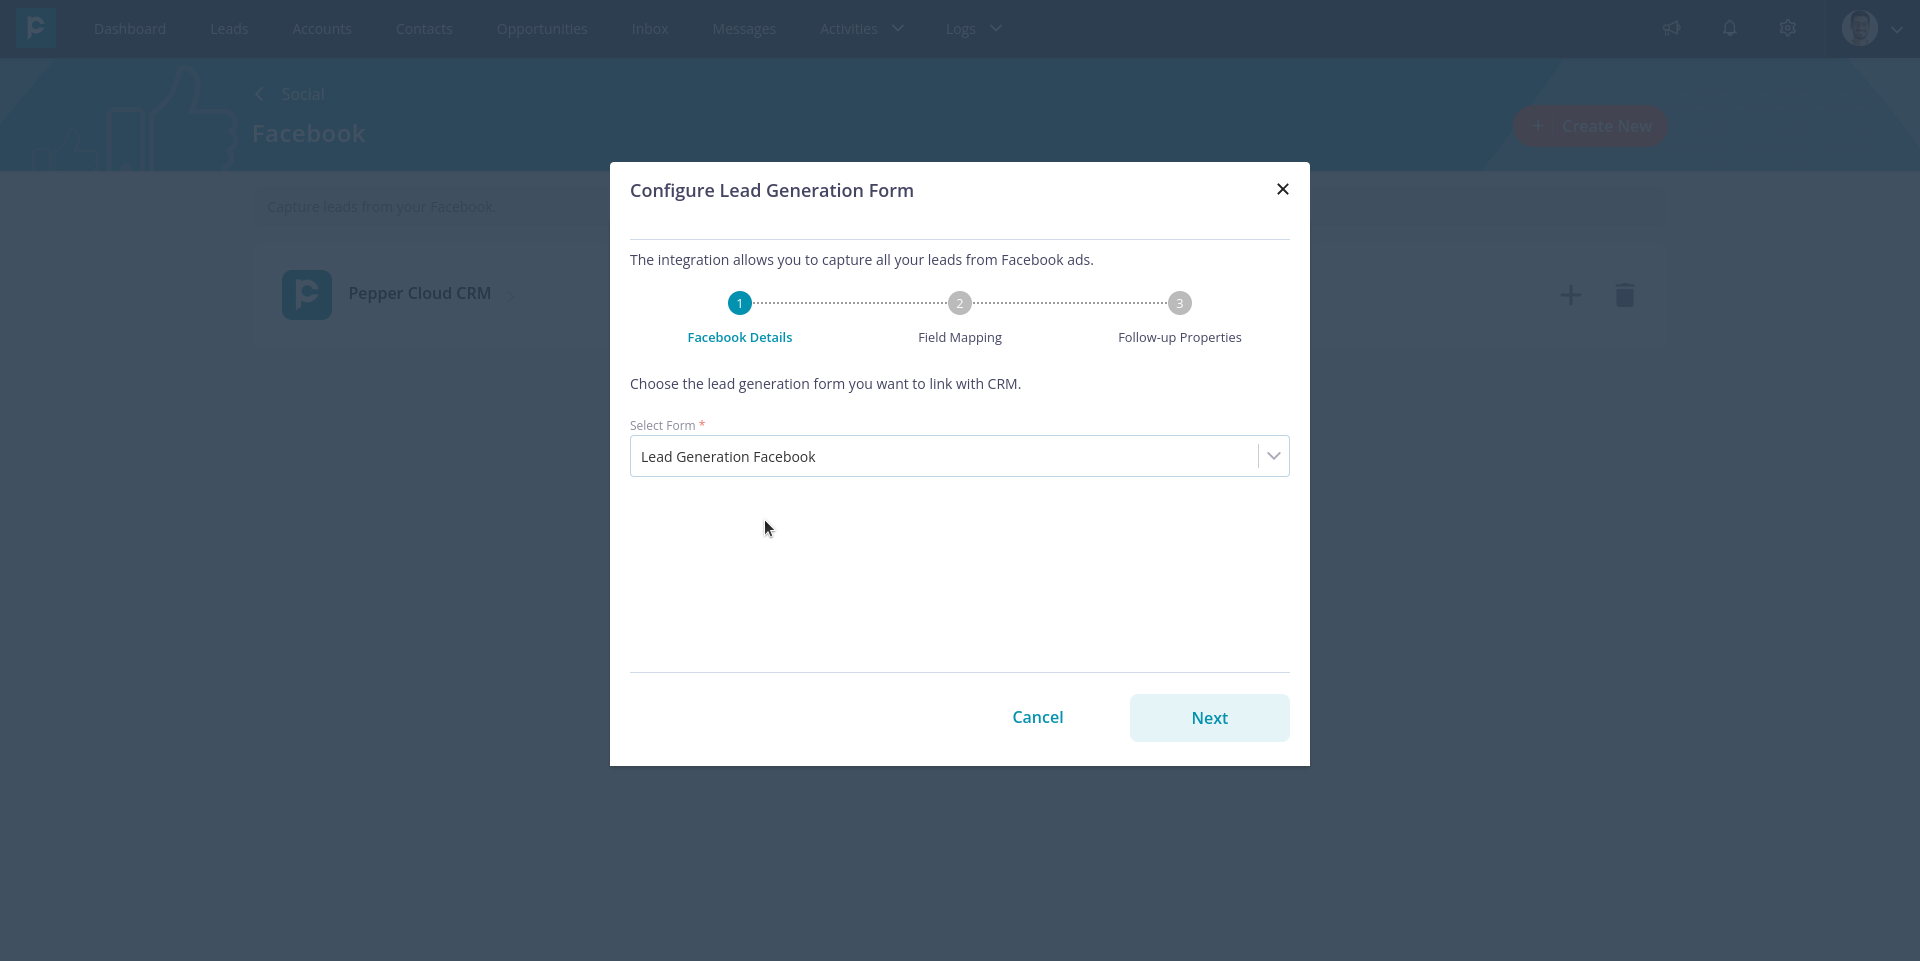
1. After your Facebook page is integrated, a modal will automatically open prompting you to configure the form. The drop-down of “Select Form” contains all the forms that are created on the chosen Facebook page. Choose the form and click “Next”.
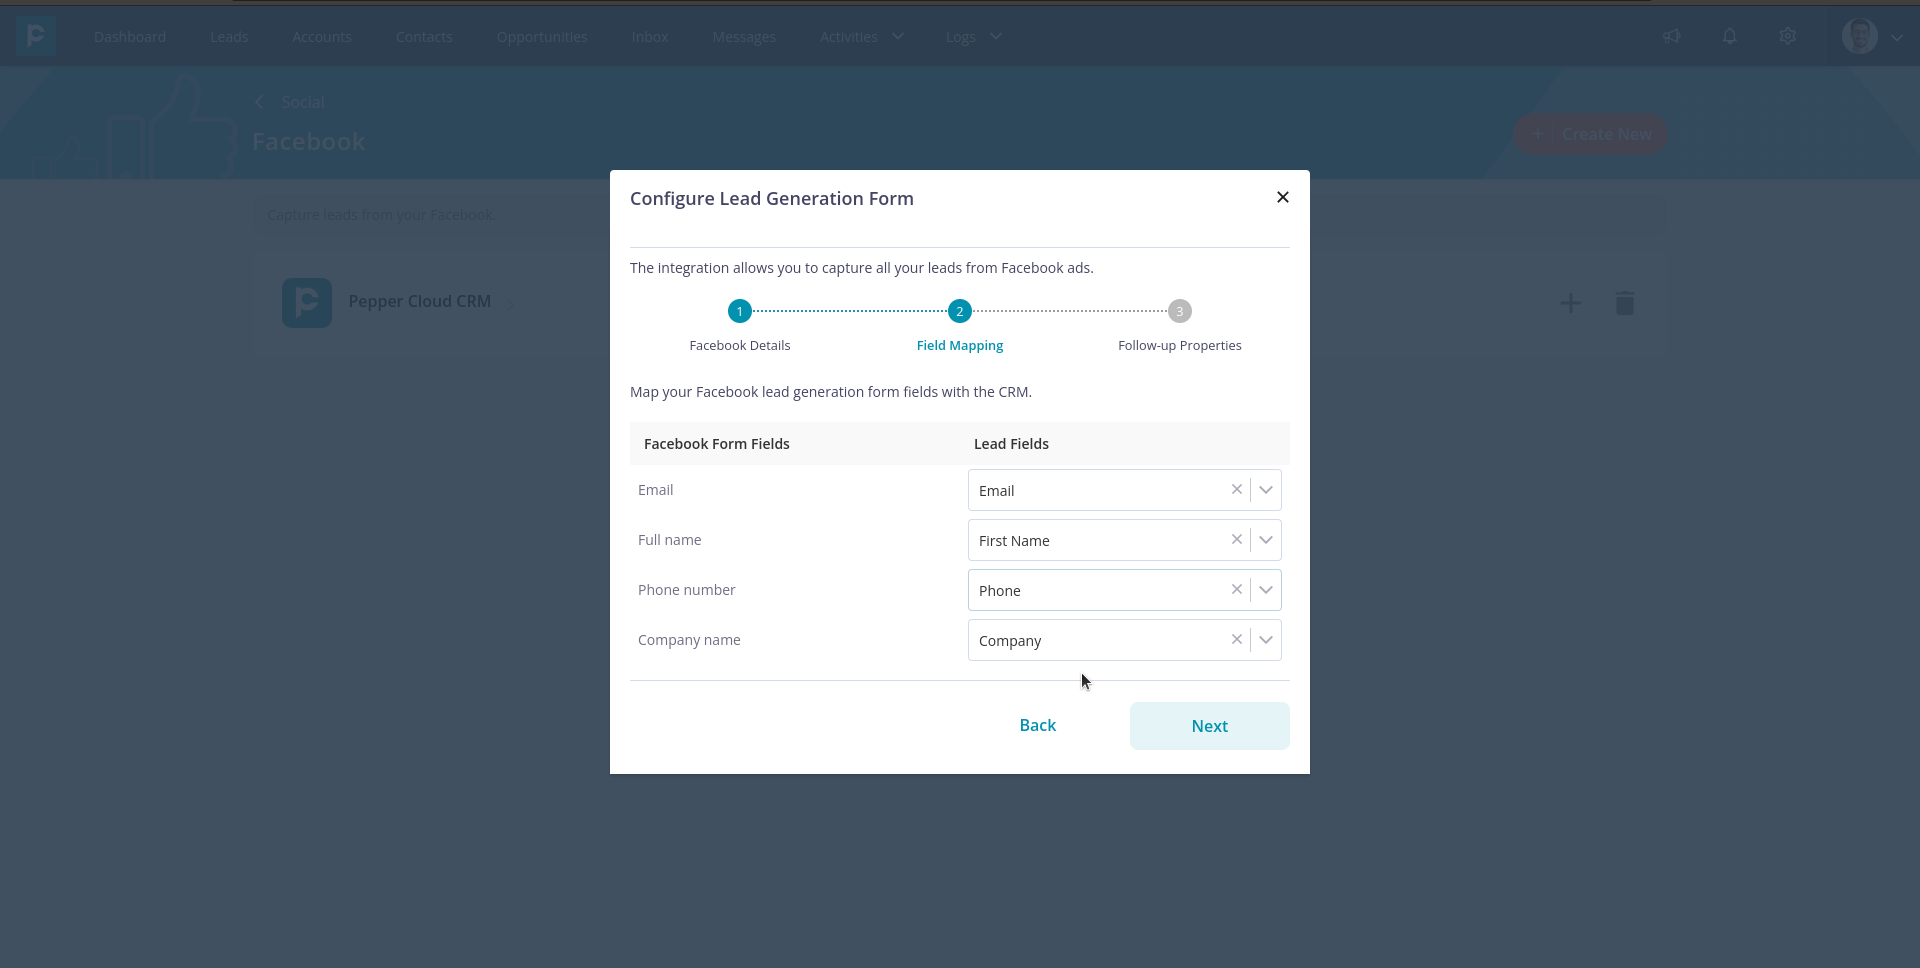
2. Map your facebook fields with CRM Fields and then, click “Next”.
3. Select your default follow-up properties for the leads generated through the Facebook ad form. Click “Submit” to complete the configuration.

And now, you are all set to capture your Facebook leads directly into your CRM.
Quick ways to get you started
- To add multiple lead ad forms into CRM: after successful configuration of the lead ad form, you can add more forms by clicking the “+” icon on the page card.
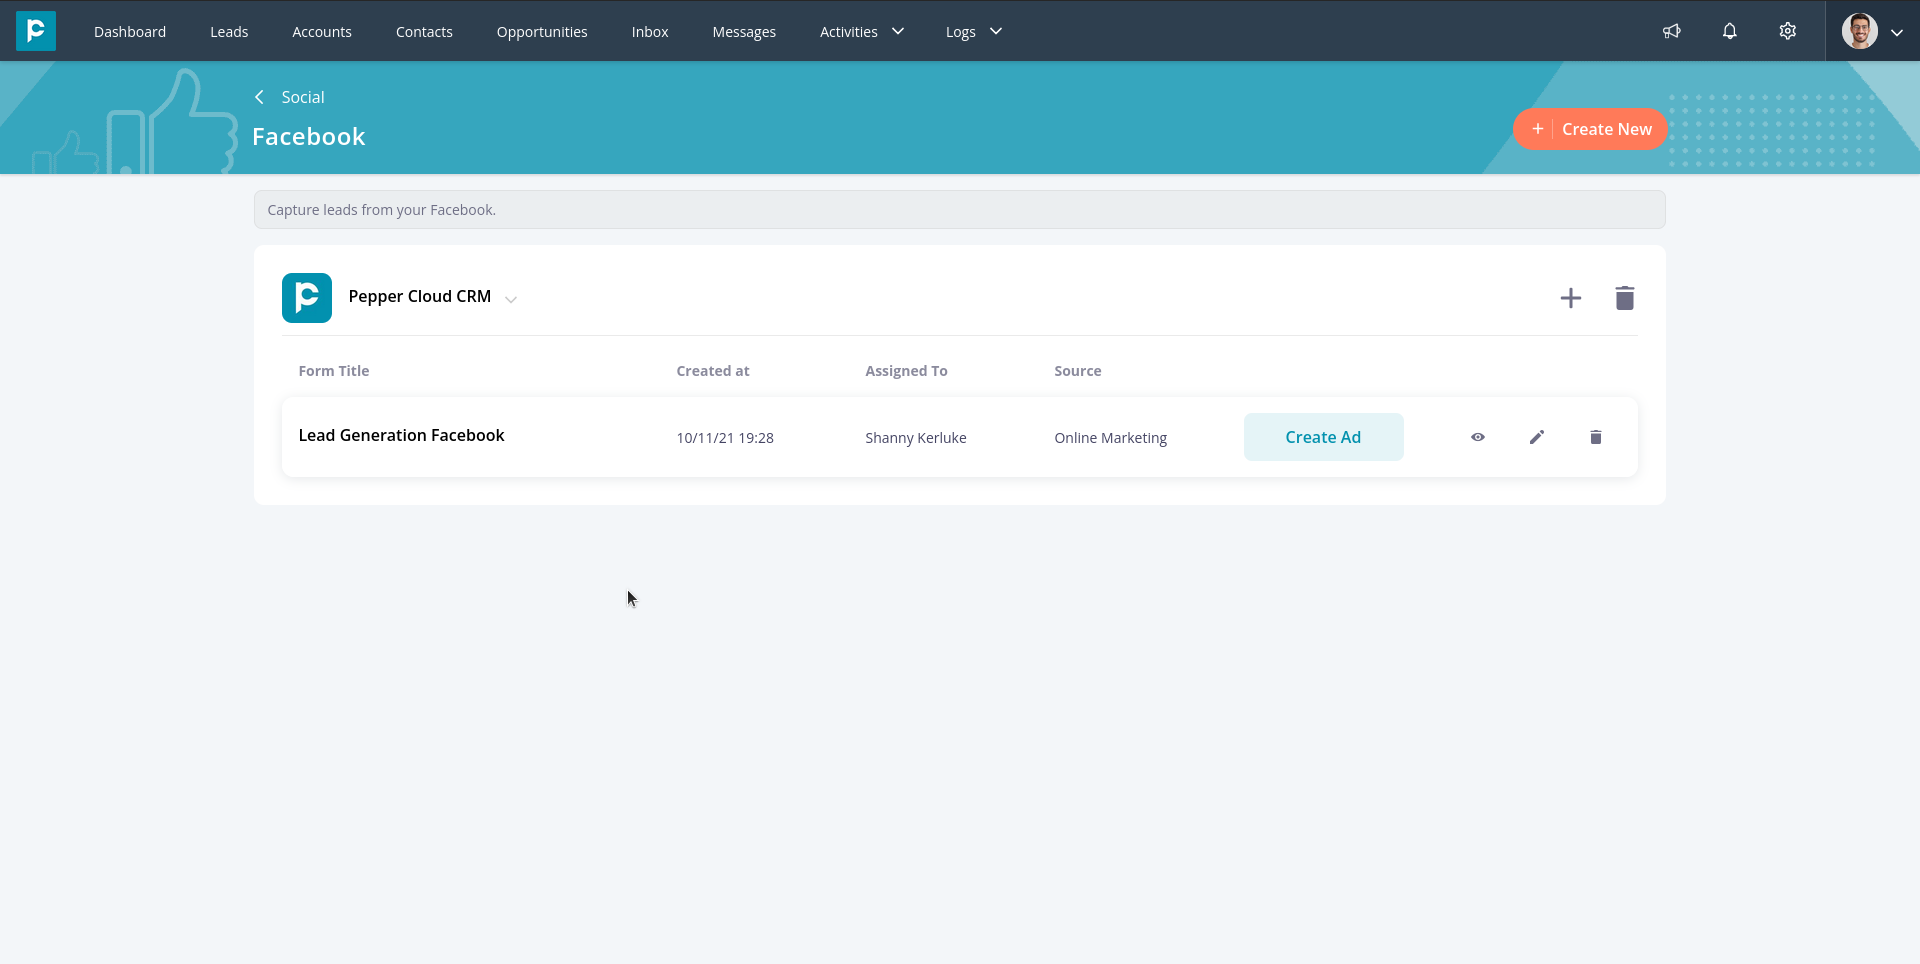
- To edit the form or to change its configuration: If you would like to edit the field mapping or would like the change the default properties, click on the edit icon (pen icon) of the ad form.
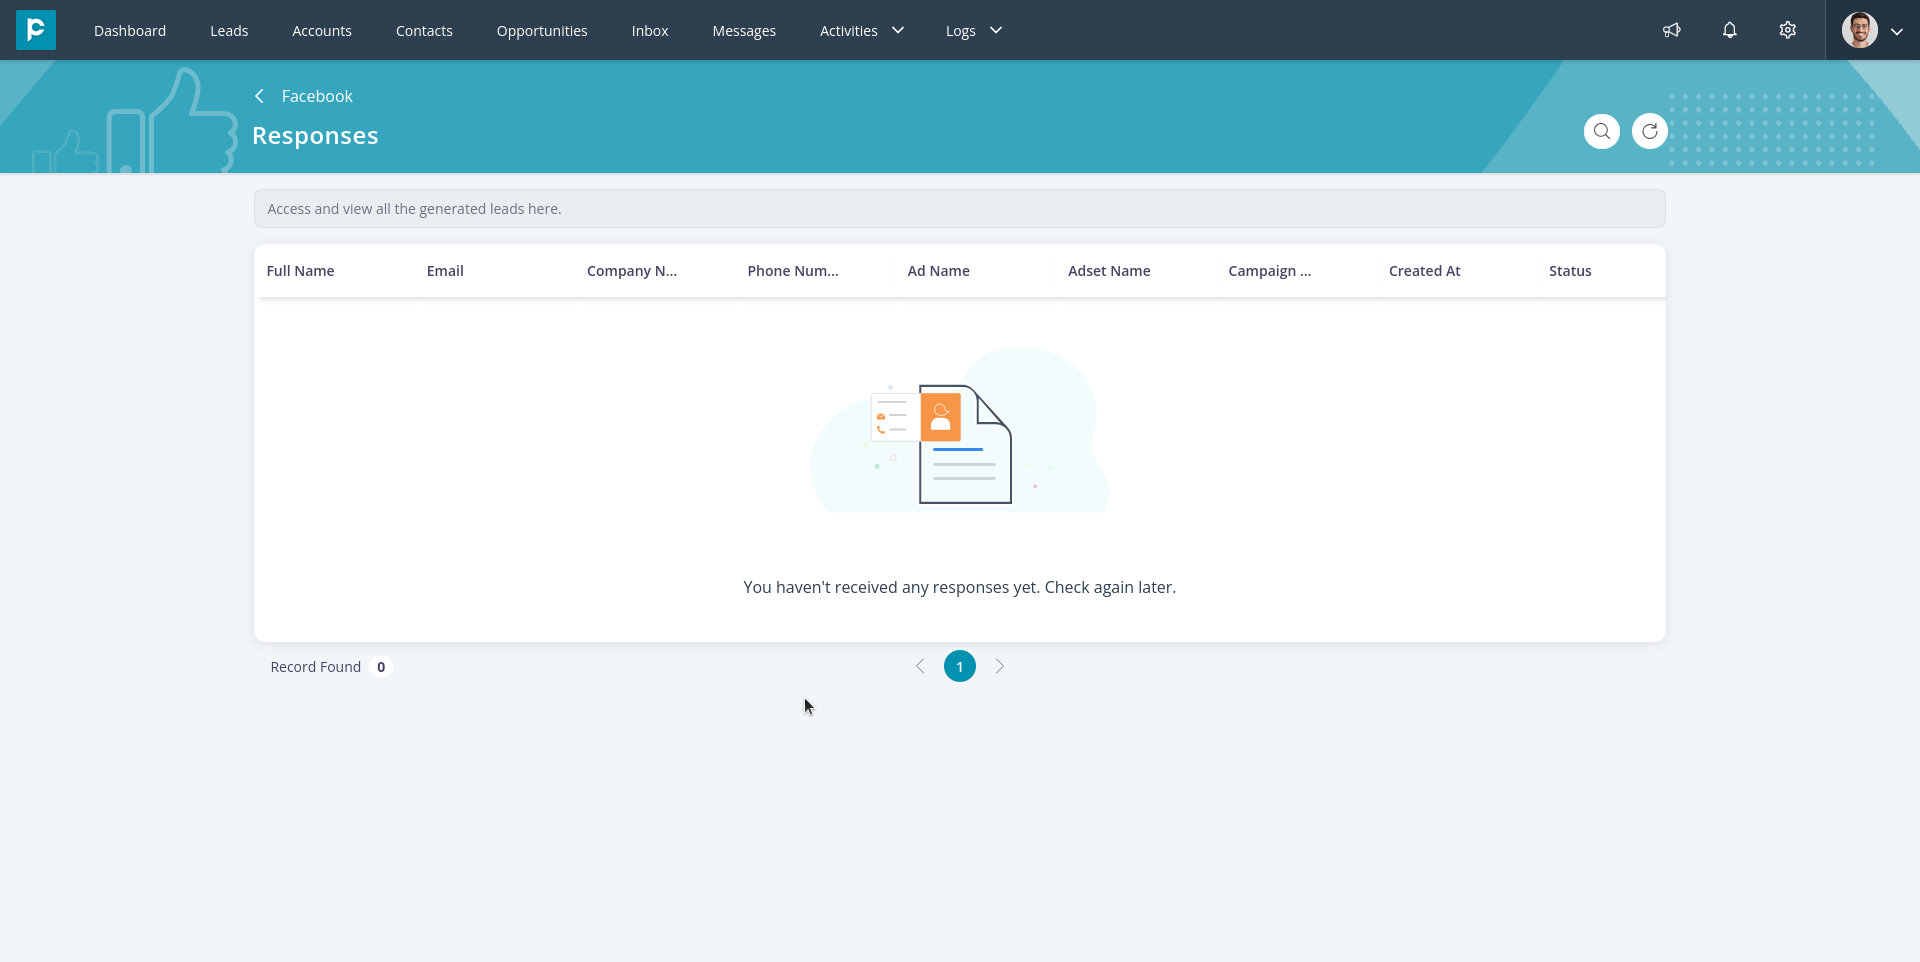
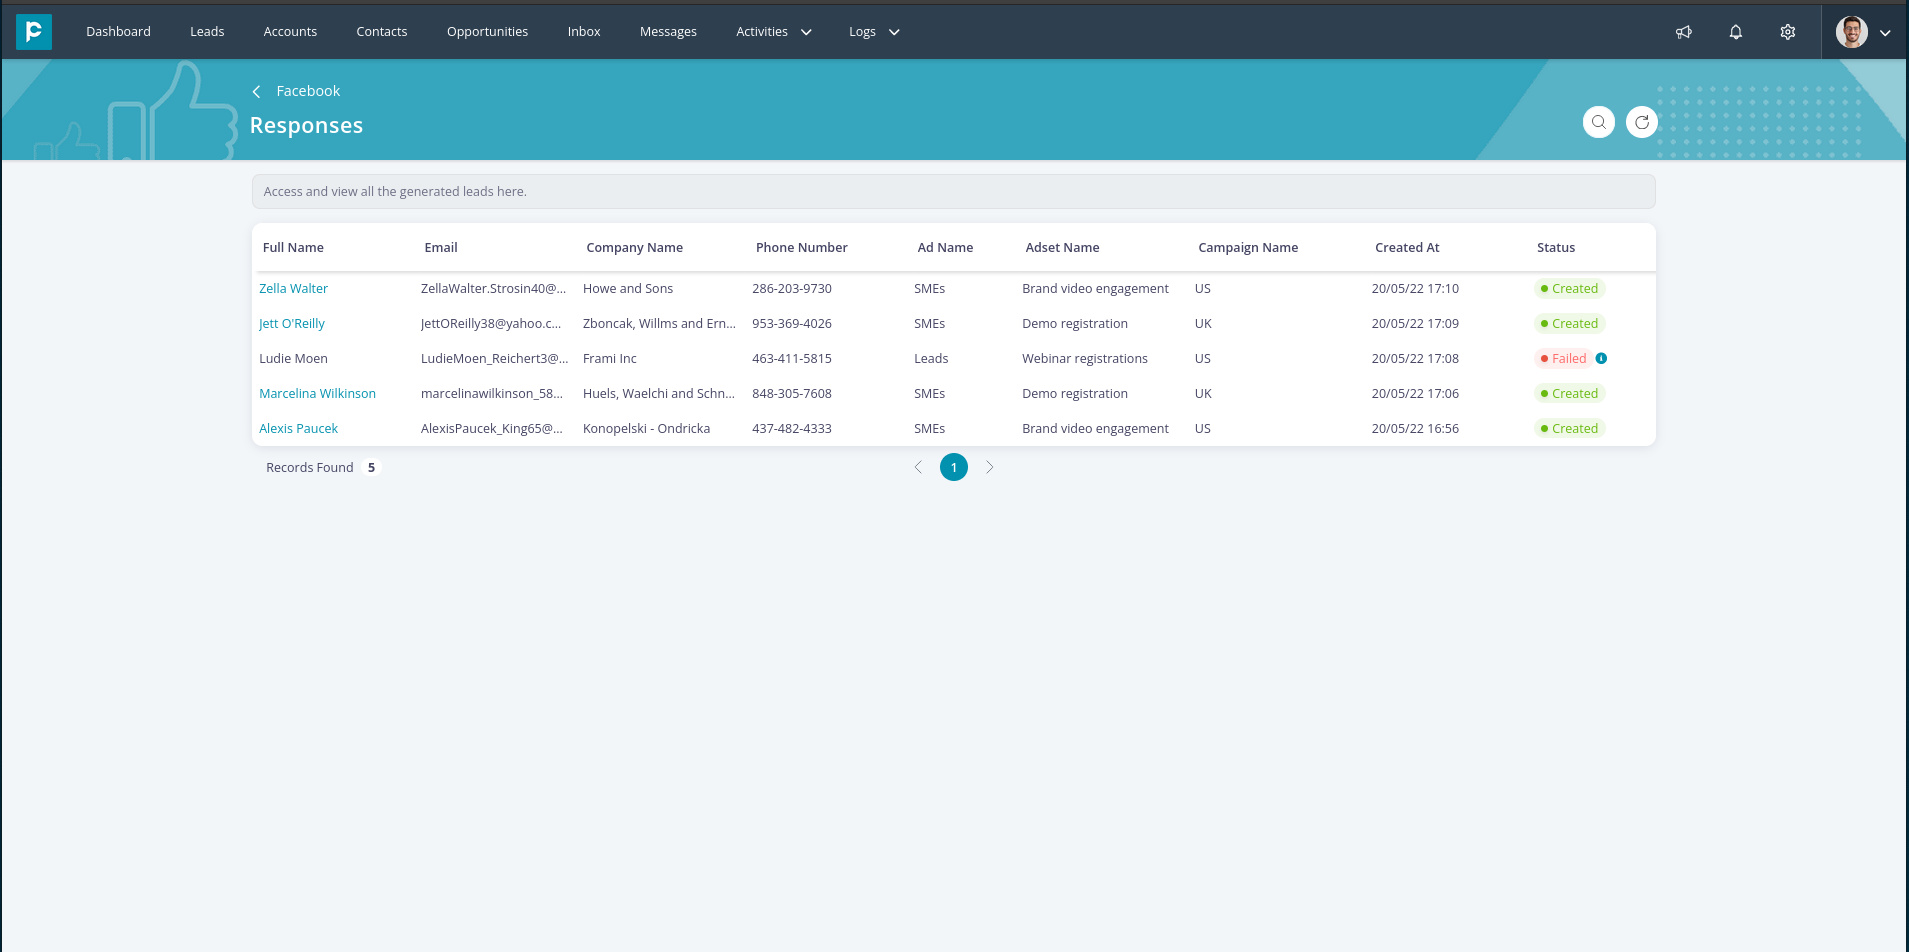
- To check the Facebook ad-generated leads: Click on the view icon (eye icon). This takes you to the page where you can see the list of responses along with other details such as lead import status, ad name, campaign name, etc.
- To search the leads: Click on the search icon and search the leads by the fields.
Here is a quick video tutorial on how to integrate Facebook lead ad forms with Pepper Cloud CRM and how to automatically import Facebook leads in the CRM system.
So, what next? Go and try it out yourself. Need more help? Feel free to talk to our friendly representatives or write to us on Facebook.
