


WhatsApp API Account and Twilio - A Complete Guide
Use the guide to learn how to get WhatsApp API from WhatsApp partner, Twilio.
WhatsApp is proving itself as the easiest and most frictionless platform for customers to communicate with businesses. But how can growing businesses use it for their benefit?
WhatsApp Business API is a product of WhatsApp designed specifically for growing enterprises. However, WhatsApp Business API is slightly complex but highly useful compared to the WhatsApp Business App (the free version of the WhatsApp Business app for small businesses).
Read our blog on WhatsApp Business solutions to know more about WhatsApp Business API.
Some of the useful features provided by WhatsApp Business API include:
- Multiple salespeople can log in from an unlimited number of devices.
- Create message templates to send bulk messages instantaneously.
- Sharing location, document and rich media content.
- Creating a rich business profile with Business name, Logo, Location, Opening hours, catalogue, etc.
- Create message templates to send notifications easily.
- Chats can be assigned to users within the team.
- Measuring the business outcomes with metrics.
- 24-hour messaging window.
How to get WhatsApp Business API?
You can get WhatsApp Business API only through WhatsApp partners such as Twilio.
Applying for a WhatsApp business API generally involves four steps:
- Buy or port a phone number through any WhatsApp partners.
- Go through WhatsApp Commerce Policy and Display Name checks.
- Verify Facebook Business account and number, and accept messaging permissions.
- Connect your WhatsApp business API to business software such as CRM.
We shall check each of these steps in detail.
1. Buy or port a phone number
Firstly, you need to buy a new number or port your existing number.
Generally, buying a new number is recommended as porting to an existing number takes more time for approval from WhatsApp. Moreover, once the number is ported you cannot use it again for a personal account.
If you are porting an existing number, make sure the number you port can receive calls or SMS and is not used for another WhatsApp Business App or API account.
2. Going through WhatsApp Commerce Policy and Display Name Checks
After purchasing a new number or porting an existing number, submit WhatsApp enabled sender request through Twilio. WhatsApp will review the application to make sure that it meets its Commerce Policy. Additionally, WhatsApp will also need to approve your Display Name. To get it verified quickly, use a Display Name that matches your legal business name.
3. Verifying Facebook Business and Number
The following step is to complete the Business Verification in Facebook Business Manager by providing the required documents. The verification process usually takes a few working days.
Note: Facebook Business Verification is different from Facebook Page Verification.
4. Connecting to business software
Once you have obtained a WhatsApp API account, integrate your WhatsApp Business API with your Pepper Cloud CRM system.
Now that you’ve learned the basics of how to get a WhatsApp API account, we’ll walk you through the process of applying for WhatsApp API in Twilio. steps to apply for WhatsApp API through WhatsApp partner, Twilio.
How to get a WhatsApp account activated through Twilio?
Step 01: Create a Twilio account
Create a Twilio account or log in to your account in Twilio.
Step 02: Buy a phone number from Twilio for WhatsApp
1. Login to your Twilio account.
2. Navigate to “Phone Numbers” > “Manage” > “Buy a number” to purchase a number from Twilio for your WhatsApp business API.

3. Select country, choose capabilities and search criteria.
4. Choose a number from the list shown by Twilio and click on “Buy” to purchase the number.
5. Once purchased, configure the number.
Step 03:
1. Navigate to “Messaging” > “Senders” > “WhatsApp Senders”
2. Click on “Sign up to request access” to open the request form.

Step 04: Twilio Request Access form
1. You need to fill in the following information in the Twilio request access form.
- Phone Number: It is where you can be contacted. Please remember this is not your Twilio Phone Number, where you want WhatsApp API activated.
- Email Address: It is the address where Twilio will reach out with the next steps after your account is approved for use of the Twilio API for WhatsApp in production.
- Company Name, Website, HQ Country: Your company’s information. It should be the same as the company name used in your Facebook Business Manager account, and the same name that will be displayed on the WhatsApp business profile, once you go live.
Note: Please make sure your business is not on the list of prohibited verticals listed in WhatsApp's commerce policy. Additionally, developers will need to verify their business through Facebook Business Manager as part of the WhatsApp onboarding process.
- Twilio Account SID: You need to enter the primary Twilio Account SID.
- To find your Account SID, log into Twilio.
- On Twilio console/dashboard, you can find your Account SID.
- Facebook Business Manager ID: Look out for this ID by following this link, or log into Facebook Business Manager.
- Click on “Settings”.
- Navigate to "Business Account info".
- Find the Business Manager ID.

2. After filling out the information in the form, click on “Request Now”.
Your application will be successful in a couple of days and you will receive a pre-approval email with instructions on what to do next.
Step 05: Create WhatsApp sender profile
1. Navigate to “Messaging” > “Senders” > “WhatsApp senders”.
2. Click on the “New WhatsApp Sender” button to create a new profile. A form will appear.

3. Provide the Business Profile details. Ensure the Business Display Name is in compliance with WhatsApp's rules. Twilio will submit the Display Name to WhatsApp.
In Twilio, you can request to configure up to 25 new WhatsApp numbers.
Note: If your display name is rejected, Pepper Cloud can help you choose a new display name that meets WhatsApp rules. However, all the decisions related to business verification and display name approvals are solely controlled by Facebook and can take up to 30 days for approval.
4. Click “Submit Request” when you are done.

Step 06: Approve Twilio in Facebook Business Manager
Login to your Facebook business manager and approve Twilio to send messages on your behalf. Here is how to do it:
1. Login to your Facebook Business Manager.
2. Navigate to “Business Settings”.
3. Click on “Requests”.
4. In “Received” requests, find the Twilio request and “Approve” it.

Step 07: Verify Facebook Business Manager account
Your Facebook business manager account needs to be verified to prove your company’s identity and to fill out the WhatsApp Business Profile form. Follow the below steps to verify your account.

1. Login to Facebook Business Manager.
2. Navigate to the “Security Centre” in Facebook Business Manager Settings.
3. Click “Continue” to start your business verification.
The business verification process generally takes 7-14 business days for Facebook to review. Twilio will send a confirmation email after completing the registration process.
After successful registration, connect your WhatsApp Business API by adding Account SID, Auth Token, and Twilio registered WhatsApp number into your CRM.
For detailed steps, read our guide on how to integrate WhatsApp Business API with Pepper Cloud CRM.
Steps to create message templates in WhatsApp Twilio
WhatsApp Business API is a WhatsApp API that needs the involvement of the WhatsApp Business Solution Provider. In Pepper Cloud CRM, you can opt for WhatsApp Business API through Twilio. Hence, it is also known as WhatsApp Twilio.
For WhatsApp business API, note that the message templates need to be approved by WhatsApp through Twilio.
After you integrate WhatsApp business API with CRM through Twilio, there are two major steps in creating and using the message templates.
- Create and submit the template for approval
- Add the approved message template to your CRM
1. Creating and submitting the template for approval
1. Login to your Twilio account.
2. Navigate to the Twilio console.
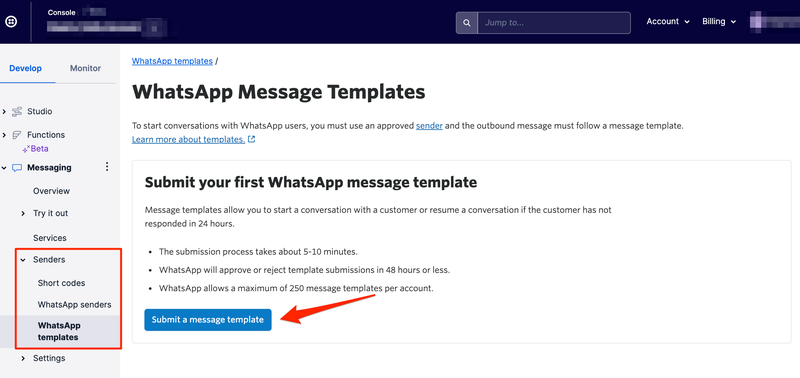
3. Click on “Messaging”. Click on “Senders”. Click on “WhatsApp templates”.
4. Click on “Submit a message template”.
Note: If you are not creating a template for the first time, you will see the New message template button. Click it to create additional templates.
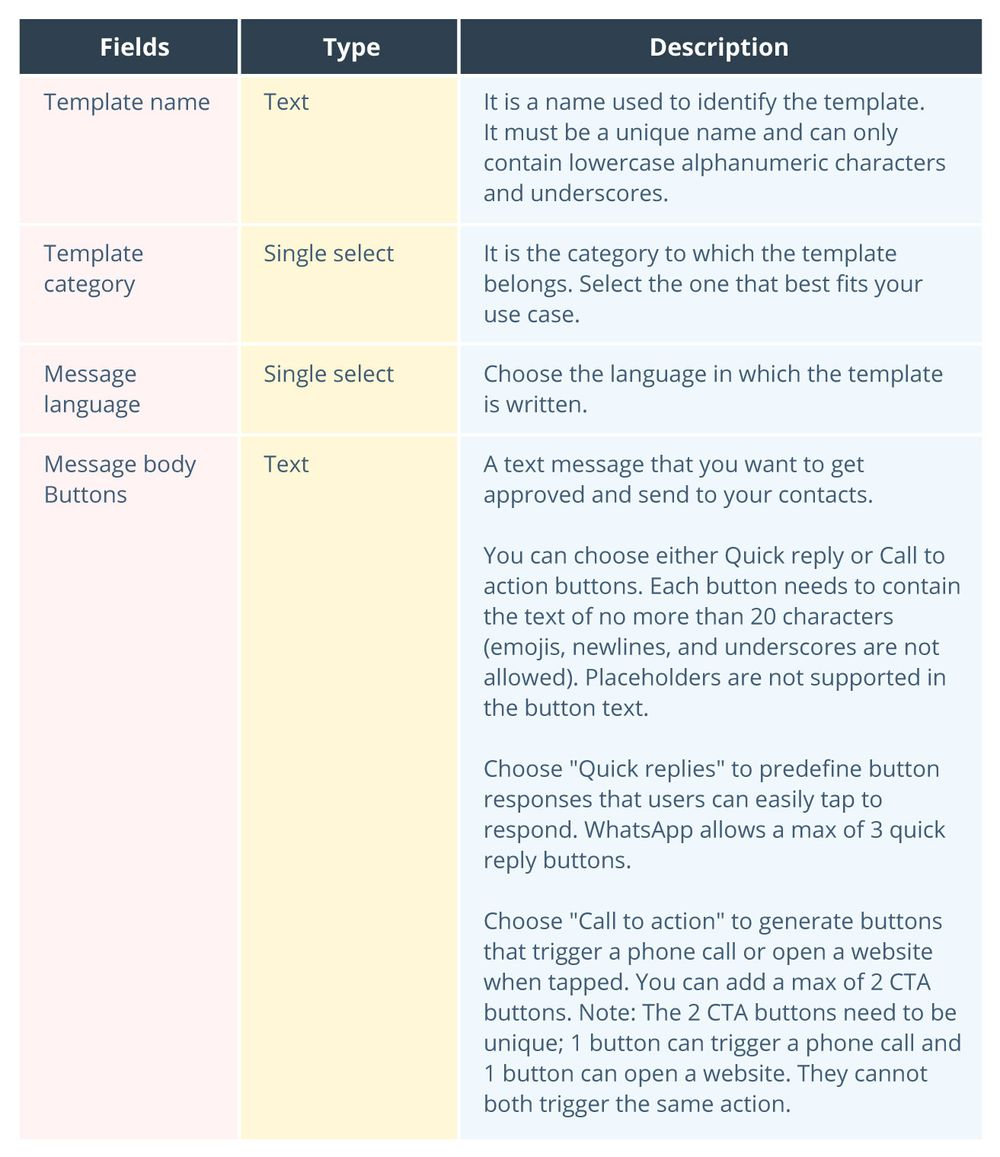
5. On the next screen, fill out the necessary information and submit it. WhatsApp’s team will analyse the submitted information and either approve or reject your template.
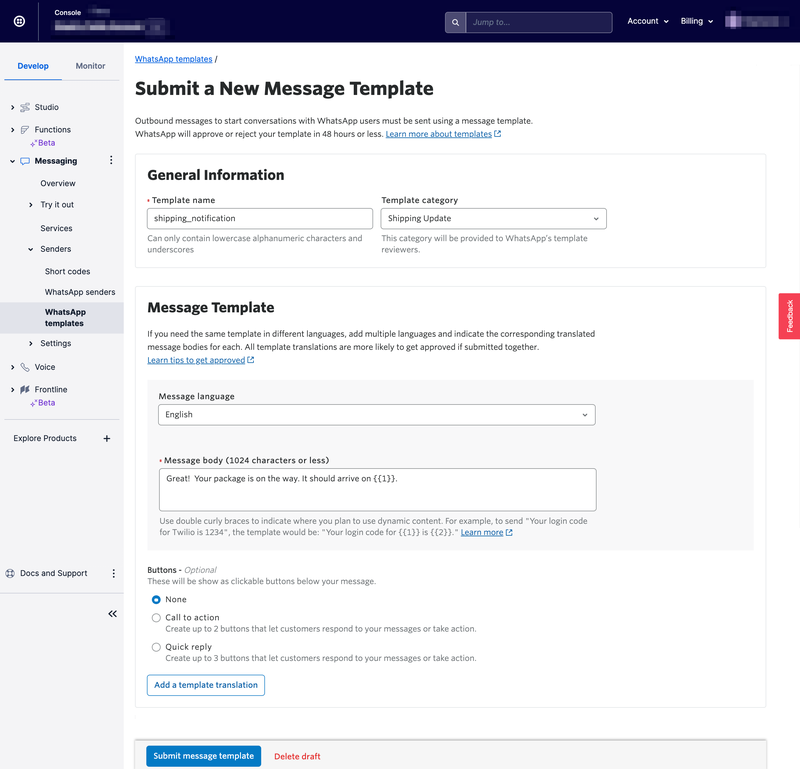
Note: Once you submit a template, it cannot be edited through the Twilio console.
Please refer to the WhatsApp documentation to learn more about message template formatting and supported languages.
2. Adding the templates in CRM
To start using the template, you should add the template to the CRM and link it to the channels. Follow the below-given instructions.
1. Login to your CRM.
2. Click on the “Settings” icon on the top right corner of your CRM system and navigate to “Customisation”.
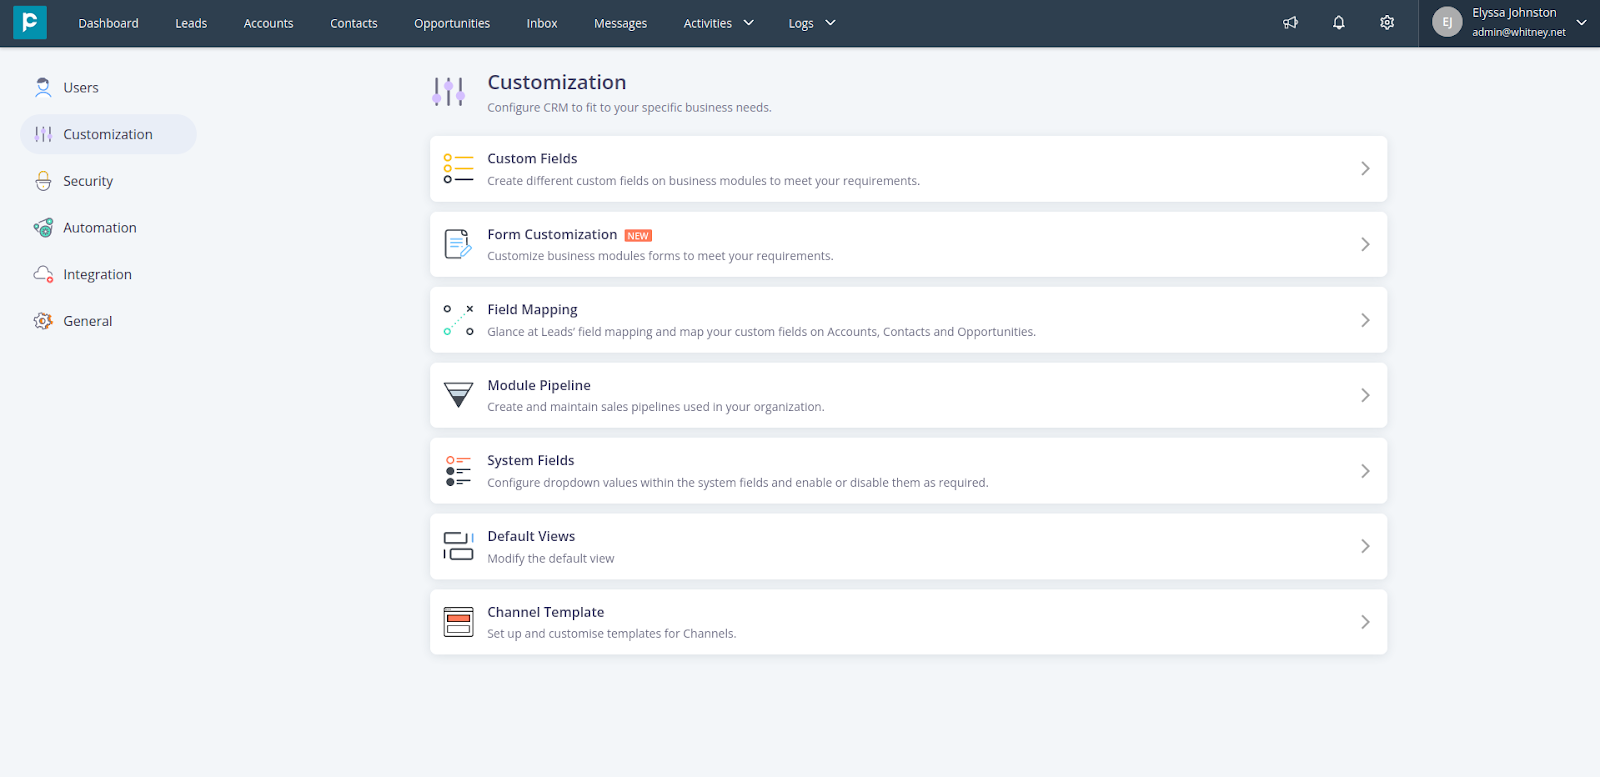
3. Then, navigate to the “Templates” screen.
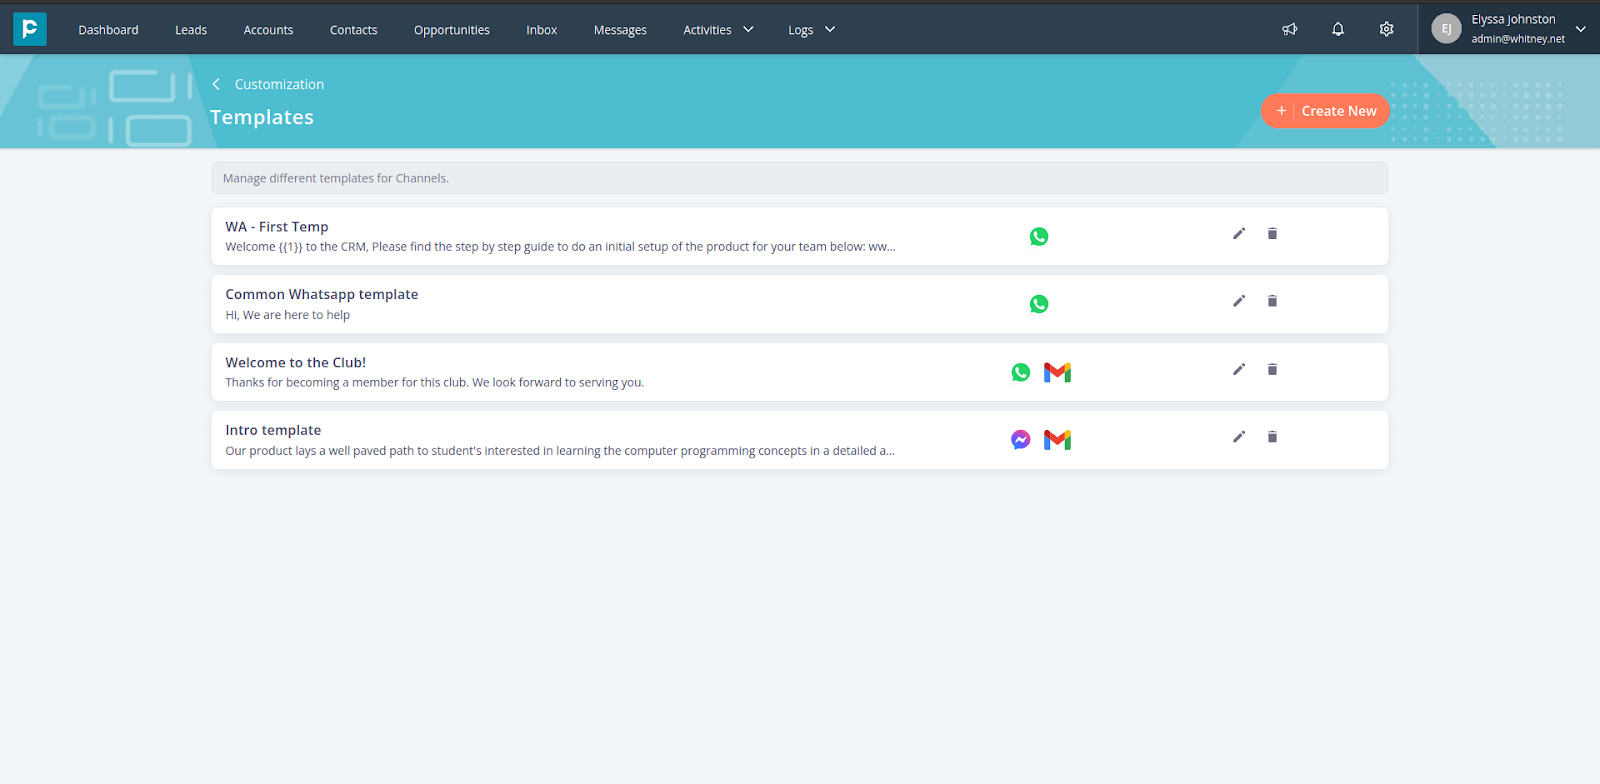
Further reading
